Saturday, 12 March 2022

Off on a Tangent....

The Curse of a Butterfly Mind....

As has happened before (See "The man Who Found Too Much" and the related follow-up posts) a simple query on the Solo Facebook group has got the Little Grey Cells bouncing about....

The query related to "combat between Icelandic Vikings and American natives", with mention being made of the "Battle of Vinland" and suitable rules systems.

As always my first thought was "it's not the rules system" for the running & hitting that will make this different, it's the narrative and different cultural aspects. 

Anyhoo... Here are SOME random thoughts (in italics - as posted on the Group - and others)...

The Vikings:

"The Norsemen's reasons for being there will be simple (land hunger or trade/profit). They may (or at least their elites may) be willing to risk falling in battle to a greater degree than the locals but this is NOT a going to be a raiding warband....".

So I'd have a very mixed crew (of different ranks down to slaves and women) with a right old mix of available resources and motivations - and not a tooled up warrior band. In theory this should be three ships and 140 chaps of all sorts.

"Crew make-up will be crucial. Have they brought any/many REALLY skilled hunters with them? Spears/throwing spears for hunting they'll have - but any bows at all? If not they may have a problem... What food do they have...? Which craftsmen do they REALLY need to protect."

However, I'd go straight back to source to see what that says - Eric The Red's Saga; all there on the wonderful Gutenberg...

https://www.gutenberg.org/files/17946/17946-h/17946-h.htm

Plus:

https://en.wikipedia.org/wiki/Saga_of_the_Greenlanders

For further inspiration I suggested Thomas Holt's "Meadowland".

The Rules:

My thoughts here were;

"Any basic hand weapon/hand missile weapon rules (simplest always being best) where you have rules to allow for different equipment/troop types/fighting methods will do the basics - no need to spend for those, you can use free rules/home-bash easily.

However, the main piece of "situation chrome" won't be the fighting/moving mechanics but the different mind sets, abilities, motivations and intentions of the participants and the "culture clash"... Otherwise you'll just end with (yet another) "marginally different" Dark Age Bash rule set but just with different figures.

Personally I'd also look beyond simple skirmishes and do this as a "fill in the map" mini campaign.. This could be set up really easily and would be a LOT of fun..."


It was suggested that the Norsemen's equipment (maille and metal weapons) would give a major advantage in combat... Being very suspicious of rules that stress technology over psychology my thoughts were; 

"On paper. In reality the technological advantage will be minor, as maille use will (or certainly should) be heavily restricted to a small minority [of vikings] (as will swords) and stone/shaped hardwood is as good at inflicting crushing trauma as anything else..

Sharpened stone is as good as piercing, cloth/flesh etc. as anything else...

As for maille (OK, later comment, but it gets the point over): Letter from Gonzalo Mendex de Canzo to King Philip III in 1600 "For war with the Indians no other armour except this (padded armour) is of any value. As for the coat of mail, the arrow could go through it and splinters of it would be very dangerous; the buffalo-leather coat designed to absorb sword-cuts is pierced very easily; and the corslet (plate breastplate) is very dangerous, moreover, if the arrow hits it will re bound and injure the next person..."

Metal axes will be more effective cutting against indigenous wooden/bark armour, but have to hit right and provide no more blunt trauma than a shaped hardwood weapon would.

But mainly the approaches to hand to hand will be culturally different because the Way of War is different...

Case a) Weird guy in some kind of protective gear (like indigenous wooden armour traditions but bigger/better) wants you to get into his kind of fight..

Response from people who see no advantage in dying stupidly in battle: Never get into his kind of fight...

Case b) Guy is seemingly wearing/carrying something which protects him REALLY well.

Responses;

1) You never go hand to hand from the front and, like Kipling's British in Burma, you don't go for him "When none of your mates is near" (One to distract, One to hit from behind).

2) Shoot his legs out - they HATE that... Or poke 'em with a spear (Rock beats paper. Spear beats sword)..

Or run past quick and bash/slash his knees and ankles from behind.

(Remembering where most Viking period wounds are archaeologically 🙂).

Case b) Guy is wearing something which slows him down and affects his movement and fighting abilities in dense terrain.

Get him to follow you into dense terrain... If he's THAT stupid enough to want to die in battle, give him what he wants....

The rules should reflect all this - and certainly NOT have indigenous folk fighting like vikings..."

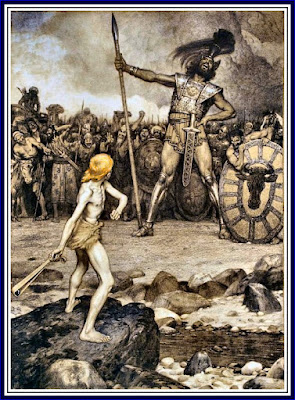
WRONG KINDA FIGHT......

The Locals:

First thoughts were:

"Meanwhile, unless there is a real expert out there who has evidence for the contrary, I see no reason why the Ways of War of the aboriginal folk of the north east woodlands should have altered much from the earliest descriptions we have of them. That is that only an idiot gets himself killed unnecessarily, and that their conflicts will  normally mainly consist of individual or small scale raids  being undertaken for reasons of social advancement, recreation/excitement, religious obligation, for the capture of women and slaves, plundering, revenge or as a Rite of Passage - with larger group actions only being prompted by the drive to take territory or trade routes, or to defend same or out of fear of a threat to same or due to some misunderstanding which leads to such. 

I guess I'd look further into the differences between the (apparently more aggressive) Hunter/Gathering peoples and the agricultural folk".

I also included a link to:

https://anthrosource.onlinelibrary.wiley.com/doi/pdf/10.1525/aa.1947.49.2.02a00020

I also did some more research, including in Jones's "Native North American Armor Shields and Fortifications".

However.......

I soon realised I (you guessed it) was looking very much at the indigenous peoples we know most about ( i.e those woodland folk further south than Newfoundland who were still around to write about in detail in the 16th/17thC) rather than the indigenous Newfoundland folks who had (largely/likely) been of a different culture (possibly more like the Thule/Inuit ?) - and who had suffered from a European presence since late medieval times before being recorded....

https://www.heritage.nf.ca/articles/aboriginal/beothuk.php

https://www.heritage.nf.ca/.../abori.../beothuk-clothing.php

From the saga there are "missiles" (bows/javelins), slings and what sounds like a staff sling in use, plus shields by the locals...

So, conclusion was that we probably have a very different look for the locals than the "Woodland Indians" one initially imagined...


Also, re-reading the sagas (it's been a while) it sounds like (as so often) that the conflicts were more due to misunderstandings than anything else...

Personally, the more I think about this the more I'd go for a blank map campaign - but maybe further south than Newfoundland? Unhistorical, but possibly with more going for it...?

A (maybe) painting project for the future.... (?)

Next up a Battle Report from the other month (as already promised..?)


Tuesday, 1 March 2022

1776 and All That (part seven/the last)

They think It's All over.....

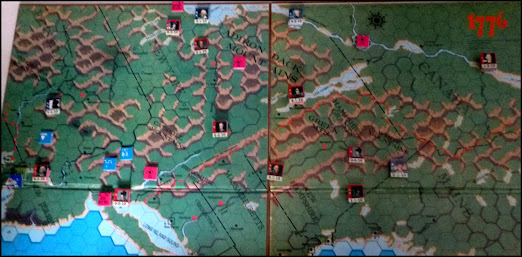
After the action at Jackson's Farm we move to the last map move in the 1776 Saratoga Scenario - and the randomised leader activation makes things tricky for me...

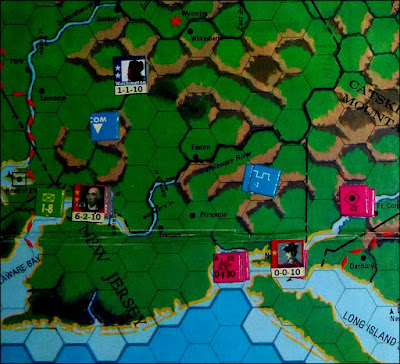
Grey assaults Philadelphia, which falls. This alone probably loses me the scenario - but Washington, up in the hills, simply just doesn't have the manpower to contest things, so there's nothing I can do. 

In the north Burgoyne splits his troops at Albany; leaving a garrison there and himself heading up towards Ticonderoga (hoping to thwart Lafayette's move along the St. Lawrence? Who knows..?).

Warner, lacking the troops (or bottle?) to tackle Brant, moves to reinforce Fort Oswego.

Despite the "friction" encountered at Jackson's Farm Clinton (unluckily for me, dice-activated before Gates on the map) has swept up the Mohawk Valley in pursuit of Gates. I decide to break down the move down with simple dice tests (with a penalty for Clinton) to see how far Gates gets before being caught up.

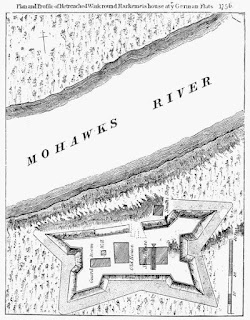
Luckily Gates makes it past Fort Stanwix before the British get near. This is key. As Clinton approaches Stanwix he then has a choice - attack the fort, and risk losing contact with Gates, or pressing on. He elects to attack the fort and takes it in two assaults.

Meanwhile Gates continues his march unmolested and joins Warner at Ft. Oswego. 

With the fall of Stanwix the British have now definitely won the scenario.

Lafayette is too slow making his way up the St. Lawrence to take Montreal or Quebec.

Washington, in the hills north of Reading, is impotent, due to lack of men.

Stark could have run minor interference in New England, but hasn't enough men to make a difference or to force a battle and is being pressed by Howe and another detached force. He withdraws into the White Mountains.

At move end, while the Americans hold one of their objectives - Ft. Oswego - the British have taken Ticonderoga, Albany, West Point, Ft. Stanwix and Philadelphia, so have piled up the Victory Points.

On the other hand, looking beyond the scenario, the Continental forces have avoided costly losses, so still have two viable armies in the field. Personally I think THIS should count in the VP tally, but I don't make the rules. Were this part of a longer campaign this successful avoidance of destruction would be counted a good thing....

However, HAD there been a further move or two Lafayette could have pressed further into Canada, but he would likely have had to face Burgoyne and the Canadian garrison troops (now released from their static role by his incursion). A defeat here for either side could have been disastrous.

Up by Lake Ontario Gates could possibly have been forced to battle by the combined forces of Brandt & Clinton. Or he might have slipped away (again) and headed south to join Washington - or even (more unlikely) north to follow Lafayette. Who knows..?


Looking at how the game panned out The (dice-controlled) British were FAR more active than historically.

The march on Philadelphia was perhaps predictable, as was Burgoyne's progress towards Albany. Howe' unexpected move into New England stopped Stark being a nuisance, but it was Clinton's march on West Point then, critically, on to Albany that was the clincher.

Had Clinton not pushed beyond West Point - and had instead sat there, or, say, had reinforced Howe' push into New England, or even pulled back to New York -  Gates, when facing Burgoyne's (rash?) attack at Albany, would not have been worrying about the threat to his rear, and thus would have had the aggressive and capable Arnold, plus his regiments, at his side in the redoubts above the town. Had Arnold been there, to perhaps blunt Fraser's flanking move, the Battle at Albany COULD have been a Saratoga....  

Conclusion:

THAT was fun.... 1776 was already one of my favourite board games, always repays replaying, and has proved to be perfect as a "scenario generator". Had I wanted to I could have fought a number of fort assaults and a city assault, as well as the two field battles. The great thing with tying a battle into a campaign being that by there was a reason for each fight AND a clear intention/objective on the part of the combatants. Using a board game makes campaign "creation" far, far less work..

I will note down down the forces Gates/Clinton/Brandt & Warner would have had next move at Ft. Oswego, and also the respective forces available to Lafayette and Burgoyne in Canada - thus giving me two ready-made battles to fight out later, should I so wish.

That was a try-out WELL worth repeating.

As always, I welcome any queries or feedback. Next, a different write-up of a different battle I fought the other week, working with the "Pony Wars" rule set. Watch this space.


Friday, 25 February 2022

1776 And All That (part six)

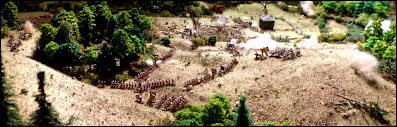
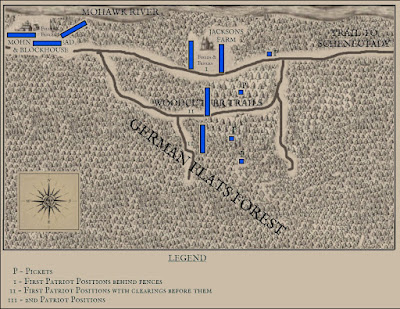
The Battle of Jackson's Farm;

Right, a quick bit of thinking and messing about with the table and I'm good to go.

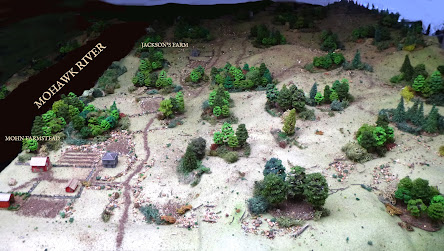
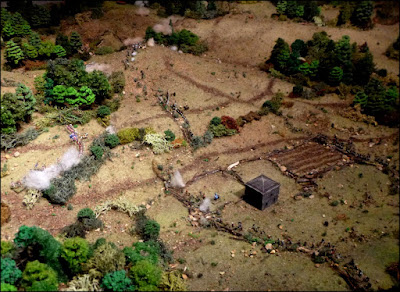
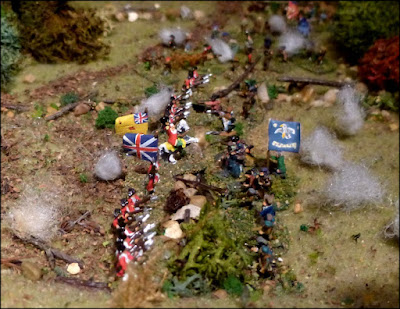
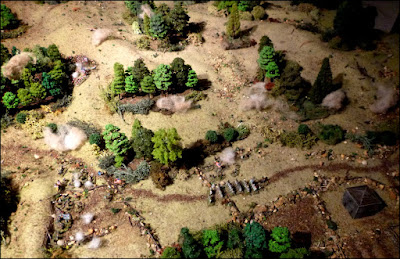
As this will be a likely be a short fight (I reckon) I've created a random layout (below) rather than get bogged down in maps etc. (note the river and other bank in the photo are "cosmetic photo-shopping". I should be so lucky as to have that big a space..)

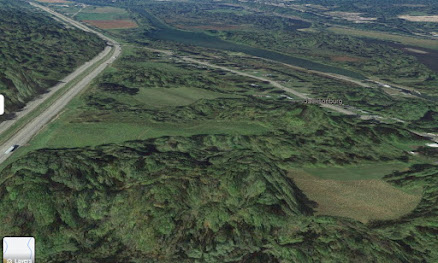
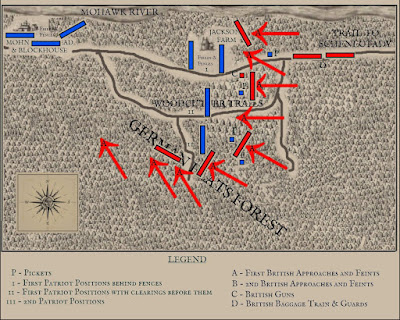
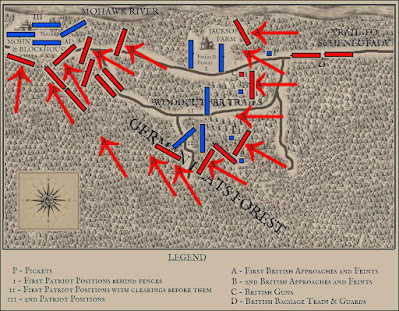
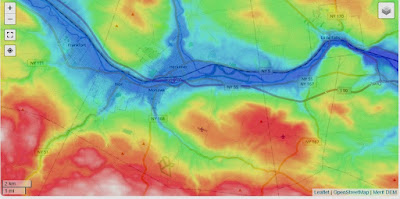
Basically the north edge of the table will represent the vegetation edging the Mohawk River, the rest of the table the re-entrants and general "messiness" of the hills etc. in the rough vicinity of present Jacksonburg (pic) before the main, modern routes were carved through them. 

One problem - as one can see from the pic below - it's ALL bloody woods !!" (I'm assuming the big empty fields, like the roads literally carved out of the landscape, are all new....).


Being UK-based, and never having been to New York State, and really having previously only looked closely at maps (rather than Google Earth) of this area before this campaign I am slightly staggered by just how much dense-looking woodland there still is - and I was born & bred in the most wooded County in UK... The daft thing is: I should know this already... I've seen the movies, and the documentaries and read the books. There are LOTS of trees in the eastern states. I knew that.. But....

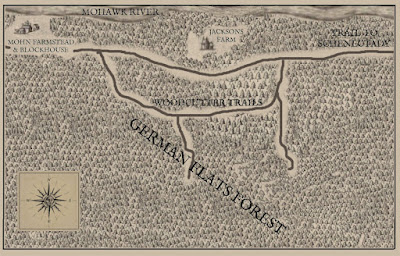
So... Back to the table. There ought to be more tree cover. It SHOULD look something like THIS:


However, moving guys about on a tree-covered table is difficult (once upon a day I'd have fought a battle like this in board game style) so that the physical on-table wooded areas are actually deemed Heavily Wooded Thickets while all other areas, except enclosed fields and "rocky clearings", are deemed to be "ordinary" woodland (which from the Web looks much like the woodland we have round this part of the world).

Thus, I reckon Special Rules are called for ...

Woodland Movement: All movement unless in fields, Thickets or on tracks is assumed to be taking place in woodland.

Woodland restricts line of sight to 50m*.

All infantry units must be in open or extended order to operate in woodland without penalty. Units in close order move at two thirds speed and suffer 1 disruption point per move if moving.

Mounted aids proceed at half speed.

All units in woodland count as being in soft cover UNLESS within 10m of shooters.

All non-light troops/skirmishers suffer 1 Disruption Point while moving in Woodland.

*Blind shooting by volley may take pace at normal ranges but uses twice the ammunition. Non-volley shooting out of LoS is not permitted. 

Some "rocky areas" in the woodland are deemed "clearings" (marked out on the table by small twigs and rocks) so count as normal open ground/fields.


Thickets: Only skirmish/light units or units in open order may enter thickets. No horse can enter thickets.

All units move at half speed. Line of sight is reduced to 10m*. All units in Thickets count as being in soft cover within 10m and hard cover beyond that.

All light troops/skirmishers suffer 1 Disruption Point and all non-light troops suffer 2 Disruption Points while in a Thicket. 

(*Blind shooting into thickets by volley may take pace at normal ranges but uses twice the ammunition and all results are halved after all other factors have been taken into consideration. Non-volley shooting out of LoS is not permitted.).


Victory Conditions: Clinton needs to rout or destroy the defenders or get at least 6 elements of his main force off the West table edge and his heavy train to the midway point of the table in 24 moves to claim victory.

The Colonial force needs to prevent this.

The Game (Summary): 

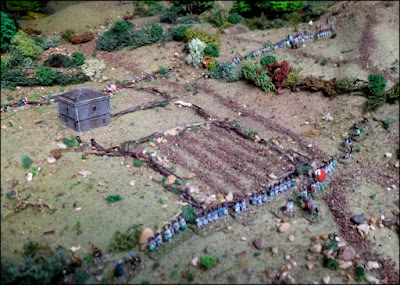
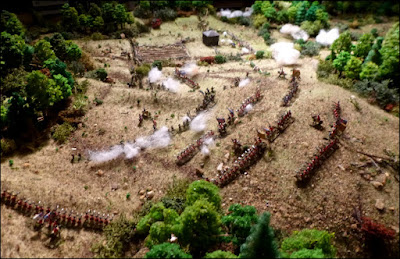
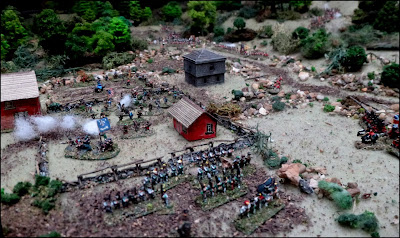
I set out two regiments of my guys among the fences at Jackson's Farm in two lines. The other units are extended in a line south to a hill a little more than halfway across the table. I do not have enough chaps to muster any more of a reserve than the second line at Jackson's.


I spend the first few moves pushing forwards detached companies as strong pickets to reveal/provoke/draw on the Enemy Blinds (advance units) in the woods.

Slowly I become aware of movement ahead, and facing both my flanks. There is firing at the far right on my line, then reports of suspicious movement on my actual right flank. Over the next few moves it is clear that there is a significant force moving through the woods towards - and more worrying, beyond - my flank.

Enemy units open fire on my troops on my right flank and in the centre. 


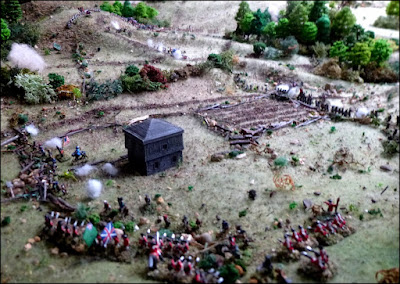
Just as I'm getting worried about my right flank a firefight develops to my front - where three manhandled enemy light field pieces appear, and open fire on my guys at Jackson's Farm. 


As I ride over to see what's happening on my right more enemy appear. Hessians and redcoats are in the woods, and my men start falling back.  There is suspicious movement around, and soon to the rear, of my right flank. 


At Jackson's Farm a regular regiment supported by light troops appear in the woods by the river. There is a short firefight, but then an enemy assault sends my guys reeling. 


Meanwhile my centre unit falls back and my right is seriously unhappy. I decide it's time to fall back to Mohn's Farm and form a second position there.

All the time the enemy keep up the pressure. There are a couple of successes (a British regiment is checked and badly mauled at Jackson's farm by my second line and another mauled in the central woods) but my men are getting jumpy.


The big problem is the feeling that we are being outflanked. I want to get my guys back to Mohn's Farm, and the walls and fields commanding the road, so that this issue isn't relevant, but the enemy advance is relentless (if slow in the woods). 


I head back to the road, but a swiftly advancing enemy unit charges out the woods, breaks the unit I am with - and my general is captured.

The enemy are now pressing on towards Mohn's Farm themselves - and whenever the Redcoats get the chance they are aggressive; throwing bayonet charges at my flustered troops.


Just west of Jackson's Farm, the supports of the broken unit, already demoralised by the artillery fire and having their mates flee through them, and seeing another unit break and their general captured - plus being cut off from the road to Mohn's Farm by more enemy emerging swiftly from the woods to its rear and flank - butt-end their guns and surrender.

It really is time to fall back to Mohn's Farm, but there is now no central command to coordinate things, so each regimental commander makes his own decision. 


It's a bitty process, but my remaining units begin to rally at Mohn's Farm. However, with enemy Blinds pressing forwards, and more more enemy now emerging from the woodland to command the road westwards, things are going to pieces.


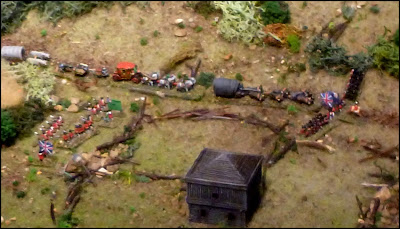
But time is nearly up - although their baggage train has been slowly advancing along the road and has now passed Jackson's Farm - there is little chance the British will exit six units off the map edge in time. 

And so, outnumbered by two to one, and with no central command, my men, regiment by regiment, decide to withdraw rather than stand against the overwhelming numbers. It is probably the best thing to do.

Endgame - but my boys at least have the satisfaction of knowing that the enemy advance has been slowed by their actions......

Conclusion: Phew... That was tense.

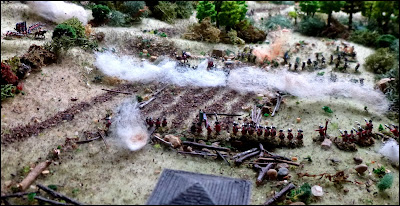
Throughout, the Blinds (represented in the table by "dust" clouds.. Yes, I know it's woodland, but I couldn't be bothered to make a load of birch seed bird flocks) clustering round my Right Flank were a real worry (Clinton doing his signature outflanking), and by the end I was seriously outnumbered.

Had I fought another move I would either have had to skedaddle, at the risk of being charged as I did so, or lose two regiments in pointless fighting around Mohn's Farm (losses Gates could well do without). It would have delayed the British further, but they had already used their last move.

The British achieved half their Victory Conditions (Clinton got his Baggage Train more than half way across the board), but failed to get the required six units off the west table edge (though two more moves would likely have done this for them; maybe three if my lads had been wasted in a fight at the farm...). 

Enemy losses were light. Mine far, far heavier than I would have liked; a regiment surrendered (not to mention the general) and my gross losses in actual casualties or missing totalled 540 men (more than a fifth of my force) though a majority of these will either be wounded, "temporary deserters" or lads hiding-up in the woods, and intending to make their way to Fort Drayton by the backways.

I'll do the calculations for the campaign later. 

I guess it was kind of a draw. Most of my guys lived to fight another day (as did Gates's force) but I lost a lot. Even if Clinton didn't catch Gates the fight was a "British Victory" on paper in that they held the field and suffered less. So call it sort of even but the British winning on points. 

The above was a precis of the battle. I did a (long) near move-by-move write up as I went along (and, as sometimes happens, took far to many random photos). If anyone is interested on more of a blow-by-blow I can post that (just make a comment). 

As always, thoughts, queries & comments invited.

The Game Blind Processes: 

For this game, to see if Enemy Blinds appear I throw a 1x12D each move, adding 1 to the dice throw (cumulatively) for each move AFTER the first complete move.

On a (modified) score of 12 an Enemy Blind is created/has been spotted.

To find the location of this Blind I dice 1x6D for EACH Picket, then for the centre of each space of four inches more than four inches away from a picket - including the ends of a picket line.

Note that at the end of each Move a marker is moved 6 inches along the long board edge. Only friendly units east of this marker need make this test.

I do the same for any forward (first line) units without pickets to their front/sides.

The highest scoring picket/unit has encountered/become aware of something and a Blind will be placed.

In the case of different units drawing the highest score then all highest drawing units have seen something and Blinds are placed accordingly.

Blinds appear 4 inches distance from the spotting unit; to their front, or flank if a flank test. Enemy Blinds cannot be placed directly in the middle of Thickets. Neither, initially, will they be placed behind friendly units, but that may be possible if dictated by card draw.

In any Blind Location tests where a friendly unit is already within four inches of an existing Blind such a unit adds one to it's test throw for each such Blind already so placed.

I also make a single test per move for eastern end of the Main Road to Schenectady.]

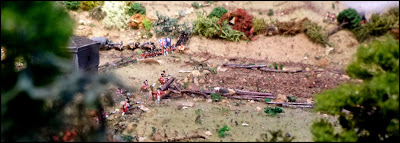
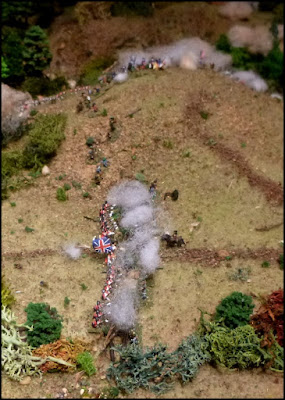
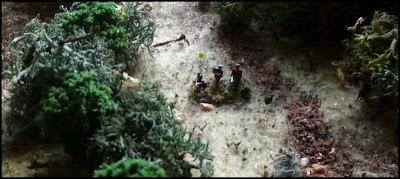
Next move I push a rifle company to investigate the Blind. They get within 50 yards of the Blind and... 

There are two Blind Movement Tokens in the tub mix, but Enemy Blinds only actually test once per move even if the second tokens is later drawn.

The test is a simple throw of a 1x6D.

On a result of 1-3. Blind remains stationary.

On a 3-4 Blind moved forwards four inches with a direction test made based on IMP.

On a 5-6 Blind moves four inches plus 1xAveD in inches towards nearest Patriot force/unit.

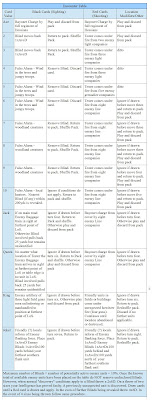
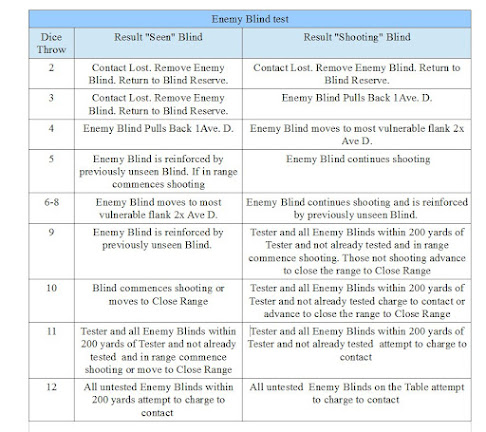
Once a friendly unit moves to within clear LoS of a Blind a test on a standard card deck is made as follows (right click, open and expand).

Other Thoughts: 

Below are some ideas that came to me during the game, for me to ponder over at some time....

Panic: Thinking here about F&I war variant..? More research needed.

Units which are in themselves within 100 yards of hidden Enemy Blinds or which have come under fire while in Woodland or in or within 25 yards of Thickets may be subject to Panic Firing.

Test 2x6D per move per appropriate unit.

On a result of 2 or 12 Theatre-Trained Regular infantry will fall to panic firing.

Veteran Militia riflemen or Theatre-Trained troops on a throw of 2.

On a result of 7-8 all others will fall to panic firing.

A unit which fails a Panic Firing Test will halt, suffer 1 Disruption Point per move, remain stationary and fire in a direction (dictated by 2x6D dice throw - see below) using double ammunition until rallied.

On a result of 2 to 3 half the unit deploys to refuse its left flank, receives an additional Disruption Point and shoots half it's strength to that flank and half to it's front. Neighbouring friendly units in range may take casualties.

On a result of 11 to 12 half the unit deploys to refuse its right flank, receives an additional Disruption Point and shoots half it's strength to that flank and half to it's front. Neighbouring friendly units in range may take casualties.

On a result of 3-10 unite fires to it's full front. Neighbouring friendly units in range may take proportionate casualties.

Any unit in woodland or thicket taking casualties from unseen shooters (including from friendly fire) will take twice the number of Disruption Points (but not casualties) inflicted on it that move. 


Baggage/Artillery Train: Thinking about baggage...

A heavy baggage train can only move at full speed on tracks. It operates at half speed in fields. The train cannot climb steep slopes. It cannot enter thickets. It cannot enter very rocky ground.

If operating off-track (other than in fields; so thus in woodland) it moves at one quarter speed and MUST be preceded/accompanied by a full regiment; which is assumed to be manhandling wagons, cutting and laying timber to allow it to progress at all etc. etc.

This regiment becomes, effectively, part of the train. It cannot fire or attack or move away from the train while so committed. It cannot separate itself from the train without spending a whole move doing so. If it separates itself from the train the train cannot move - not even to retrace its steps. While part of the train, and until subsequently rallied if it detaches itself, it is already considered Disrupted to level two (note; this disruption level does not affect movement of the train). 

Heavy to medium artillery cannot deploy in Woodland. Light guns can, but must be manhandled and not use limbers.

Further Thoughts on Scouts and Spotting: 

Thoughts about Blind reaction tests using a table like this....? Hmm... Of is that a complication I don't need. The system above worked fine....

I thought about using Blinds for friendly units (only be placed if a friendly unit "seen" by a hostile unit subsequently moves out of LoS of hostile units). Why..?  Because their presence could affect AI decisions. Maybe a thought for another day...

As with the rest of the above; thoughts etc. welcomed.


Friday, 28 January 2022

1776 And All That (Part Five)

Back to the map...

Next move for the 1776 map scenario.

Post battle I allow Gate's a 1x6D "retreat allowance"; not in the board game rules, since he had already had his "move" - and stayed put in Albany, but it seemed reasonable as he had got away and the British not been right on his tail. As did deducting 3 SP militia units for the troops which had actually scattered off-table (they went home). He proceeds up the Mohawk Valley. If activated again he can use the remainder of his Movement Points.

[I also, out of interest fought two rounds on the game's CRE based on what occurred on the table; the first with Gates standing and defending against an enfilade by Burgoyne's force alone. The second with Gates withdrawing against a reconnaissance in force - so as to allow Gates to end the battle. The losses matched the deductions I had made above. The only real difference to the result was that I allowed him "wigggle room" to move up the Mohawk.]

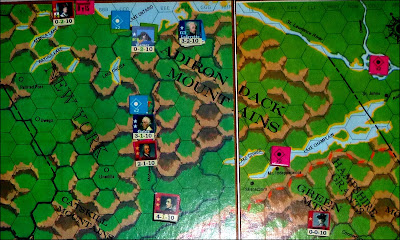
Grey passes through Princeton and crosses the Delaware at Coryell's Ferry, en route for Philadelphia, which he puts to siege. Washington has not the men to challenge this.


Brandt, by water, moves across lake Ontario to the head of Seneca, passing Lafayette, who is marching along the eastern shore of Ontario, en route for the St. Lawrence, and Warner, who has reached the lakeside near Oswego. 

Stark moves into New Hampshire, but so does Howe (after leaving Cornwallis and a small force at Bennington) and another British column which has come over the Green Mountains..

Burgoyne has elected to remain at Albany; presumably resting his men, gathering supplies and writing home to justify (and advertise) his actions.

As we saw, Gates moved up the Mohawk Valley. He then pulled over to rest and recuperate among the German farmers in the vicinity of Forts Dayton and Herkimer. There he is joined by about 2,000 militiamen*.

[*As generated by the scenario reinforcement rules. These should have arrived at Albany, but default to the nearest strategic town if that is in the hands of the enemy. I allowed them to default to Forth Stanwix  - in the hex next to the settlements and forts at Dayton/Herkimer - on the basis that 1) getting there from the vicinity of Albany was simple and logical and 2) all other major centres were in British hands, within a British controlled area or within a single move of a British force.]

However, next activated and hot on his heels is Clinton, who catches up with him on the 18th. 


Gates, despite losses due to stragglers and desertions, now has about 6,000 militia and 3,000 Continentals with him. Clinton leads fifteen (understrength) regiments of British Regulars, Flank Companies and Hessians, plus an artillery and supply train.

Gates now knows that Lafayette has moved as if to press into Canada, leaving Ft. Stanwix and Ft. Oswego exposed by Clinton's unexpected move up the Mohawk. He has also received news of Grey being across the Delaware (but does not know that he has reached Philadelphia). Gates is also aware that Washington desperately needs troops in Pennsylvania.

It is clear that Gates needs to preserve his force and not risk its destruction but we have another potential table battle. 

Clinton, particularly chagrined by Burgoyne's precipitous attack which allowed Gates to get away at Albany (and the unfair criticism he has himself received regarding this) will likely be aggressive and imaginative. Given that he was (historically) a promoter of imaginative flank marches and similar it seems reasonable that he would attempt something like that. 


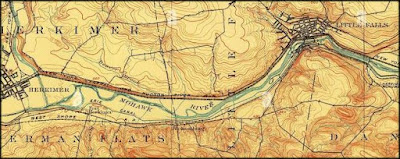
I look at the data online on the area of Dayton/Hermiker/German Flats. It seems to me that, since he has been caught up with and cannot pull away without some kind of fight (he cannot risk being chased and caught while in line of march), Gates has three choices;

1) Hold position and fight Clinton in the area of Hermiker. This risks his whole force, which I think would be unwise.

2) Leave a blocking force at a suitable location at Dayton/Hermiker/German Flats to delay Clinton enough for Gates to get his main column away.

3) Send a small force back along the Mohawk valley to block Clinton further downriver. In theory the area of Little Falls Gorge and the road over the hills to the south looks good - but there are alternative routes here, and knowing Clinton he will use these to outflank any force in the vicinity of the gorge, and trap them.

Perhaps the area around what is now Jacksonburg looks best, or maybe at Hermiker Fort itself. Looking at Streetview, and taking away the canal, this looks a good place for a small formation to run interference on a larger.


The Table Transfer:

OK, the thing to do here, I think, is to again "play" the British - as Clinton will be feeling his way along the road from Albany, so what I will do is set up a basic table roughly according to local terrain at the point between Hermiker and Little Falls where hills seems to come right down to the Mohawk (roughly where the canal cuts off from the river), with no Colonial forces on the table (using Hidden Enemy rules) and Clinton  having to make his way across the board in a race against time. That should make for a short, if interesting game. 


Before I do that, however, I will have a couple of plays on the table as it is.. 

As always: feedback welcome.

Friday, 21 January 2022

1776 And All That (Part Four)

Battle of Albany: Rules and Stuff....

The previous post was a general narrative, not a "dice by dice" commentary, but I'll set out some of the details below.

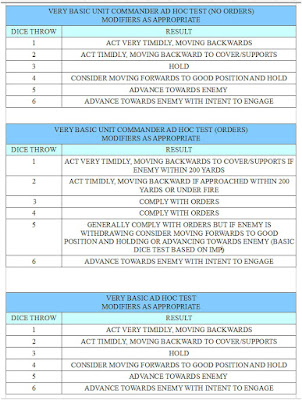
All "non me" decisions were made by using simple Ad Hoc Decision tables (see below). 

Activation of Generals/Brigade commanders - or detached/specialist units where appropriate - was by token using the 1 token per commander/unit, two blank token draw system; with drawing of tokens stopping when only two tokens remain in the tub.

Unit commanders/Leaders which had not moved/fired/carried out any action/been activated in a move can, automatically, fire/ remove disruption in line with their inherent abilities at move end. 

A note was kept of artillery ammunition used - limited to 12 salvoes per gun - but apart from tallying the number of moves expended and the special activities detailed below there was no bookkeeping.

The actual fighting/moving/morale rules were an amalgam of Andy Callan's LF&AAS and ideas nicked from SP/NMTB, plus house conventions.

a) Detached Town Force:

While the British were setting up on the table the detached force (two of Burgoyne's regiments) were sent to secure the warehouses in Albany. They arrived at the town gates at dawn.

How matters actually went for them was not revealed (to me/Burgoyne) until after Game Move six (i.e. no actual tests on progress were made until after Game Move move 6) and only then on a throw of 6 on a 1x6D test dice made at the END of each subsequent Game Move. 

At time of The Reveal the Detached Force tested for the circumstances below.

i) On arrival a 1x6d test is made to see if there were sentries at the town stockade/if they were awake.

1-2; they were absent, tucked up in bed.

3-4; they were asleep at their posts and the British lost one move in securing them quietly.

5; they were alert, fired a warning shot and sent a courier to alert Gates. If this occurred Gates will be informed of the presence of British troops in the town at the end of the fourth move after the British entered the town. The British lose a move to subduing the sentries. 

6; There were enemy militia units manning the stockade. If this occurred Gates will be informed of the presence of British troops in the town in four moves at the end of the fourth move after the British entering. Throw 1x6D for the number of Rebel militia companies present. On a result of a 6, roll again for more.

(This force number is cumulative with no upper limit. These units will be assumed to have been taken from Gates' force. IF Gates's whole force has already been deployed on the Table then companies making up this total units must be at once removed from any unengaged Rebel militia units thereon. Otherwise these units are not available to Gates.)

Resolve resulting combat on the 1776 CRT, each round of combat taking 4 table moves. 

IF the rebel militia defeat the British Detached Force then these units will arrive on the battlefield to support Gates with a throw of 6 on a 1x6D test at the end of each subsequent rebel move.

These militia units will arrive as a single force either on the track by the fort (held by Morgan) or on the access track from Albany previously used by the British (test for this). A Token for this force will be placed in the token tub and Activated as per normal rules.   

ii) If the British got into the town successfully then the Detached Force has to cover 1000 yards or so to get to the warehouse district. They march at 75yards  plus 1x6D x 25 yards per move.

Once the detached units enter the town itself they will test per move for problems, until the warehouses are secured, on the table below (if you cannot read any of the tables open them as new tab).

Once the warehouses are secured by the British the town is deemed taken and the Detached units and the town take no more part in the table battle.

b) Fraser and the Lights:

On move six Fraser moved off with the Light Companies, Jaegers/Rangers and Indians following waypoints marked on the Table. The rules I set for myself were as follows: 

Once he enters the woodland Fraser must test each subsequent move based on standard "Hidden Enemy" protocols (Throw a 1x6D each move. On a result of 6 a card draw takes place to see if he comes under attack), EXCEPT that all Red number cards under eight are removed from the deck and the following table used:


Note: the rebel companies activated on the above will be taken from as yet unactivated commanders on table.

If all commanders have already been activated it will be taken that these units are previously undiscovered local rebel units - i.e. reinforcements not shown on the Map Game. Such units will disperse at the end of the action and NOT subsequently appear on the Map.

However, whether this occurs or not Burgoyne (I) will have no idea of Fraser's actual progress or position on the Table until and unless:

1) There is a message from Fraser regarding his position and circumstances.

However, he will only report with updates if there is something salient to report (e.g. he has run into opposition in force greater than his own, come across enemy entrenchments etc. etc.). He will give a position, but may be out by a four inch radius - the centre point being calculated from the move distance from his start position towards his target, but adjusted for deviation (see below). This message will head towards Burgoyne at 8 inches per move.

2) The sound of reasonably extensive gunfire can be heard (say two moves' worth with at least four companies engaged).

Such an occurrence will be the result of him finding the flank of the main enemy position, as planned, and engaging OR his running into unexpected opposition generated by standard "Hidden Enemy" tests (taken each move). IF such gunfire is heard the location may be marked on the table but will only be approximate, i.e. within an eight inch radius of the calculated move distance centre point, adjusted for deviation (see below). 

3) His Indians raise a column of smoke indicating to Burgoyne that Fraser is in (or within six inches of) the agreed position to harass the enemy (the final waypoint).  

Calculating Fraser's position:

Once his position needs to be calculated he will, in theory, have moved four inches plus 1x6D inches per move between waypoints (these being already marked by "pules" of smoke on the table).

However, at the start of each move from a waypoint/his current position a 1x6D will be thrown to discover if he has deviated from his intended line of march.

On a result of 3 or 4 he makes a bee-line for the next Waypoint (no deviation). 

On a throw of 1 the line of march is 5 degrees off centre to the left of said bee-line, on a throw of 2 the line of march is 10 degrees off centre to the left.

On a throw of 5 the line of march is 5 degrees off centre to the right, on a throw of 6 the line of march is 10 degrees off centre to the right.  

Note: none of these calculations (neither the distance moved nor position relative to the Waypoints will be calculated UNTIL he has reported or gunfire is heard as per 1) or 2) above OR until after move 12. After move 12 test with a Dx6 per move. On the throw of a 6 some of his scouts have arrived at the planned destination and signalled - but the position of his main force must then be calculated and placed on the table. A Token for Fraser is then added to the token tub. .

c) Ad Hoc Tests

Throughout the game there were (as usual with me) a series of ad hoc tests whenever a decision was called for for a detached Leader/Unit and Enemy leader.

Some would be specifically slewed (like the Gates example shown on the game report. Others less so. here are some VERY basic examples.


Where appropriate many such tests will be based on IMP and use two dice, with probabilities matching likely decisions (as in the gates test table in the previous post). As always; queries etc. invited re. this. 

d) Gates's Plan

We knew Burgoyne's battle plan. Did Gates have an actual plan? Or was he winging it?

There has recently been some discussion on the FB solo Group about Solo AIs, and how their "decisions" need, in some folk's eyes, to follow some kind of logical sequence or flow or plan, rather than being random. I'll post MY (idiosyncratic?) thoughts on this, and the place (or absence) of sequence, flow, planning and logic in human affairs  - and especially regarding definitive pre. 20thC battle plans (other than "this is where we'll go, and see what happens") - another time.

Meanwhile, here is a brief account of the Battle of Albany by that little known military historian Lambert Funtnell (Bart.).


"And so, with cautious Clinton hesitating beyond the creek to the south, and the brash Burgoyne pressing from the northern lakes, it would have appeared that Gates, encamped on the slopes above Albany, had placed himself in a trap of his own making. But not so.

Knowing his man, Gates, no doubt instinctively, felt he could rely upon Burgoyne to make some dramatic, and no doubt dashing, venture against his entrenchments. And so proved to be the case. True, his local levies would not stand to meet the steel-tipped musketry of the mercenary enemy; but all the better, for the old fox had a plan.

Throwing forward a taunting line of skirmishers to the Paltroon Creek bottom he drew the enemy on. Down from their secure ridge the British and their foreign lackeys came. Across the murky creek they splashed, then crawled their slow and mud-clagged way up the steep slopes on which his embattled redoubts lay. In vain, their gunners squandered their precious shells against the unyielding earthworks, where Gates's militia bands waited.

Then, just as the wily fox had foreseen; while the weary redcoats breasted his very palisades, his swift-heeled, local sons of the soil, after taking a toll with their trusty, if rustic, flintlocks, rushed to the security of their drilled and regular brethren in blue, waiting in serried ranks on the Schenectady Road.


From here, gathering his charges like a trusty shepherd, brushing aside the half-hearted efforts Fraser's savage auxiliaries and scattering of light troops, Gates and his loyal regiments slipped from his assailants' fingers; leaving the exhausted Burgoyne and his lackeys, panting with impotent frustration on the hilltop."


Next Post will continue the map campaign....
 

Thursday, 20 January 2022

1776 And All That (Part Three - The Battle of Albany)

 The Battle: 

OK... Previous posts looked at how we got to where we are.

Burgoyne's (my) main force moves off just (two moves) before dawn. However, on arrival "On The Field" there is a chance the enemy will scupper British plans before things start by having units out n' about on patrol or as a screen (someone like Arnold insisting the job is done properly?).

The British units start in column of march along the Cahos Falls track, but screened/preceded by the Lights, Jaeger and Indians; who will "clear the ground, testing per move as per my standard Hidden Enemy protocols (but with a card deck of two black suits - as dummy cards - and one suit of red cards, minus the Character Cards, due to Gates's cautious personality).

As it happens this whole process, including the unlimbering of the heavy guns and the movement into their starting positions by the infantry, takes five moves in total with no enemy interference. Maybe they're still abed? The battle proper can now commence.

The battle opens with a volley from the guns into the enemy camp. No casualties, but it got their attention.

I randomly draw and place the various Rebel Commanders (their individual commands having been allocated on the Board Game board). 

Over the next few moves three out of the four rebel brigades activate, but only Morgan (based in the old fort overlooking Albany) does anything active, moving two of his regiments towards the firing of the British cannon - possibly intending to pot at the artilleryists with his rifles. But to do this properly he would have to come down off the hill he is tasked to defend. He resists the temptation.

(Note: that in randomised initial positions for the rebel brigades Arnold - who would likely have been pro-active - drew to man the defences facing Clinton, off table...)

The others Colonial brigade commanders elect to keep their men out of the direct fire from my heavy guns and back from their entrenchment line. Probably a wise move if Gates isn't going to to order an attack.

With neither side willing to make a serious move time passes. Burgoyne is waiting to hear from the Town and Fraser. Gates is simply cautious.

By move six Burgoyne gets an update from the town (see next post for the process used). There was no resistance at the town stockade. The troops were stoned by children while marching through the streets at one stage, and some men returned fire without orders (their names have been taken for later punishment). Luckily no casualties ensued, and the warehouse district was  secured without further incident.  

Meanwhile Fraser is still somewhere out there in the woods. 

Burgoyne now has a choice..

a) Call off today's attack on Gates's defences; holding position while sending more men into the town (perhaps the grenadiers?) in case Gates decides to move in that direction, meanwhile bringing up his supplies and back-up to nearer the town. At the same time he should be informing Clinton that the town is theirs, but that they should both coordinate an attack on Gates on the morrow. The only problem with calling off the attack is letting Fraser know.

b) Proceed with the original plan - but now that most of the enemy are visible it is very clear that Burgoyne does NOT have the three times superiority he ought to have to secure an attack on a fortified place. However, if Fraser paralyses Gates with his flank attack and distracts the commander of the main position, a sudden rush across the valley, following and supported by an all-out bombardment, might still succeed.

Burgoyne elects to stick with the plan. 

Meanwhile, Gates, concerned by the tooled-up British force sitting on the hill opposite his position and the news from the town, moves himself and a Continental Army regiment up to the Main Redoubt. He starts positioning men to defend against an assault from the north. All this seems sensible.

Morgan's rifles push on to the creek, where they begin sniping at the grenadiers. Lincoln, commanding the small redoubt overlooking the bostals, following Morgan's example, orders a militia unit forward to harass Burgoyne's gunners. Both these moves are unauthorised by Gates, but he sees no reason to call them back.

The commander of the Grenadier brigade, von Riedesel, adjusts his line to meet the threat from the enemy skirmishers, who are now peppering his men, while the artillery opens fire on Lincoln's men as they make their way down the open slopes towards the cover by the creek. 

As more rebel skirmishers reach the creek von Riedesel has sudden change of mind. Perhaps hoping to tempt the skirmishers into crossing the creek he withdraws his command to the reverse slope of the small ridge he is on and tries to keep his men's' spirits up (removing Disorder Markers caused by the sniping). 

Up on the main ridge Gate's now makes what may prove to be the clinching move. Clearly concerned by the British across the creek, and, seeing the grenadiers taking advantage of the reverse slope, maybe he is wondering what else Burgoyne has concealed up his sleeve behind the track. Whatever the reason, Gates summons two Continental Army regiments from the woodland redoubt on the west up to the main ridge. This reduces the number of men guarding his flank, but will strengthen the Main Redoubt.

Unknown to Gates, it is still thought by the British colonels that the redcoats will likely get a very bloody nose if Burgoyne tries to assault with his five regiments against Gates's entrenched ten.

Burgoyne's guns, surprisingly, now exchange fire with Lincoln's militia, both sides taking hits, but the rain of heavy balls smashing though the trees around them, and the dropping howitzer shells are upsetting the inexperienced militiamen, who start to fall.


The next move von Riedesel reorganises his grenadiers in the safe area below the small ridge. Lincoln's skirmishers again open up on the gunners who, instructed by Burgoyne, also seek the safety of the reverse slope.

With the British gunners and grenadier on the reverse slope - and Lincoln's shaken skirmishers and Morgan's riflemen not being stupid enough to cross the creek - things have reached a stalemate in the valley. 

Only the Continental Army two regiments summoned by Gates (and which have decided to go the long way round to the Main Redoubt by road, rather than cross country and up the steep rear face of the hill) are moving.

It is now approaching midday. Suddenly, near eastern edge of the woodland west of the redoubts there is a plume of smoke... Fraser has signalled that he is in position.

Burgoyne at once launches one of his British brigades and von Riedesel's grenadiers brigade down the ridge towards the stream, and brings back his artillery crews to their guns. The gambler makes his throw..... 

Suddenly - and fortuitously for Burgoyne - there is a whooping and a hollering as Fraser's, Lights, Jaegers, Indians and Highlanders rush the westernmost of Gate's defences - catching the Continentals there by surprise; they are standing easy, and not even close-manning the barricades as Fraser's men sweep in. There is brief fight, before the shocked Continentals turn and run. Fraser's men have taken the woodside entrenchments at a single blow, but now have to halt to reorganise.


The Continental are running, but more due to surprise and shock than actual casualties. 

The British guns open up on the Main Redoubt, but do little damage. Gates hesitates, then orders two militia regiments to the man rear of the Main Redoubt, to prevent Fraser sweeping up the slope, and two more to man the front facing Burgoyne. 

Meanwhile the the Continental brigade who ran from Fraser's Lights and Indians reform, and the two regiments ahead of them (which were earlier ordered to march to the Main Redoubt) halt, and form line to face Fraser.

At the creek, Morgan's riflemen pull back - intimidated by the approach of the Grenadiers - and just in time as, with unexpected speed (good dice) these rush down the slope and splash across the stream to occupy the very position Morgan's men had recently stood.


With most of the British from the ridge now across the creek and Fraser's troops deployed to command the Schenectady road (his only viable line of retreat) Gates has a dilemma; to deal with Fraser now, or see off Burgoyne first. He hesitates.

Next move von  Riedesel is activated first. His men order their ranks and shed their disorder, five companies firing into the backs of Morgan's rifles, sowing more confusion.

Gates rides off the ridge to pass orders to the troops on the lower ground facing Fraser. He can be reasonable confident that his troops in the redoubts can hold Burgoyne's gamble, so it looks like he wants to concentrate on drive Fraser back into the woods. He has four regiments of Continentals and two of Militia to hand. He could also draw off another Continental regiment from the bostal redoubt, just to make sure. 

Burgoyne's guns batter the redoubt, while his redcoats reorganise themselves after crossing the creek. Burgoyne himself brings down one of the two reserve regiments from the ridge, leaving the other to protect the guns. 

Despite their disruption level, and the British forces from the ridge moving swiftly at them and in reach of both flanks - not to mention Morgan's rifles' speedy withdrawal on their right - Lincoln's skirmishers down by the creek and fronting the bostal redoubt, elect to hold position and open fire on the redcoats. They cause no damage, but one has to admire their (surprising) pluck.


Having crossed the creek, Burgoyne's leading British battalions slowly move up the main ridge, flanking Lincoln's skirmishers. 

At the next opportunity Morgan's rifles pull back further towards the defence line of the town, meanwhile, von Reidesel's Hessians, facing them, deploy towards the westernmost bostal (evidently he does not fancy going up the eastern arm, flanked as it is from both sides) while his British grenadier companies charge into the flank of Lincoln's skirmishers by the creek. Unsurprisingly these skedaddle up the hill; but not after some losses to the grenadiers' bayonets and being shot at, as they run, by the artillery.....

Frazers Light troops deploy, with his Rangers shooting up at the militia manning the rear slopes of  the Main Redoubt, while his Highlanders slog up the slope on their flank, where they are met by an (ineffective) volley from the militia there.


The Indians meanwhile scuttle between the redoubt hill and the woods, seemingly with the intent to flank the defences. Seeing this the brigadier at the redoubt swivels his reserve regiment of Continentals to face this threat, just in case.

South of the Main Redoubt the four Continental regiments advance on Fraser's light companies. If Gates's plan here is to secure the Schenectady road this looks likely to succeed.

And so another move ends as we creep into early to mid afternoon.


 Personally, at this stage, I cannot see Burgoyne's attack on the ridge succeeding without heavy loss. His only real hope, I feel, lies in Fraser so upsetting things on the flank of the Main Redoubt that the garrison here loses its nerve. I'm convinced that any attack on the entrenchments will prove costly. On the other hand, most of the Continental regiments are south of the Main Redoubt, facing Fraser, so the redcoats will mainly be up against untried militia... Maybe it's worth pushing luck a little further..? Burgoyne certainly thinks so.

Lincoln's skirmishers keep running, but as they scramble up the broken ground flanking the nearest bostal it's noticeable that some are slinking off the field, such is their level of disruption.

The British artillery again turns it's attention to the Main Redoubt, while Gates rides to help reduce the disruption among his Continental regiments threatening Fraser. The British light companies facing them open fire, to little effect. 

However, on the main ridge a sudden charge by the Highlanders and Rangers is too much for the militia on the west side of the redoubt, and they turn and flee, upsetting their supports. Just to make matters worse Burgoyne himself is the next commander to be activated. In good order his regiments make their way up the main ridge.


Over near the town fort Morgan steadies his rifles and awaits developments, while Lincoln rallies his skirmishers.

The Continentals to the south of the ridge adjust position to take into the account issues on the main ridge, and one regiment fires upon Fraser's light companies, causing little damage.

Up in the Main Redoubt the commander here seems to panic, drawing back a regiment from the north-facing entrenchments to bolster the unit of Continentals facing Fraser's highlanders, but upsetting them in the process. The Continentals would like to get off a volley into Fraser's men, but the range is too great. 

Next move, and Gate's on the south side of the ridge, can't see what's happening in the redoubt. By the same token, Burgoyne can't see what's occurring in the fortifications either. 

The MORE good luck for the British; Fraser is the first commander to be activated. The Rangers slam into the flank of one of the militia units in the Main Redoubt while the Highlanders, Fraser at their head, charge the Continentals. The militia unit panics and routs. The Continentals also turn and run, upsetting the nearby militia units at the entrenchments. Suddenly all is going to pot in the Main Redoubt as the commander here gets cut down by the Highlanders. The bagpipes of the Highlanders and the war whoops of their supporting Indians echo along the entrenchments, further upsetting the militia.

Next, the grenadiers start moving up the slope to the bostal, then (the luck is all going the Britishers' way) Burgoyne is activated! The lead British regiments reach the breastworks; they aren't even charging - but this is enough for the militia facing them. Already shaken by the other rebel units withdrawing or routing, and the falling of the redoubt commander, these too make off, only to be struck by a salvo from the British guns....

Lincoln and Morgan brace themselves for an attack, but do nothing aggressive.

Meanwhile, Gates is determined to secure the line of retreat to Schenectady, and, after getting his men in order, pushes two regiments towards Fraser's light infantry.


That last bound was a bad one for the Americans. The Main Redoubt has all but fallen and all the units in it have been discomforted in one way or another. However, Morgan and Lincoln still hold their entrenched positions and Gates has four Continental regiments in hand south of the Main Redoubt. All is not lost - and the British KNOW that they have been VERY lucky in getting into the Main Redoubt so cheaply...

Next go the British guns open up on Lincoln's redoubt, but to no discernible effect. The broken militia flee from the Main redoubt while the regimental commanders there make their own decisions to pull back and consolidate - the overall commander being hors de combat.

The Hessians start climbing the bostal. Burgoyne is activated and another of his regiments charges into the main redoubt, driving back a small militia unit.

To the south of the Main Redoubt the Continentals exchange fire on Fraser's lights and sort themselves out into defensive lines in case any enemy swarm down from the ridge. Gates rides off, hat in hand, to the routing militia - successfully rallying one regiment.

Next move - we are now into mid afternoon - Fraser's Lights south of the Main Redoubt again come under volley fire, and scurry back to the cover of the woodside entrenchments.

Fraser is activated. He sorts out his Highlanders and moves them forward in the Main Redoubt, while his Rangers both advance and give a harassing fire to those of the redoubt garrison still showing fight. Meanwhile his Indians, like a bad movie, rush to the skyline of the Main Redoubt ridge and glower down on the Continentals below and to the south.


Over towards the town Morgan decides to hold his ground, while von Reidesel's men carry on, clambering up the up the western bostal stream-bed.

In the Main Redoubt Burgoyne's regiments either get themselves back into order or open fire - or, in once case, charge the defenders; forcing one militia regiment to break off contact and routing another. These units fall back through the other rebel units in the redoubt, causing more disorder - as well as upsetting Lincoln's skirmishers on their flank. To all intents and purposes the Main Redoubt has now fallen to the British.  

While the British guns open up on his redoubt, Lincoln's skirmishers in turn open fire on the British Grenadiers, causing some shock - and that ends another move.

Next go Fraser sorts out his men, moving the Highlanders towards the woods. His Lights reform down by the woodland entrenchments. Some of his Indians and rangers open fire on their nearest Continentals, but to little effect. 

The remaining rebels begin to withdraw in good order from the Main Redoubt.

By the bostal some of the Hessians reform themselves, others open fire on Lincoln's men, who also come under fire from the artillery. The British grenadier companies charge and push back Lincoln's skirmishers, while Morgan shifts HIS rifles over the bostal ridge to support Lincoln.

One of Burgoyne's regiments charges one of the militia units falling back from the redoubt and speeds it on it's way, while another flanks Lincoln' skirmishers. End of the move - and Gates doesn't get activated.....


At the beginning of the next bound Fraser's Indians and Lights fire upon the Continentals below the Main Redoubt, while his Rangers and Highlanders deploy. Another broken militia unit flees off table and the British guns fire off one of their last salvoes into Lincoln's redoubt.


But then Gates is activated.. I reckon he now has some serious choices to make...

Gates's Options

It looks to me that Gates is in a bit of a pickle.  

He has six militia regiments already at breaking point or actually broken (both have already left the table), with one of his Continental regiments wavering.

He has lost the Main Redoubt to the enemy. 

However, he still has four Continental Army regiments in the south which are more or less intact and in good order.

Although Lincoln and Morgan's are redoubts holding steady, and their regiments (seven militia and once CA) are relatively unblooded and secure, there is a danger they will soon be attacked by Burgoyne and von Reidesal's troops. Experience has shown that the militia will likely not stand when charged. 

Even if the British are thrown back from or hold off attacking these redoubts today they will still hold the Main Redoubt, and likely cut the Schenectady road - Gates's only line of retreat - if they bring some of their heavy guns up to the main redoubt overnight.  

Gates knows that, off-table, the town has been occupied and that Clinton (with fifteen regiments and more heavy guns) waits in the wings, likely to attack Arnold's four militia regiments tomorrow.


Although it looks like an attack on Lincoln's redoubt is imminent, if this falls Burgoyne may well be satisfied with the day's gains and may not risk pressing on further south. If this turns out to be the case - or if Lincoln holds - then this could allow Gates to extract him and Morgan to join with the Continental Army units, plus the militia units now retreating from the Main Redoubt. With his force concentrated (and stabilised) south of the Main Redoubt he can then decide to either:

1) Push past Fraser's Light Infantry, extract Morgan and Lincoln from their redoubts before they are assaulted and pull his force away down the Schenectady road (informing Arnold of the plan and instructing him to also withdraw towards Schenectady in the night). 

Pluses: He gets his army away pretty much intact and avoids another action tomorrow - with the combined armies of Burgoyne and Clinton attacking him; leaving him a chance to fight another day.

Negatives; This is admitting defeat, plus he will be abandoning Albany and his heavy supplies in the Main Redoubt. 

2) Attempt to establish a new defensive position off-table behind Arnold (who is holding the south-facing defences).

Pluses: His army is still pretty much intact and he may well give a bloody nose to the combined armies of Burgoyne and Clinton if they attack him tomorrow.

 Negatives; He will be abandoning Albany and his heavy supplies in the Main Redoubt. He may become trapped and put to siege, rather than assaulted. If he loses, whether in open battle or siege, his army will likely to be lost to the Struggle.

3) Reorganise on-table and attempt to retake the Main Redoubt. 

Pluses: He may regain his heavy supplies in the Main Redoubt, making a night-time retreat to Schenectady less humiliating, plus securing the Schenectady road to allow the extraction of Lincoln and Morgan (and off-table Arnold).

Negatives: He may lose heavily, Lincoln and Morgan could be cut off, and swamped - or forced to accept terms - tomorrow. 

4) Reorganise on-table and attempt to retake Albany. 

Pluses: His army is still pretty much intact and he may well give a bloody nose to the combined armies of Burgoyne and Clinton if they attack him tomorrow.

 Negatives; He will be abandoning his heavy supplies in the Main Redoubt. He may become trapped and put to siege in Albany, rather than assaulted. If he loses, whether by storm or siege, his army will likely to be lost to the Struggle.

5) Leaving Morgan and Lincoln in position, reorganise on-table and attack Burgoyne with what forces he has at what seems the best place - possibly pushing Burgoyne back. 

Pluses: He may regain his heavy supplies in the Main Redoubt. By rebuffing Burgoyne this will make a night-time retreat to Schenectady less humiliating, plus securing the Schenectady road to allow a retreat overnight.

Negatives: He may lose heavily and be knocked back with losses. If so,  Lincoln and Morgan could be cut off, and swamped - or forced to accept terms – tomorrow.

None of the above are ideal, but then, he is in a bad position. I scribble a quick Ad Hoc Decision table: 

Result is a nine - Option 1. Given Gates's situation I will switch player and play him, with Burgoyne "going on automatic".  An aid is sent off to inform Morgan and Lincoln.

But before any action can be taken first Burgoyne, then von Reidesel are activated and throw their regiments at Lincoln's troops, Morgan's Rifles and the remaining dispirited garrison of the Main Reboubt. The militia on the slopes from the Main Redoubt and in Lincoln's redoubt will not meet the bayonets of the Hessians and Redcoats and three units break. Morgan's men retreat to their supports.

Gates has suddenly had the situation taken out of his hands. With more than half his army routed or wavering near breaking point all that can be done is to salvage what he can from the wreck and pull back towards Schenectady. Luckily Burgoyne and Reidesel's men are too exhausted to pursue. All is over bar the withdrawal.

In campaign terms this was not a disaster for the rebels. Losing Albany and the supply train was bad, but Gates got away with most of his army.

Burgoyne will claim this as a win - but in strategic terms it was not. OK, Albany was taken and Burgoyne's army suffered minimal casualties in pushing gates off his perch, but now Gates can head north towards Lafayette. Had Burgoyne waited for Clinton to be ready this could (and should) have been a decisive victory.

Conclusion: 

Well, that was an exciting little game which did NOT end as I expected - I fully anticipated Burgoyne getting a bloody nose; but then I hadn't fought this kind of fight with these rules before.

The result was partly due to a LOT of luck on the British side regarding Gates's initial dispositions, good Leader Activation/good movement dice and Fraser's successful progress though the woods. Add to that mix a LOT of aggressive action test results on the part of the British junior commanders (plus the failure, on EACH occasion when tested, of the militia to hold the ground they were given when faced with a bayonet charge) and maybe this was too one-sided a fight. 

The British artillery was pretty ineffective though.

Technical thoughts: I need to make some different colour-coded markers for Disruption Levels and Casualties.

I may consider making some "formation change templates".

I maybe need to research/revisit/revise the rules regarding heavy gunnery, esp. howitzers.

I need to do some more reading-up on British officer casualties.  

Had I not been doing a lot of reading which challenges a lot of the myths about the AWI I would have been more concerned by the results.

As it is, the adjusting of the traditional picture of the effectiveness (or otherwise) of musketry and the taking into consideration how British troops ACTUALLY behaved and fought in this period (amongst other things the lying down/using reverse slopes when under fire during this period - a practice I had previously understood to have been adopted later, in the Napoleonic Wars, rapidity of approach, flexibility and the speedy nature of British charges) meant that the rules seemed to reflect the reality quite well.

Next post will consider some of the rules and off-table action processes I used for this game, along with some technical notes and decision table examples. 

As always, any thoughts, queries, critiques and comments welcome. 


A Little Action..

But not a lot... With the reenactment season in full swing, D&D commitments, bedding in the new cat and having to pen (and play in) a fa...