Showing posts with label Preparation. Show all posts

Thursday, 19 September 2024

All Ashore Who's Going Ashore Part One, the Prep....

Or, "Not The Navy Lark..".


Whether inspired by a recent multiperiod event at Hever Castle, where we did Smugglers, Sailors & Revenue men (I tend to come away with more cuts n' bruises from these than from our medieval fights, due to no protective gear in 18th/19thC.  I hear that apparently the viking group which attends this event - all shields, maille, helms & protective gloves - think that we are mad..) or a recent decision to re-read Alexander Kent's the Bolitho saga (which I think I first started reading in 1970s Iran) I decided this week to do a little AWI Landing Party action....   

So....

The Story:

Fort G
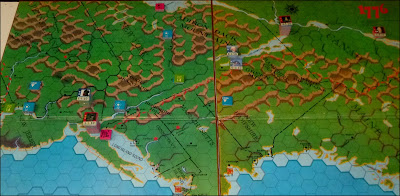
ibaigazo, held by the rebels and with its collection of heavy guns, commands access up the Big Snake River. The captain of the British Frigate HMS Reckless has orders to neutralise the threat to allow passage of an important supply shipment to proceed upriver. Clearly to attempt to do so using the frigate itself would be suicide and the cliffs and bluffs prevent landings below the fort itself. Thus, seven boats of ships crew and the frigate's marines are to proceed up Wee Small Creek (from point A on the map, attack the fort from the landward side, spike or otherwise destroy the guns therein, and make their way back safely.


There is no intelligence as to the exact size of the garrison. Friendly local sources indicate it is small, though large enough to man all the guns present. The element of surprise would therefore seem to be vital.  

The Plan:

The boats will proceed upriver, during the night of the 12th, to the bend where they will be hidden in the patch of woodland there. They will rest up here during the day. Come nightfall the force will move along the tack which leads from the river westwards. On reaching the north-south track the force will proceed north to the next junction, whereupon it will split.

A third of the crew and half the marines under 2nd Lt. Reed will move along the track towards the Big Snakey. At four o' clock in the morning they will infiltrate the fort using the spurs of the high-ground, deal with any sentries, and begin spiking the guns.

The rest of the men will wait at the junction while a small group reconnoitres, and deals with, any picket at the small entrenchment on the rise east of the fort. The force will then move to to the next junction, where, again, it will split.

Half the crewmen and the rest of the marines will stay at the redoubt with Lt. Harris of the marines and Midshipman Burton 
and await any noise from the fort. If there an alarm or shooting is heard they will rush the fort entrance; making as much noise as possible.

The remainder of the crew, under 1st Lt. O'Tool will move north along the track, past the spur leading to the fort entrance, and on to the woodland to the north of the fort. At four o' clock in the morning they too will infiltrate the fort from the north; neutralize any
 sentries, and begin spiking the guns at that end.


The objectives are:

1) To spike the guns. Once this has been done a colour will be raised to indicate the fact to the Reckless.

2) To blow up the magazine.

The force will then return to the boats and head downstream to the confluence with the Big Snakey, to rendezvous with the Reckless after she has further bombarded the now impotent fortifications.

NO weapons are to be loaded until ordered. This puts Friendly Units at an initial disadvantage if attacked, but prevents accidental discharge. 

                                                           *
The plan is complex and will require stealth and good timing. Officers will check their watches at the woodland before setting out to aid with coordination. Keeping to the tracks is risky, but necessary to prevent parties from getting lost in the scrub in the dark.

In addition to the risks of getting lost once off the tracks (dice tests) there may be enemy patrols and random civilians (hunters/travellers etc.) about. On the plus side there may also be Loyalists in the area, willing to guide, or even join, the force. 


Scenario Specific rules:

1) Night-time Move Tests: Each night-time move a 20D will be thrown for each independently operating unit. Units test even if stationary, but only four tests an hour. On a throw of 20 the Event Table must be checked. This Move Test throw is modified as follows (cumulative):

Unit is stationary -3
Unit is in woodland -2
Unit 
is moving and has friendly locals with it -1
Unit is moving and has friendly local Scout/s with it -2
Unit is "Sneaking" -4
Unit is stationary and taking cover +2
Unit is moving at full speed +1
Unit is Scurrying +3
Unit is moving on track +1
Unit is within 3" of track +1
Unit has prisoners - +1
Plus 1 for each Wildlife Token in play (see Event Table).
Plus 8 if any friendly unit fires or has fired in last 10 moves.
Plus 4 if any friendly scout or single enemy sentry fires 
or has fired in last 5 moves.
Plus 5 if any enemy unit has fired during this scenario.
Plus 12 if any gun has fired during the scenario.
Plus 15 if boats have been discovered by hostiles 
and this fact has been reported to the Fort.

However, an unmodified 20 result always requires a Test for an Event and an unmodified 1 an "Accident Test" (see below) .  

2) Day-time Move Tests: Each daytime move a 12D will be thrown for each independently operating unit. Units test even if stationary. On a throw of 12 the Event Table must be checked. This Move Test throw is modified as follows (cumulative):

Unit is stationary -1
Unit is in woodland -2
Unit is moving and has friendly locals with it -1
Unit is moving and has friendly local Scout/s with it -1
Unit is "Sneaking" -2
Unit is stationary and taking cover +2
Unit is moving at full speed +2
Unit is Scurrying +5
Unit is moving on track +3
Unit is within 3" of track +2
Unit has prisoners - +1
Plus 2 for each Wildlife Token in play (see Event Table).
Plus 5 if any friendly unit fires or has fired in last 10 moves.
Plus 2 if any friendly scout or single enemy sentry fires 
or has fired in last 5 moves.
Plus 5 if any enemy unit has fired during this scenario.
Plus 12 if any gun has fired during the scenario.
Plus 15 if boats have been seen/discovered by hostiles and this fact has been reported to the Fort.

However, an unmodified 20 result always requires a Test for an Event and an unmodified 1 an "Accident Test"(see below) .  


4) Accident Test:

Throw 1x6D.
On a result of 1 someone dropped a loaded firearm and it goes off. Test for friendly casualty as normal shooting. This occurs EVEN if an "unloaded" order has been given (someone disobeyed). 
Result of 2-4; someone has disturbed Wildlife - gain a Wildlife Marker.
Result of 5; someone has tripped. Dice for injury as shooting. Injured party moves at half speed.
Result of 6; someone has tripped. Dice for injury as shooting. Injured party moves at half speed. Also, the person who fell has shouted. Place wildlife marker (represents human noise but who need different markers?)

5) Movement:

Friendly units have three movement modes "Sneaking", Normal and "Scurry".

6) Accidental Firing:

Each Friendly Force must be designated loaded or unloaded. If loaded a 1x6D test must be made for each Event Test.

On a result of 1 someone shoots. Test for all adjacent stands of three.
On a result of 1-3 they also shoot. Continue this process for every shooting stand. Add 2 to each subsequent Event Test for every stand which has fired.
IF the Event Test results in any human presence test for casualties on that presence. If an enemy patrol/sentry they MUST return fire (i.e. they cannot just run off in the first round). Any Ambush is deemed triggered prematurely and gets NO Ambush bonus.  

7) Event Table:

Should be self explanatory. 


Right, all ready to go.... Watch this space for the fight...


Monday, 29 August 2022

This Ain't Zululand: Part Four

A Delayed Post:

I'm a bit behind with posts & write-ups thanks to the Reenactment Season (Evesham, Bosworth etc. and associated injuries), heat-induced lethargy, a bout of Covid which I'm still shaking off (dagnabbit) and family-issue wrangling, but here we go. Thoughts on a replay of the previous TAZ fights, but from the Other Side of The Hill.... 

Playing At Home.

Same set up and scenario as the first battle, this time playing as the Great King's general. My job is to stop the British achieving their objective while not losing too many men.

The reason for this (apart from the fun) is to play around with a situation where it is MY guys who are hidden, to see how I can manage a "secret plan" of my own with limited data AND how to manage the enemy's reaction to what they find. There may be some seat-of-the-pants flying but should be fun.

Decisions, decisions:

My first decision will be how to deploy my forces.

It doesn't take a military genius to see that the British will be most vulnerable if their convoy straggles (test throws will be as before, and as we have seen before, so this cannot be guaranteed) or when they are crossing the Drift (or drifts). Having men to hand to take advantage in these situations would be good, but placing them so makes their discovery by enemy scouts more likely.

Scattering my regiments will allow wider coverage. However, this leaves them open to defeat in detail and increases the chances of independent action on the part of my sub-commanders. Placing troops off-table keeps them safe, but makes them difficult to summon - and again risks independent action on their part. Also, do I expose certain troops to view (and thus fire) in the hope this affects enemy decisions ? Hmmm....

Once the British enter the field (via the track) they will be making their own decisions as to what to do. This will be hidden from me since while my general can guess at their route, how they actually approach and how (i.e. in column of march, deployed for battle or in mobile square) will only be "known to me" if I chose to place the general in Line of Sight of the column (i.e. close to the action) or when a report (Messenger) mentions this (see below: "Incoming Data").

The enemy "decision" will certainly affect the success of any moves on my part. Their decision may also affect how any of my sub-commanders react.

One thing I will need to decide is where to place my general. Ideally he should be able to see both the enemy and his own army. He should also be in a position to signal to his men so as to exert some kind of control over the action. However......

Given that on the two previous occasions the "Home Side" achieved their objective with just the AI as player (albeit at a cost) I feel that I should handicap myself. My general will therefore start the game in the kraal (let's say he is having "second breakfast"; one of the privileges of rank) and will not move from there until there is the sound of heavy gunfire (say at least a whole British company) within 36 inches of the kraal or a message arrives (see below) indicating that the enemy are here in force.

Incoming Data: 

Unless the enemy is in clear sight I won't know what they are doing unless informed by messenger. Unlike the enemy horse in the previous games I do not have separate Scout Units. Instead my units must spot the enemy, then send messengers to my general. These messengers are not professional soldiers (these are the junior ranks of the units - perhaps rookies or even herd boys). The process will work like this.

On an enemy force approaching within sight and within twenty four inches of a friendly unit or scout a test is made per friendly move on the table below to see if a messenger is despatched:

We then assess how long, in theory, a messenger will take to reach the General and test once that time is expended to see if the message has been delayed.
 

Once the message has arrived we test again on the table below to ascertain how good the data sent actually is.


Summoning /Activating Troops:

On-table troops will be activated in the normal way  - i.e. their commanders will react to messages, pre-arranged signals, react to ad hoc decision tests with regards changing situations and standing orders etc. etc. However, off-table troops must either have specific instructions as when to enter (written before play) or must be summoned by signal or messenger. They will NOT enter the table without orders. 

Messengers sent by the general will be subject to the usual problems/factors of messengers, with a standard "Delay test". Messages must be written out and must be interpreted based on the actual words - not the intentions of the writer.

Signals, if used, must have a pre-set meaning (written down at the start of the game, "e.g. On signal march to location of smoke", "On signal; march to Black Calf Kopje",  "On signal; march to Black Calf Kopje, attacking any enemy seen en route"etc.). Their implementation may be subject to a "Delay Test". Once on the field they will be subject to normal sub-commander reaction tests.

Pre-set instructions must be specific (e.g. "If many guns are heard march to them", "March to Black Cow Kopje when the sun is highest", "March to any Kopje from which I signal with smoke", "March to the Drift" etc.)  with a supplemental instruction if desired (e.g. "If many guns are heard march to them. Attack any enemy seen."  etc.).


Summary:  

Yet another "How Can I Introduce FoW into my Games experiment. OK, a lot of tables there, but I want to see how I can manage (or mismanage) on limited data. Playthrough next....


Wednesday, 13 July 2022

"This Ain't Zululand": The Prep.

The Trouble With Trekking...

A quick trip to Sander's Patch to test some rules.

Backstory & Mission:

Very basic this time. After discovery of gold within his domains the colonial power (against local advice) has decided to stamp on the Great King; and has thus gone to the trouble and expense of shifting an expeditionary force way up the Great River.

A British Column, consisting of wagons and impedimenta, plus an escort of about a regiment of redcoats, some Native Auxiliaries (horse and foot,) and a few cavalry is therefore approaching the River Tembi, intending to move from the south of the table to the north, burning the kraal, while en route to the Great King's main city.

There are hostiles reported in the area, in some strength; but their intentions (and locations) are unknown.

The Head of the Column must feel it's way across the table within Thirty Moves to be successful. Until Activated the Main Column will not enter the field. This is randomised so I do not know how long I will have to scout and "clear" potential ambush points (PAPs) before it arrives.

Wagons can break down and other hazards could delay progress.

Lt. Hawarden's Sketch Map 

The Field:

There is a clear wagon and cattle trail for the column to follow.

The terrain is generally flat, so some off-trail wagon movement is permitted.

Elevations include a scatter of rocky kopjes and some significant stretches of donga (the old Tembi riverbed). The ground is pretty open, with some patches of woodland along the River Tembi, which splits the Table. 

All kopjes, the donga and woodland patches (there are no Napier Grass patches - as I couldn't find any suitable terrain models in my boxes) could conceal hidden enemy and must be Scouted before deemed safe or tested for as Potential Ambush Points (PAPs) if approached.

Because the scouts are with the column (rather than me losing them scouting off-table) parallel Table-Edge tests must be made each move for each third of the table the column has traversed/is traversing. 

Randomising/Solo Stuff:

1) The Column: Incidents relating to the column will be handled by a dice throw per move and (on the appropriate throw indicating an incident has occurred) a test throw on the Convoy Table below.

2) Enemy Entry: Enemy units enter play only when a test reveals them. Every move a British unit is within fourteen inches of a Potential Ambush Point (see below) or within two feet of an east or west table edge test is made (1x6D). In the case of table edges a throw must be made for each 32 inches of table length falling within these parameters. On a throw of six a potential threat has been perceived and a Blind is placed.

This Blind tests (1x6D) each enemy move and if a six is thrown then at the start of the next enemy move a card is drawn and placed at the point where the threat has been perceived. After this point the Blind Card activates and moves as normal units.

On a card being "revealed" by proximity/within LoS of a friendly unit, the card is revealed; with any units prompted by the card type/value being placed (as per my standard Hidden Enemy Protocols but with one red Pip = one unit picked at random from the unit storage tray).

It is assumed that ALL Enemy Brigade Commanders will have been ordered to act aggressively. This will, however, be tempered by ad hoc Decision Throws based on conditions on the field as soon as any reverse has been experienced.


3) Scouting: Scouting (and other movement where Scouts have not already passed or cleared Potential Ambush points - see below) is dealt with as per my standard Hidden Enemy Procedures (see also above).

However, in addition toll PAP and table edge rules, because of possible long distance off-table threats, Scouts within three inches of a table edge or on a kopje plateau edge facing a table edge and within a foot of that edge may ALSO sight to off-table areas. Enemy seen in these areas may be engaged (long range fire). Enemy so spotted cannot return fire and MUST enter the table within one foot of the spotter; being so placed on a throw of 5-6 on a 1x6D test (per move). However, such units may be "Pinned" as per shooting rules, and thus denied entry to the Table.

4) Potential Ambush Points: There are several Potential Ambush Points (PAPs) on the table. These are:

Type 1) Any kopje plateau

Type 2) Any isolated patch of woodland, any large patch of scrub/Napier Grass, any isolated patch of rocky scrub and/or the main kraal

Type 4) Any donga or long stretch of woodland or rocky/scrubby slopes (e.g. kopje sides)

If not rendered harmless these can provide assembly points for Native Surprise Attacks. To be rendered harmless these features must be either Scouted, passed through or occupied.

To Scout a Type 1 PAP a British unit must climb to the actual plateau of the feature, then make a "Discovery Test". It must then move across the plateau to the furthest (in distance) edge from it's arrival point. It must then test again. Should a plateau contain any Type 2 or Type 4 PAP then these must be tested for separately as below.

To Scout a Type 2 PAP a British unit must move to within two inches of the edge of the feature, then make a "Discovery Test". It must then pass through the feature, making another test each move in which it ends it's turn in/remains in the feature, until a total of three tests have been made. Only after three tests have been passed without prompting and Ambush is the PAP deemed cleared.

To Scout a Type 4 PAP a British unit must either enter or move to the very edge of the feature then make a "Discovery Test". This is deemed to have cleared a six inch stretch of this kind of feature. To clear any further stretches further moves taking the unit/s along the feature must be made and tests taken per such move.

IF, at any time, an enemy force (including retreating/routed units) passes through/occupies a preciously "cleared" feature it reverts to being a PAP.

5) Wildlife: Apart from encounters on the Table above there is only one kind of wildlife of concern - a Wildebeest herd. These move randomly (basic six point 360 degree Spider Test) three inches a move. If spooked by a body of men (must be more than 12 strong) they will stampede away from them at six inches a move for three moves (six point half Spider Test for direction). The Convoy cannot pass through the herd, but must go round or halt to let them move on.

6) Convoy Arrival: Order of march will be written out in advance. Two moves in after the Scouts hit the table a 1x6D dice will be thrown. On a throw of "6" the lead element/s will arrive on the table at the Arrival Point.

However, IF a scout has been dispatched off-table with data re. seen enemy/enemy threats within 3 feet of the Arrival Point the Order of March MAY be changed by the Off-table Column Commander. This is represented by the following table.


7) Sub-Unit Commanders: As always Friendly sub unit commanders will be subject to ad hoc tests when detached or without orders and a decision is required. I (as General) will have no influence on these decisions if the sub commander is outside my Command Radius.

Units within Command Radius may also be affected by the following circumstances:

Unexpected sighting of enemy

Unexpected exposure to sudden, serious threat.

Ammunition issues

Enemy sub-commanders will be similarly affected.

The Enemy:

There may be no opposition, other than (maybe) at the kraal itself.

On the other hand a mass attack from the Regiments of the Great King is possible. Scout reports are inconclusive - not least because they have been ordered to stay close to the column.

Likely hostile strength is unknown but could consist of anything up to twenty of the Great King's regiments (or Fahwini) of warriors. These troops have in the past occasionally crossed spears with the Protectorate's Hausa Police, with mixed results, but have never pushed into "The Patch" in strength. Neither have they faced British regulars before. They can be expected to be confident and aggressive. 

Summary:

OK, the scene is set. The scenario rules laid out. Next Post; the game itself....


Friday, 21 January 2022

1776 And All That (Part Four)

Battle of Albany: Rules and Stuff....

The previous post was a general narrative, not a "dice by dice" commentary, but I'll set out some of the details below.

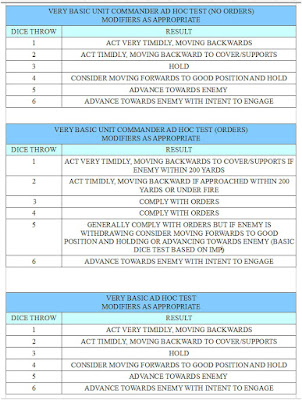
All "non me" decisions were made by using simple Ad Hoc Decision tables (see below). 

Activation of Generals/Brigade commanders - or detached/specialist units where appropriate - was by token using the 1 token per commander/unit, two blank token draw system; with drawing of tokens stopping when only two tokens remain in the tub.

Unit commanders/Leaders which had not moved/fired/carried out any action/been activated in a move can, automatically, fire/ remove disruption in line with their inherent abilities at move end. 

A note was kept of artillery ammunition used - limited to 12 salvoes per gun - but apart from tallying the number of moves expended and the special activities detailed below there was no bookkeeping.

The actual fighting/moving/morale rules were an amalgam of Andy Callan's LF&AAS and ideas nicked from SP/NMTB, plus house conventions.

a) Detached Town Force:

While the British were setting up on the table the detached force (two of Burgoyne's regiments) were sent to secure the warehouses in Albany. They arrived at the town gates at dawn.

How matters actually went for them was not revealed (to me/Burgoyne) until after Game Move six (i.e. no actual tests on progress were made until after Game Move move 6) and only then on a throw of 6 on a 1x6D test dice made at the END of each subsequent Game Move. 

At time of The Reveal the Detached Force tested for the circumstances below.

i) On arrival a 1x6d test is made to see if there were sentries at the town stockade/if they were awake.

1-2; they were absent, tucked up in bed.

3-4; they were asleep at their posts and the British lost one move in securing them quietly.

5; they were alert, fired a warning shot and sent a courier to alert Gates. If this occurred Gates will be informed of the presence of British troops in the town at the end of the fourth move after the British entered the town. The British lose a move to subduing the sentries. 

6; There were enemy militia units manning the stockade. If this occurred Gates will be informed of the presence of British troops in the town in four moves at the end of the fourth move after the British entering. Throw 1x6D for the number of Rebel militia companies present. On a result of a 6, roll again for more.

(This force number is cumulative with no upper limit. These units will be assumed to have been taken from Gates' force. IF Gates's whole force has already been deployed on the Table then companies making up this total units must be at once removed from any unengaged Rebel militia units thereon. Otherwise these units are not available to Gates.)

Resolve resulting combat on the 1776 CRT, each round of combat taking 4 table moves. 

IF the rebel militia defeat the British Detached Force then these units will arrive on the battlefield to support Gates with a throw of 6 on a 1x6D test at the end of each subsequent rebel move.

These militia units will arrive as a single force either on the track by the fort (held by Morgan) or on the access track from Albany previously used by the British (test for this). A Token for this force will be placed in the token tub and Activated as per normal rules.   

ii) If the British got into the town successfully then the Detached Force has to cover 1000 yards or so to get to the warehouse district. They march at 75yards  plus 1x6D x 25 yards per move.

Once the detached units enter the town itself they will test per move for problems, until the warehouses are secured, on the table below (if you cannot read any of the tables open them as new tab).

Once the warehouses are secured by the British the town is deemed taken and the Detached units and the town take no more part in the table battle.

b) Fraser and the Lights:

On move six Fraser moved off with the Light Companies, Jaegers/Rangers and Indians following waypoints marked on the Table. The rules I set for myself were as follows: 

Once he enters the woodland Fraser must test each subsequent move based on standard "Hidden Enemy" protocols (Throw a 1x6D each move. On a result of 6 a card draw takes place to see if he comes under attack), EXCEPT that all Red number cards under eight are removed from the deck and the following table used:


Note: the rebel companies activated on the above will be taken from as yet unactivated commanders on table.

If all commanders have already been activated it will be taken that these units are previously undiscovered local rebel units - i.e. reinforcements not shown on the Map Game. Such units will disperse at the end of the action and NOT subsequently appear on the Map.

However, whether this occurs or not Burgoyne (I) will have no idea of Fraser's actual progress or position on the Table until and unless:

1) There is a message from Fraser regarding his position and circumstances.

However, he will only report with updates if there is something salient to report (e.g. he has run into opposition in force greater than his own, come across enemy entrenchments etc. etc.). He will give a position, but may be out by a four inch radius - the centre point being calculated from the move distance from his start position towards his target, but adjusted for deviation (see below). This message will head towards Burgoyne at 8 inches per move.

2) The sound of reasonably extensive gunfire can be heard (say two moves' worth with at least four companies engaged).

Such an occurrence will be the result of him finding the flank of the main enemy position, as planned, and engaging OR his running into unexpected opposition generated by standard "Hidden Enemy" tests (taken each move). IF such gunfire is heard the location may be marked on the table but will only be approximate, i.e. within an eight inch radius of the calculated move distance centre point, adjusted for deviation (see below). 

3) His Indians raise a column of smoke indicating to Burgoyne that Fraser is in (or within six inches of) the agreed position to harass the enemy (the final waypoint).  

Calculating Fraser's position:

Once his position needs to be calculated he will, in theory, have moved four inches plus 1x6D inches per move between waypoints (these being already marked by "pules" of smoke on the table).

However, at the start of each move from a waypoint/his current position a 1x6D will be thrown to discover if he has deviated from his intended line of march.

On a result of 3 or 4 he makes a bee-line for the next Waypoint (no deviation). 

On a throw of 1 the line of march is 5 degrees off centre to the left of said bee-line, on a throw of 2 the line of march is 10 degrees off centre to the left.

On a throw of 5 the line of march is 5 degrees off centre to the right, on a throw of 6 the line of march is 10 degrees off centre to the right.  

Note: none of these calculations (neither the distance moved nor position relative to the Waypoints will be calculated UNTIL he has reported or gunfire is heard as per 1) or 2) above OR until after move 12. After move 12 test with a Dx6 per move. On the throw of a 6 some of his scouts have arrived at the planned destination and signalled - but the position of his main force must then be calculated and placed on the table. A Token for Fraser is then added to the token tub. .

c) Ad Hoc Tests

Throughout the game there were (as usual with me) a series of ad hoc tests whenever a decision was called for for a detached Leader/Unit and Enemy leader.

Some would be specifically slewed (like the Gates example shown on the game report. Others less so. here are some VERY basic examples.


Where appropriate many such tests will be based on IMP and use two dice, with probabilities matching likely decisions (as in the gates test table in the previous post). As always; queries etc. invited re. this. 

d) Gates's Plan

We knew Burgoyne's battle plan. Did Gates have an actual plan? Or was he winging it?

There has recently been some discussion on the FB solo Group about Solo AIs, and how their "decisions" need, in some folk's eyes, to follow some kind of logical sequence or flow or plan, rather than being random. I'll post MY (idiosyncratic?) thoughts on this, and the place (or absence) of sequence, flow, planning and logic in human affairs  - and especially regarding definitive pre. 20thC battle plans (other than "this is where we'll go, and see what happens") - another time.

Meanwhile, here is a brief account of the Battle of Albany by that little known military historian Lambert Funtnell (Bart.).


"And so, with cautious Clinton hesitating beyond the creek to the south, and the brash Burgoyne pressing from the northern lakes, it would have appeared that Gates, encamped on the slopes above Albany, had placed himself in a trap of his own making. But not so.

Knowing his man, Gates, no doubt instinctively, felt he could rely upon Burgoyne to make some dramatic, and no doubt dashing, venture against his entrenchments. And so proved to be the case. True, his local levies would not stand to meet the steel-tipped musketry of the mercenary enemy; but all the better, for the old fox had a plan.

Throwing forward a taunting line of skirmishers to the Paltroon Creek bottom he drew the enemy on. Down from their secure ridge the British and their foreign lackeys came. Across the murky creek they splashed, then crawled their slow and mud-clagged way up the steep slopes on which his embattled redoubts lay. In vain, their gunners squandered their precious shells against the unyielding earthworks, where Gates's militia bands waited.

Then, just as the wily fox had foreseen; while the weary redcoats breasted his very palisades, his swift-heeled, local sons of the soil, after taking a toll with their trusty, if rustic, flintlocks, rushed to the security of their drilled and regular brethren in blue, waiting in serried ranks on the Schenectady Road.


From here, gathering his charges like a trusty shepherd, brushing aside the half-hearted efforts Fraser's savage auxiliaries and scattering of light troops, Gates and his loyal regiments slipped from his assailants' fingers; leaving the exhausted Burgoyne and his lackeys, panting with impotent frustration on the hilltop."


Next Post will continue the map campaign....
 

Friday, 7 January 2022

1776 And All That (Part the Second)

The Battle Prep.:

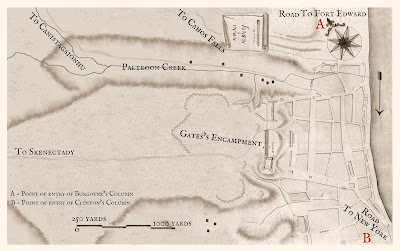
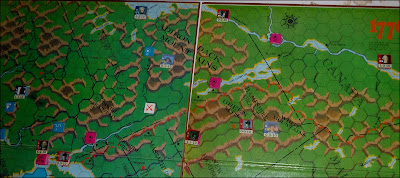
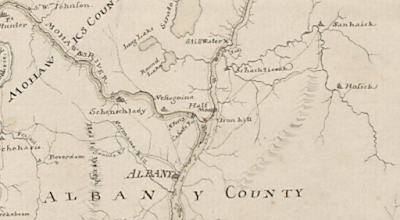
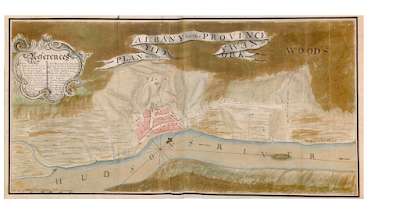
Having had a good old poke about online looking at period, near period and modern (from Victorian to modern topographical) maps I have come up with a rough sketch map of the area, with which I'm reasonably happy.

On this I have set out what I think is a reasonable position for Gates to adopt, based on the decisions made in the previous post.

Using this map (and as I am "playing" him) I have formulated Burgoyne's general plan of approach. 

Burgoyne will NOT launch a major attack via the town (street fighting is too messy.. Plus he does not want his troops and Indians running amok among the warehouses - he want the town and its supplies intact). Instead, he will move towards the town, then pull most of his force off the Albany/Ft. Edward road and up the track to Cahos Falls (and the Mohawk River  - with its portage and ferry connections). This gives him two practical lines of retreat to his bridgehead if he is repulsed. Here he will set up his main line of battle and his batteries.
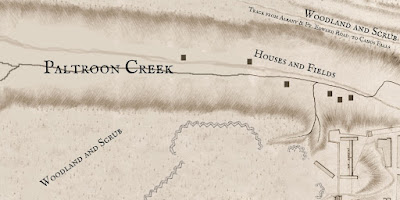
From the above map I have cut a "Table Map" (below) scaled to my Wargames Table and covering the area most likely to be affected by Burgoyne's' (my) plan; i.e. the northern flank of gates's position. This terrain will be laid out on the Wargames Table.  


I have allowed Gates to dig-in (basic entrenchments) during the time Burgoyne has been faffing about. This seems fair and in character. it will also make my job (as Burgoyne) harder.

While the rough layout of Gates's defences has been viewed from the high ground north of the Paltroon Creek valley and probed by his scouts, Burgoyne (i.e. me) does not know how exactly how Gates has deployed his actual forces.

Clinton, to the south, is still an unknown quantity. In theory he could "march to the guns" once the battle gets started in earnest. This will be an in-game decision, but would complicate matters as, assuming Gates will have set up some kind of defence to cover himself from Clinton, he would have to fight his way onto the ridge or into the town or even across Normans Creek (or even be really clever and try to outflank Gates by crossing Normans Creek further upstream). To be fair this ought to be fought as a separate action.

The British Battle Plan 

This is a real Gambler's Throw...

The British Plan is to set up their heavy artillery on the northern ridge (using the track to the Ft. Edward road for access) to play on the enemy, while a reconnaissance in force (Light Companies, Jaegers and Indians under Fraser) moves through the woodlands to the west-cum-north-west to feel out Gates's western flank and attract his attention to that point of the field.


When the time is ripe, and gates engaged on his flank, the main force will then make as if to push from the northern ridge, across the relatively open area of mainly farmland in the Patroon creek valley, to demonstrate, and if opportunity allows, attack Gates's north facing entrenchments.

At the same time, with Gates now distracted, two picked regiments will swiftly enter the town and secure the warehouse district (off table). Once the docks and warehouses are secured one regiment may be used to push up to the dilapidated fort and secure that and the defences facing Gates's position. However, that would be a bonus and at the discretion of the officer in command.

We may find the Gates has placed forces in the town. If these are in any strength the attempt to take the warehouses will be aborted. 


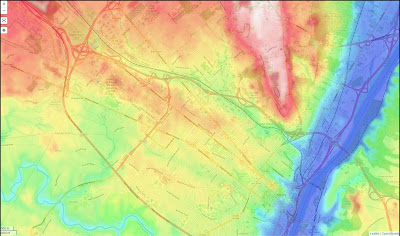
Meanwhile a force made up of Hessian and British Grenadiers, under Von Riedesel, supported by a sudden and concentrated artillery barrage, will thrust up the bostals where the two small tributaries of the Platroon cut into the slopes of Gates's ridge, near the north end of the town entrenchment, to take the small redoubt there. 


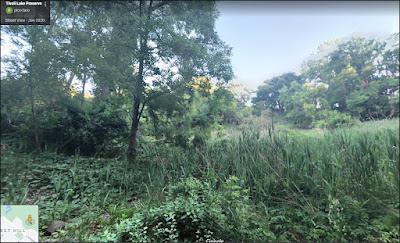
[There are no tracks actually marked on the period maps, but it seems reasonable to assume that these little valleys would be regularly used to access the top of the ridge from the valley/farmland - see pic from Mr. Google above, looking up towards the ridge - and thus, at the very least, have paths up them.] 

With both his flanks threatened it is thought Gates will likely pull back from his defences facing the Paltroon Valley, possibly allowing these to be overrun by the British by the main force with light losses.

He may withdraw into the town of course, or pull back to his southern (south-facing) defences, and hunker down there.

However, with luck - and bearing in mind Clinton breathing down his neck in the south - forcing him to fall back MAY end with him attempting to withdraw along to the track to Schenectady (and Lafayette) rather than heading into Albany to make a fight of it there. However, this will rely on him not feeling too pressed by the Lights and Indians.

If he takes the Schenectady route he can then be 
harassed by the lights and Indians to see him on his way.

If he simply concentrates in the south then a combined attack by both Burgoyne and Clinton should end him tomorrow. 

If he pulls into Albany this will be a bit of a pain (and a risk to the warehouses?), but the combined heavy artillery of Burgoyne and Clinton on the heights should make him see sense in a day or two.


Gates's Plan:

Not known to me... We can guess at:

First: To preserve his army as a fighting force.
Second: To see off the British.
Third: To hold Albany and prevent the warehouses etc. falling into British hands.

If he succeeds achieving a stalemate there is a light chance that the British may falter, giving Lafayette the chance to come to Gate's assistance in the coming weeks.

Of course, with gung-ho commanders like Arnold in his army he may have difficulties here and there.

Victory Conditions:

I'm a great believer in Victory Conditions suiting the contemporary narrative, not being "points" based, based on the military ideal or some retrospective concept of "aims" as imposed by historians.

With Gates his (unknown to me and to be decided post battle) Victory Conditions will match with the above plan. With Burgoyne self-interest will have an influence on the British Victory conditions...


OK, if Gates pulls out towards Lafayette this will not achieve a decisive victory for the British since Gates's army will likely have suffered few serous losses. However, from Burgoyne's personal point of view this is possibly the best result since it will mean:


1) Burgoyne 
(and not Clinton) will have been seen to have defeated the enemy - and alone, with no help from "sluggard" Clinton.

2) 
Burgoyne (and not Clinton) will have captured Albany intact (Yay Burgoyne!).

3) As a result it will be Burgoyne 
(and not Clinton) who will be seen to have given the Rebels a bloody nose, and hence it will be Burgoyne who will be lionised in the newsheets, given a vote of thanks in Parliament, congratulated by the king etc. etc. etc.  Who knows, there may even be a complimentary cartoon to prop up on the mantelpiece... ? Or maybe there's even a play in it..? Here's dreaming....


So let's say British Conditions are:

First: Push Gates from his northern defences and secure the warehouses in Albany, with minimal losses.

Second: 
Take Albany, pushing Gates aside, and effecting a junction with Clinton.

Third: Drive Gates reeling towards Schenectady and take Albany.

Pre-Battle Thoughts:

This has the makings of an interesting fight. The British plan is perhaps over complex - a real Gambler's Plan - which could go VERY astray. Gates (or at least his sub-commanders) is a bit of an unknown quantity. He may be sensibly cautious. He may be prompted by others to be more aggressive. 


Apropos Burgoyne himself; I first became aware of the fascinating "Gentleman Johnny" at school via a play reading of Shaw's "The Devil's Disciple" (I read "The Sergeant") and, about the same time, an account of Saratoga in my childhood book club copy of "Great Military Battles" by Cyril Bentham Falls. I have yet to read any of Burgoyne's plays, but have seen some of his verse. An interesting guy...

In passing, I stumbled across this somewhat idiosyncratic biography of Burgoyne online the other day.. A little odd, and somewhat dated perhaps, but I found it amusing - plus providing some interesting scenarios in his earlier adventures...

http://joan.delahyde.com/johnny/Gentleman_Johnny_Burgoyne_Complete.pdf 

So.. All I have to do now is finish some scratch-built field defences and set up the table, and we're away.... I will try to make sure the post battle report contains details of the "Decision Process" and C&C Difficulty issues.  Watch, as they say, this space....

Sunday, 2 January 2022

1776 And All That....

 A "Cheat" Campaign.

One of the easier methods of playing a campaign I've adopted over the years is to use an "oven ready" board game to generate the battles.

This means less work to set up the campaign parameters and systems for supply/politics etc. (assuming I know the game rules), no map work, scaling or other niggles. One just sets out the game and away we go; basically scenario generation the easy way.

Avalon hill's "1776" is one of my fave board games, is reasonably easily adapted for Solo and provides a lot of fun as a board game. As a "scenario generator" for the table it is one of the best, I reckon and has a place in my heart as being one of my earliest board game purchases.

It also has the advantage of having a number of ready-made small, short game scenarios which allows you to play without embarking on a marathon "whole war" exercise. Hence.....


The Saratoga Campaign:   

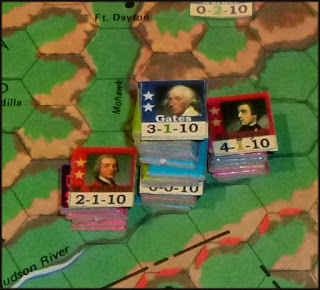
Using 3rd edition rules (cadged from the Web - since getting a copy THIS side of the water would break the bank) and home-printed Leader counters I set up as the Scenario Instructions. 

I will play the Colonials on the map (as Geo. Washington). I write initial orders each move for the various commanders of the independent commands scattered across the map. HOWEVER, people being people, there is always a change these officers will not obey my orders promptly or may even go off piste. The chances for this will be based on ad hoc Decision Tests, dependant upon their personalities and, where appropriate, affected by enemy action. 

The British will have an over all strategy based on their Victory conditions, but the actions of their individual commands will, like mine, be based on personality-tweaked Decision Tables. British forces above a certain size and a certain distance from my forces may also generate "Decoy Tokens". These will also act on ad hoc Decision Tables.

Also, I will abandon the IgoUgo system and activate all independent commands (inc. Washington and Decoys) by Token Draw.

Table battles will generate themselves, however I do not intend to fight sieges/assaults on forts on the table as 1) I want this to be a quick "experiment" and 2) thanks to the amazing Mr. Google one has no real excuse (beyond laziness or time or cost) not to model the actual forts reasonably accurately (once one could have blamed use of a "generic fort" on "the library never had a book showing it". The incredible resource that is the Interweb shoots THAT get-out down in flames).  

OK, so off we go.

First Move: 

Washington is activated (Yay!) and scuttles back into Pennsyvania to avoid any sudden moves by the large British force at New York. He dispatches Lafayette to gather heavy artillery from West Point before the British seize it.

British General Howe, at New York, decides to send three Decoys out, one by sea along the coast towards Princeton, one towards New Haven and one up the Hudson towards West Point (aka Fort Clinton).

Meanwhile Wayne shifts up the Delaware Valley to try to put the Catskills between him and the British and threaten the British garrison at Ft. Oswego.

General Burgoyne moves down from Canada towards Fort Ticonderoga. 

There is no action. 

Move Two:

Reinforcements are placed as the scenario rules.

Faced by Burgoyne's superior force Shuyler, at Ticonderoga, panics, abandons the fort and pulls out his troops and guns: moving towards Fort Stanwix. Warner, across the lake at at Mt. Independence likewise abandons his post and pulls back into the Green Mountains.

Burgoyne occupies Ticonderoga.

Wayne continues towards Fort Oswego. 

Howe advances into Connecticut to secure British supply lines.

Henry Clinton disembarks at West Point/Ft. Clinton.

Move Three:

Howe pushes into Massachusetts.

Burgoyne moves towards Albany, leaving a garrison at Ticonderoga.

While Wayne and Lafayette continue the advance on Oswego.

Warner moves behind Burgoyne and up towards Fort Stanwix.

Henry Clinton attacks and takes West Point/Fort Clinton. 

Move Four:


Howe pushes into New Hampshire to secure British supply lines, now threatened by the appearance of Stark.

Lafayette's force approaches Fort Oswego.  At Oswego Brandt wants to ambush the Colonials as they approach. The fort commander is against this and refuses to allow his garrison to take part in the adventure. Brandt and his force leave the fort by bateau and canoe. Lafayette attacks the fort and takes it, but suffers losses.

British troops under Grey land on the New Jersey coast to threaten Princeton. 

Gates, at Albany is reinforced. He now has a force here of approx. 6,000 men and sufficient supplies to put up a good fight. He decided to stay put in the vicinity of Albany. However, he has neglected to entrench.

Meanwhile both Burgoyne (12 regiments plus Indians and a battery of heavy guns) and Clinton (15 regiments and a battery of heavy guns) move towards Albany with the intention to attack Gates. Both forces enter the Albany hex.


"Fight On The table" Table Decision Time:

1) Gates's Decision:

With Gates at Albany, and the two British armies under Clinton and Burgoyne headed to the town, we now have a possible Field Battle looming.

Now, the 1776 Game Moves are "a month" long. This would seem to be plenty of time for Gates to decide on what he wants to do before the arrival of the British. Would he elect to stay put, or push off to avoid what could turn out to be a pincer movement, or what? We will allow Gates to decide.

However, although the map moves are a month long the hexes on the map only represent about 18.5 miles across. As mentioned above; Gates had, in theory, good time to decide what to do IF approached by the British forces. BUT both British forces arrived in the Albany hex after the halfway stage of their moves and after using different amounts of that move; Burgoyne after three fifths of his move and Clinton five fifths.

This allows Gates time to attack Burgoyne BEFORE Clinton even reaches the hex, but would he..?

Working on the (Traditional? Unfair?) reading of Gate's character I'm going for a 3x6D test: 

3: Leaving a small force to hold Albany, Gates steals away with the remainder of his army northwards towards Ft. Stanwix (and Lafayette's force) to avoid "the trap". 

4-6: Gates calls a Council of War* and abides by their decision (Arnold and Morgan will press for an attack on Burgoyne).

7-8: Leaving a holding force in Albany town to distract Clinton, Gates moves to the north of Albany and approaches Burgoyne. Whether he attacks or holds to simply block will be decided once he is close to the enemy (fought as an "Encounter" battle). 

9-11: Gates digs-in in the vicinity of Albany to provide a defence against attack from both directions

12-13: Leaving a holding force in Albany town to distract Burgoyne, Gates moves south to Normans Creek hold there to await Clinton's attack or to attack Clinton (to be decided once he is close to the enemy. Fight as a Face to Face battle). This, however, may leave time for Burgoyne to attack him from behind. 

14-15: Gates calls a Council of War and ignores their decision*; remaining in situ at Albany without digging-in. He will await attack.

16-17: Leaving a small force to hold Albany, Gates moves his whole force to attack one of the British armies (dice for which, fight as an "Encounter" battle).

18: Gates despatches Arnold with a small force to swing past Burgoyne and move to retake Ticonderoga while taking his main force across the Hudson and towards New York. 


(*Councils of War: I would use the method described on my Post "Technical Interlude: Council... What Council....?" but with the various Leaders with Gates acting as "Councillors" with starting cards based on their known characters.

IF Gates chooses to ignore the Council decision then Leaders who have voted strongly against him may very well decide to engage in independent action - i.e. disobey orders on a dice test. If Gates goes along with the Council decision, but certain Leaders who had proved very much against the consensus remain "unconvinced" they MAY consider disobeying orders on a dice test.)

I make the dice check: an Eleven. Gates will garrison Albany and attempt to dig-in nearby to withstand an attack from any quarter before any British forces press home. If the British are prompt he will only have time to put together scratch defences (Arnold goes SPARE !!).


2) British Decisions:

A very basic dice test (not to mention their orders) has already decided that both British forces will press on to Albany. However, whether either force will press home an attack on Gates's force (if it is still in situ) is unknown; as is how prompt they will be and whether they can/will coordinate with each other in any way.

Burgoyne has advanced via Forts Miller and Hardy (not on the 1776 game map) on the west side of the Hudson. He has already stolen a march on Gates, and crossed the Mohawk River (??? Commandeering the ferries and local canoes? Portaging his bridge of boats ALL the way from the Hudson up the Mohawk to pass the falls? Sky-hooks? Goodness knows.. Looks ruddy difficult to me - but that's one of the anomalies of board game movement. Mind you, I have no idea how Gates's/Schuyler's army crossed it either in real life, so there we go... Let's say Burgoyne got his bridge of boats to come down the Hudson and crossed the Mohawk at the confluence with the Hudson while Gates was asleep....).


He still has time to attack Gates (12 days) before Clinton. However, discretion (dice test) overcoming his gambler's instincts he elects to spend 6 days digging-in, so that he has a bolt-hole if repulsed by Gates/thrown back after an unsuccessful attack on on Albany, resting his army, seeking supplies locally and trying to make contact with Clinton (simple dice test per day for this; fail on each occasion).

After this six days are up Burgoyne hesitates (has he lost his nerve?) and spends two more days trying ascertain Clinton's whereabouts and intentions. On the third day (28th) he moves to engage Gates, whatever the risk.

Clinton is likewise on the west side of the Hudson. When within 18 miles of Albany he halts, resting his men and seeking news of Burgoyne for two days.

While Burgoyne is moving towards Gates' army Clinton's scouts make contact with him. Clinton wishes to further rest his men and secure supplies, as well as reconnoitring the ground beyond Norman's Kill/Gates's position. He will not attack until the 29th.

On hearing this Burgoyne halts, his men camping rough while his indians and scouts reconnoitre Gate's position. He WILL attack on the 29th, whether Clinton supports or not.

[Note: All of the above "decisions"  were simple dice tests with modifiers based on Personality and circumstances.]

We have a battle.....  All we need to know is what the field will be like....

4) My Decision - How To Set Out The Table: 

OK.. Gates has decided to stay put somewhere in the hex. Burgoyne has elected to attack him, wherever he is.

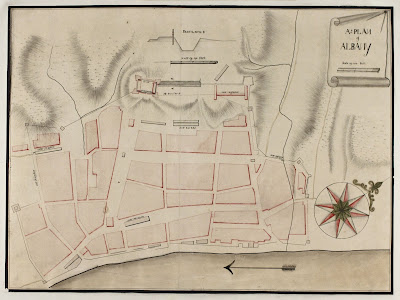
Looking at old maps (I LOVE the Interweb) Albany itself has a fort (described by contemporaries as dilapidated and apparently mainly used as a prison) and stockade but appears to be dominated by patches of higher ground outside the enceinte.


Basically it looks like the adage "If you want to defend this place I wouldn't do it from here" seems VERY apt.

Digging-in at the town itself seems a daft thing to do - especially as both British forces are accompanied by heavy artillery. However, entrenching on the heights above the town might be considered - denying the town to the enemy and keeping supply lines open up the Hudson (in theory...) if the British lay siege. This seems an option.

The Mohawk River has already been crossed by Burgoyne (to enter the hex - goodness knows how; see above).

However, in reality this river is a serious obstacle and Gates might consider moving towards the Mohawk and using that to protect his flank/rear before settling into a defensive posture. The angle between the Mohawk and the Hudson, by the Falls, looks secure - but I'm going to assume that that is Burgoyne's bridgehead (aka deathtrap?). Of course Gates could rest a flank on the Hudson between Burgoyne and Albany. 


Between Clinton and Albany is the river Normans Creek (aka Normans Kill - not on the game map and close enough to Albany got Clinton not to have reached it yet). From StreetView and Google maps is not a creek you want to have to fight across. Gates might very well consider using this obstacle.

On the other hand, the terrain around Albany seems wooded with a number of slopes, hills and other places suitable for defence.

Hmmm...... Do I decide for Gates, or make another test? I guess that depends on whether I am going to "Fight the Battle" as one of the British forces or as Gates (basically I'd chose the one with the hardest job, just to make life interesting).

I COULD have gone to an annotated map and worked the moves day-by day, but we already know what the British are going to get up to....

So..... I toss a dice for Gates.

1-2) He will dig-in on the gentle ridge that seems to run from Albany town eastwards, resting a flank on the town's fort.

3) He will dig-in on the banks of Normans Creek, commanding the main crossing.

4-5) He will dig-in on the larger north-south ridge between Burgoyne (at the Mohawk/Hudson confluence) and Albany.

6) He will march to the Mohawk in the vicinity of the ferries at Schenectady and dig-in, using the river to guard his flank and giving him the option of pulling back upriver towards Ft. Stanwix and Lafayette if defeated.


I dice. He opts for No. 1.

I will set up a table with a wooded ridge with the fort/Albany at one end. Gates will be somewhere on it. I will play Burgoyne. He has fewer troops. He will have no idea of Gates's exact dispositions. There is no guarantee Clinton will help, even on the second day....

Watch this space for the fight....


A Little Action..

But not a lot... With the reenactment season in full swing, D&D commitments, bedding in the new cat and having to pen (and play in) a fa...