Friday 24 May 2019

To Galilee...

"This Aint The judean Revolt" - The First week:

The first week or so in the "This Ain't The Judean revolt" project has got underway...

Task Force "Titus" (The Fifteenth Legion, 3 cohorts, 4 mixed cohorts, 2 Alae of Auxilia cavalry), coming up from Egypt, pressed northbound along the Via Maris in easy stages, resting overnight in each town.

As expected the advance was unopposed; with Gaza welcoming the force - though Askelon and Azotus proved less friendly, but passive (neutral). Both settlements were left with garrisons of one Aux. Mixed Cohort each, to ensure a clear line of supply. On the 4th day Jamnia opened it gates and feted the troops - another friendly town.

On the 5th Titus left the Via Maris and moved his force inland to the vital road junction at Lydda. This settlement again proved to be hedging its bets (neutral) so a garrison of one Legionary Cohort and a Mixed Cohort were left here before Titus moved on to the (neutral) city of Joppa. Here the army rested for a day.


Meanwhile, in the north, Vespasian and the main force arrived at Ptolemais, before pushing into the Jezreel Valley. At Capharecco the town was found to be divided within itself, with factions fighting (Civil Strife). The weight of two full legions, plus auxilia, crushed any dissenters with ease - and the victorious Graeco-Syrian population proved most friendly to the Roman forces.

Moving up the valley it proved necessary to garrison (neutral) Geba (1 Mixed Coh.) before Vespasian moved on towards Scythopolis. This town was lukewarm in its welcome to the Romans, so a garrison of 1 Legion Cohort and a Mixed Cohort was established here.


The army rested one night without incident - but then Vespasian (me - I forgot my own rules!!!!!) decided to rest here a second night - sparking hostility in the town. With only 500 insurgents the rising was put down easily, but in turning this neutral town to a hostile one I have not helped my cause - not least by affecting my Supply options. I double the garrison, just to be safe, then, on Day 8, move north into Galilee towards Japha...

Battle of the Nazareth Road:

On the long haul up from the Jezreel Valley, halfway to Japha the Roman rearguard suddenly comes under attack by forces from (as it turns out, hostile) Japha itself, reinforced by rebels from Mount Tabor. Only about 1,400, and mainly light troops, but way to go to secure the flanks... DOH!!!

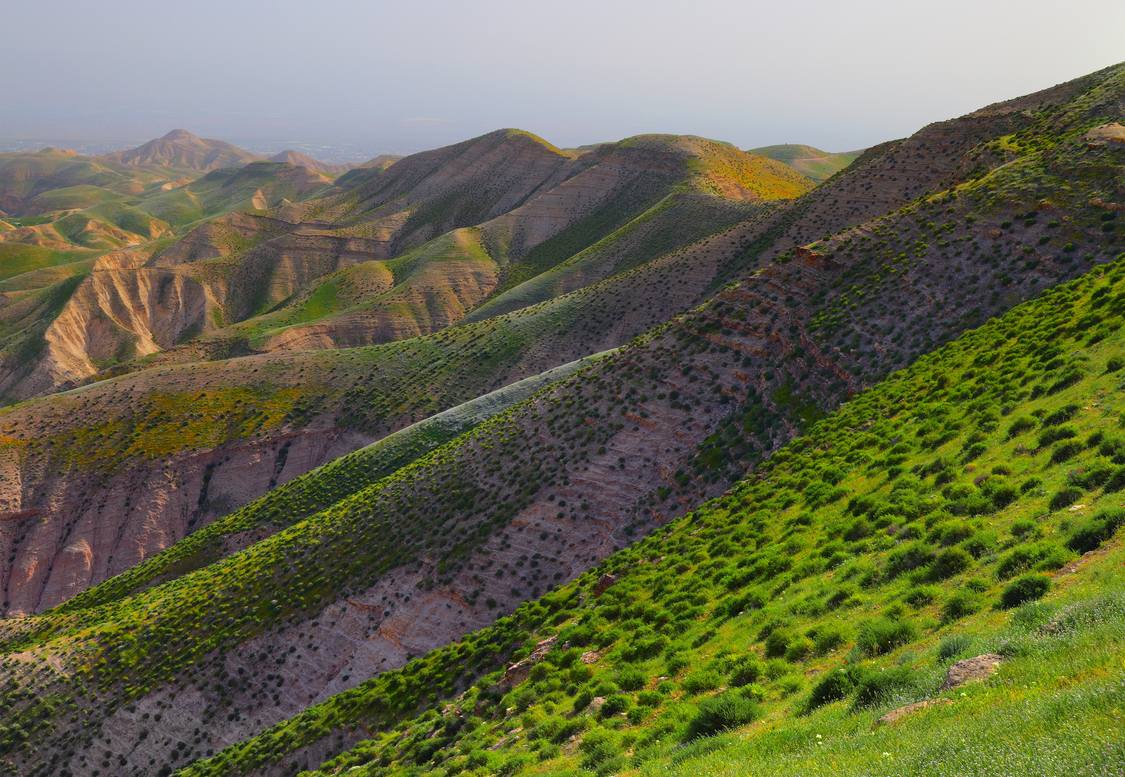
The attack occurs on the winding road through the hills. The road comes from the south (top of the table in pic below) along the east ridge, skirting a deep,steep valley filled with palm trees, before descending to the valley and then climbing up again northbound along the lower part of the eat ridge.

Romans are moving south to north. The rebels have decided (dice decision) to attack the rearguard as it makes its way northwards.


The Roman rearguard consists of:

I coh. Aux. Inf (mixed close order foot and archers; 680 effectives)
1 coh. Archers (320 effectives)
1 coh. Balearic slingers (280 effectives)
1 coh. Hispanic slingers(200 effectives)
1 Ala African Light Horse (280 effectives)

However; at the commencement of action three Legion cohorts (the "back markers" of the main column) plus a "straggler collection" detail, are still on the table. These may get involved if the Gods (God?) decide this is apt.

There is also the possibility that Roman Flank Guards could turn up.

I decide to "play" the rebels in this "on The Table" game..

The Roman job - in theory - is just to leave the table with minimum casualties.
My job - to disrupt this, causing maximum casualties. If I kill more than I lose this will be a victory for the rebels.


Rules are my standard House Rules: Officer Activation by token - plus Command Chits (as per SP2) , very basic move & fire mechanics, Shock etc. (all as Sharp Practice/Dux Brit.) plus use of a Moral Chart in "sticky situations".

I have thrown in a "Column" token into the mix to allow for the possibility of "Column Back Marker" activation and a "Card Token" to dictate the Roman Rearguard Commander's decision-making process and allow for "imponderables" (see chart; this uses a normal pack of playing cards. A card is drawn each time the Card Token is pulled).

It is assumed all of my units are concealed until I move them. Romans are placed on the table. Then my forces.


I deploy some 400 men (archers and slingers) hidden among the palms in the steep valley in the south/central part of the table. These are light troops; able to swarm up the valley sides or along the valley, depending on my signals.

Four hundred more slingers (hand & staff) are lying down in the scrub on the west ridge. They are to make themselves known as soon as the enemy rearguard reaches the valley floor.

Four hundred javelin men are lying down on the top of the east ridge (south end) and my command unit, with 200 medium close combat troops are hidden in the wood halfway along the east ridge.


First move goes to me with a Dice activation, each unit activated on a throw of 3-6 (thereafter normal activation rules apply).

A turn of a card and use of the Chart will dictate Roman "policy" first move. Thereafter a card is only turned if the "Card Token" is pulled.


The Battle itself:

On the western ridge my group of slingers appeared and opened fire on the column. The Roman infantry moved into the valley and formed up to meet this threat and their own slingers replied.

Their cavalry received orders to clear my slingers from the field (a Card on the Card Event Table) and they pushed across the line of march to do so.


Struggling up the slopes of the west ridge they came under heavy slingshot, and their commander and several riders went down. My slingers scampered out of the way, then a lucky activation allowed them to get a volley in as the cavalry moved onto the ridgetop. Without their commander, and taking casualties, the cavalry were forced to take a morale check - and broke!! However, in the brief exchange of missiles before he cavalry broke, the slinger commander also went down - effectively ending the sling unit's participation in the fight.


Meanwhile my javelin unit on the east ridge emerged, engaging the enemy's Balearic slings, and my mixed missile unit ran up from the palm grove to engage the enemy archers - now their rearmost unit.

For several moves these missile units peppered each other, though only the Roman archers took casualties in any number.

While all this was going on the Main Column moved off the board en route to Japha.


Suddenly (a Card turn) the enemy commander threw his largest Auxiliary cohort up the slope of the east ridge, where a ravine-like feature would bring them up to support the Balearic slingers.

With a lucky activation I got the chance to throw my (small, previously concealed) close-combat infantry at the Balearic slingers. Unable to evade they were caught - and broken.

The Auxiliary foot moved up the ravine feature, but stalled failing to get to the top. However, its archer contingent advanced far enough to add their fire to the exchange with my missile troops.

There were a couple of moves where only shooting occurred, then the enemy infantry forced their way further up the ravine, threatening my javelin men.

Again, luck was with me - and I was able to throw my close combat troops - and my javelin infantry - against the head and flanks of the Auxiliaries while they were still confined by the ravine. 


Their Commander and standard went down and, caught in a trap with attacks on both sides, they broke; their archer contingent withdrawing to protect their backs....


This looked like as good a time as any to withdraw to missile range, which we did. Game over, and the enemy moved off the board unhindered....

The enemy rearguard had protected the main column - but at a cost in men and prestige.......


The Butchers Bill was:

Roman Aux inf. killed (we took no prisoners): 180 inc. a Prefect and standard.

Enemy archers; 100.

Balearic slings: 120 inc. a Prefect.

Cavalry: 40 inc. a Prefect.

Total: 440 dead, inc. three senior officers and a standard captured. There were about 10% of the above got away as "walking wounded"

Own casualties:

Close combat troops; 40 dead, 20 lightly wounded.

Slingers: 20 seriously wounded, 20 lightly wounded, including the commander.

Archers: 40 dead, 60 seriously wounded,
20 lightly wounded.

Javelins: 60 dead, 60 lightly wounded.

Total: 140 dead, with 80 serious, but treatable, wounds.


Not as successful as one would have hoped. The enemy bowmen - all of whom were mailled & helmeted - caused most damage, accounting for some 180 of our casualties. I will need to remember that for future reference.

An interesting little skirmish.  But certainly not enough to to stop the Romans in their tracks.... 


Meanwhile, back on the map:

Leaving a garrison of 1 Aux. Coh.at Joppa, Titus advanced to the friendly town of Appollonia - only to remember, on arrival on the 8th, that in his race to rendezvous with his father he had forgotten to secure Supply Trains from the towns passed through... Choice: despatch a Tribune to visit and organise Supply Trains (with the risk of that Tribune provoking by levying too enthusiastically or getting caught by an Event Card) or retrace his steps with the whole force..

Decisions, decisions...

Friday 17 May 2019

Wrong Kind of Battle....


Interim Post..

A busy few days of kit preparing, group organising, marching and fighting for The Battle of Lewes Commemoration - and recovery from same (I am NOT getting any younger - and being selected to do single combat with King Henry was NOT in the original script...  Fun though - even if it did mean more bruises..).


This has meant little progress on the "This Ain't The Judean Revolt" project apart from doing the (simple) cards and Region card holders....


VERY simple graphics on the Location/Settlement Cards (hence can be used for other projects).

"Town Profile" with red shadows = Hostile.

"Town Profile" with red shadows and "crenelations" = Fortified Hostile.

"Town Profile" with green shadows = Friendly.

"Town Profile" with brown shadows = Neutral.

"Town Profile" with brown shadows and "smoke= Neutral in Civil Strife.

Simple...


Actual fighting should start taking place shortly...

Monday 6 May 2019

Into The Hills......

"This Ain't The Jewish Revolt": Second "Scenario Generator".. 

Based on the William J. Philpott article "The Peasants Are revolting" (Miniature Wargames Dec. 1987) mentioned in a previous post this is the second attempt to put together a Solo Campaign for this war.

I have set out below the "rules" for this experiment; this time based on the Roman campaign to "restore order".

The assumption is that, much like the historical account, the campaign will  consist not of the Romans moving (chasing?) a Judean Field Army about (to hopefully draw them into the wrong kind of fight) but will be based on The Resistance carrying out ambushes of columns, raids, supporting Jewish communities under threat and resisting the Romans from behind defences. Meanwhile, the Romans will attempt to retake all rebellious locations and minimise Friendly/Neutral alienation or damage. I will "play" the (more active, and therefore more playable) Romans.


The Map/General Principles:

Rather than being a complete representation of Roman Palestine the map is schematic and only shows a selection of settlements/locations (primarily those of significance mentioned in Josephus's account of the Roman campaigns).

There are some obvious omissions (some significant locations that do not appear in his narrative, so presumably either did not get dragged into the fighting or did not put up significant resistance) and some "interesting" or "curious" inclusions (in that nobody seems sure where they were, why they were important - or even what they are; some of the places I have lumped in as "settlements" actually sound more like clusters of villages, or cave systems, or a combination of the two....).


Like the map, campaign movement is stylised, in that all movement will be restricted to the roads/tracks. Where possible/traceable I have used the actual known routes/roads/links between the settlement locations, but there has been some tweaking (and some deliberate "redacting") here and there, to make a game akin to the article that inspired this attempt and to "guide" (aka restrict) the choices of route open to the Roman Player.

The roads and tracks will sometimes pass though terrain which can cause problems for the Roman forces if they are approaching a Hostile Location, but otherwise terrain has no effect on the campaign.

The Locations/Settlements on the map are deemed either Friendly, Neutral, Hostile or In Civil Strife - the Roman objective being subdue all hostile locations on the map as soon as possible.

However, initially the attitudes of most the various settlements/locations are hidden, in that only Jerusalem and the two Mountain Bases are known to be Hostile and only the Roman Bases at Caesarea and Ptolemais known to be actively "Friendly".


Section1: Activities.

A) Campaign Movement:
Each Campaign Move (excluding Sieges - see below) is a day, with each day being divided into five periods.

Three periods are deemed "daytime" Periods. Two periods are "night-time" periods. Troops must spend a minimum of two out of every five such periods resting in a "Safe Place" - i.e. Friendly Settlement/Base, Captured Fortress or Marching Camp - or suffer penalties.

The roads (red) and tracks (brown) link the Locations. Units can march (roughly) up to 4cms on the roads/tracks or fight a battle lasting 4 hours per Daytime Period. Where there are no settlements within a day's march  "milestones" act as waypoints to mark a day's maximum march. If a Roman Force discovers cannot reach a safe destination before move end it must either retrace it's route to a Friendly Place or camp in the countryside (see below).

Nights: Units can march up to 3cm or fight a battle lasting 3 hours per Night-time Period. However; night marches are hazardous. For each period of night march throw a 6D. On a normal road a result of 1-2 means that the unit gets delayed/disorganised/lost in the darkness and the march is aborted (in effect it does not move from its staring point, but "loses" the two Night-time Periods"). On a track take 2 from this dice throw. If the force is leaving a Friendly Settlement to embark on its night march add 1 to the dice throw (it is assumed friendly guides have been engaged).
If the force is leaving a captured/destroyed Hostile location to embark on its night march take 1 from the dice throw (it is assumed potentially unfriendly guides have been engaged). 


B)
Rest Periods, Force Marches, Attrition: Any formation which does not rest in a Safe Place two out of every five Day/Night Periods tests for losses to fatigue/disillusion. Each unit in the formation risks suffering attrition for each such Day on which this occurs.

Each legion unit loses 1% on a 6D throw of 1 for each occasion.

Each Auxiliary foot unit loses 2% on a 6D throw of 1 and each Auxiliary Horse unit 3% on a 6D throw of 1 or 2.

Foederati troops automatically lose 5%.


Forced Marches of up to five periods (i.e. into the Night Period/s) may be attempted, but this will result in a 5% loss of the total force (representing injured or footsore troops, deserters, or straggling personnel lost to hostile locals) in addition to the above losses.

Five continuous periods of rest in a Safe Place will be required after any forced march before any further action may be taken.

All troop formations where more than 50% of the force are non-Legion units MUST attempt to move to the nearest Safe Place - even if this means risking a night march or Force March - if there is one within march-reach that Move.

If forced to rough-camp in the open countryside, due to lack of such a safe base within range, getting lost or any other reason, then such a force will automatically lose 5% Auxilia and 10% Foederati to desertion/attrition for each such move.


C) Marching Camps; A Roman Legionary unit, or vexillation made up of at least 50% of such units, can make a temporary Marching Camp as a Safe Place and rest between settlements/locations; but at a cost of one Supply Train and one additional Period (set-up time, camping etc.).

If
Foederati troops are present test with a 6D. On a thrown of 1 or 2 a 5% loss of any accompanying Foederati troops (desertion) is incurred.

Once established, a Marching Camp can act as a Safe Place, but must be garrisoned by at least a cohort (Legion or Auxilia) at all times. An abandoned Marching Camp is deemed destroyed as soon as the last troops march out.

A Marching Camp may be raided by a sally party from a suitably situated Hostile Location as if it were a Settlement, but only if the sally party exceeds the garrison by 300%. A successfully raided Marching Camp (and its garrison) is deemed destroyed.


D) Battles:If a planned battle is fought, day or night, the Friendly Force must allocate a minimum of two Periods for this battle; one period for the fight (more if the fight goes into more than four hours) plus one other Period (day or night, but in every case the period AFTER the battle is declared) as Rest, to allow for Preparation and Aftermath (i.e. our lads don't just rush straight into a fight, bash the enemy, then rush off straight after).

In the case of a Roman Force being ambushed, UNLESS the ambushing force is completely destroyed/broken, this "extra period" is necessary to get the lads back into some kind of order after their shock. If the fight against the ambushers is unsuccessful then this extra period includes for reorganising, post Roman Retreat.
This extra period does NOT count as Rest.

IF the battle/ambush results in a complete Roman rout - i.e. 80% plus of Friendly Units are broken - then an additional "Organising and Inspiring" period must be expended on arrival at a Safe Place. This extra time does NOT count as Rest.


E) Supply: Roman Forces must be fed and watered. If there is a direct, uninterrupted connection via Friendly or garrisoned Locations (no matter how long) to a Friendly Base then that Force is deemed to have a Line of Supply (LoS), so needs no further logistical support.

However if no such LoS can be traced (due to Hostile or garrisoned Neutral locations, Settlements In Civil Strife or raided Settlements) then each Force must be supplied by drawing supplies from Settlements (Friendly or garrisoned Locations) or by consuming Supply Trains.

Note that the Main Roads to Egypt and Syria (annotated and marked with arrows) and the maritime ports are considered Lines of Supply, in that they lead to off-map Friendly bases.

When resting in a friendly Location such supplies are deemed to be available automatically. When camping overnight a Force will consume one Supply Train per 5,000 men per day.


Section 2:
Locations and Regions.
The attitude of most settlements/locations will only be discovered when a Roman force moves along an uninterrupted road/track directly leading to them (i.e. effectively arriving at the location/settlement or, in some circumstances, meeting a sallying, hostile garrison while en-route).

Once the nature of the location has been discovered the Romans then have a choice of entering a newly identified Friendly or Neutral location, pulling back (at cost), interfering in a settlement in Civil Strife or attacking a Hostile location
(after any attacks on the force prompted by the terrain - see below - have been beaten off).

The map is divided into regions, with a small card deck for each region based on the town attitude mix (see "Region Card Decks" below). Cards are drawn, at random, on the first approach of a Roman force, to indicate/discover the Attitude (loyalty or otherwise) of the Location.


The Card decks for the various regions are as follows:

Region Card Decks:
Galilee: 16 towns/settlements, one Hostile Feature. (
One Hostile Feature - Mt. Nebo. 16 Cards: 9 Fortified Hostile, 2 hostile, 3 neutral, 2 friendly).

Gaulantis:
4 towns/settlements (4 Cards: 3 Fortified Hostile, 1 neutral in Civil Strife).

The Decapolis:
11 towns/settlements (11 Cards: 4 friendly, 1 neutral in Civil Strife, 6 neutral). 


Syria (Phoenicia and Philistinian Syria): 7 towns/settlements (1 known, friendly HQ/Base - Ptolemeis. 6 Cards: 3 friendly, 2 neutral, 1 neutral in civil strife).

Samaria:
(Samaria proper, the coastal plain and Jezreel Valley) 8 towns/settlements, one Hostile Feature (1 known friendly HQ/Base - Caesarea. One Hostile Feature - Mt. Gerizim. 7 Cards: 2 friendly, 3 neutral, 2 hostile).

Judea:
13 towns/settlements, 3 fortified bases (1 known hostile HQ/Base - Jerusalem. 15 Cards: 2 friendly, 6 neutral, 7 hostile).

Trans-Jordan/Perea: 6 towns/settlements, 2 fortified bases (8 Cards; 3 neutral, 1 neutral in Civil Strife, 4 hostile).


Idumea: 5 towns/settlements, 1 fortified base (1 friendly, 3 neutral, 2 hostile).


A) Location Cards, Location Types and Qualities: There are five card types, one for each of the five different Location types:

Type 1) Friendly: This Location is friendly to the Romans. There are no risks involved in approaching it. It may be used as a secure, overnight resting place. However, if a Force is in a Freindly Settlement (i.e. not a Fort or a Base) then attempts to Billet troops for more than two nights in succession will result in the settlement turning Hostile.

In addition to Billeting, supplies may be drawn from Settlements equivalent to one "Supply Train" twice in the Game without penalty. A third Supply Train may be taken from a Friendly Settlement, but this will result in it turning Neutral.
Friendly settlements may be garrisoned by up to 5 cohorts without penalty. This does NOT count as Billeting but the garrison will be without an Independent Commander, so cannot move unless "picked up" by such a commander..

In addition: friendly settlements with an uninterrupted, direct line of communication with a known Fortified Hostile location (settlement/base or feature), unless garrisoned, may be subject to raiding (see below). Raided settlements cannot be used for supplies. 


Type
2)
Neutral: This settlement is neutral to the conflict. The townsfolk will cooperate with the Romans but the settlement may only be used as a secure, overnight resting place for one night before the force has to move on (forwards or back).

Supplies may be drawn (as 1 above) from settlements in Judea, Samaria, Idumea Syria (Phoenicia and Philistinian Syria) only - but only once per game without penalty. Staying overnight for two or more nights in succession or drawing supplies from a neutral settlement more than once per game can be done (once) but this will turn it hostile.

In addition: neutral settlements with an uninterrupted, direct line of communication with a known Fortified Hostile location (settlement/base or feature) may be subject to raiding (see below).

Garrisons can be left in neutral settlements in Judea, Samaria, Idumea, Syria (Phoenicia and Philistinian Syria), but must be in line of supply to a base. 

Type 3) Neutral in Civil Strife; There is a power struggle in progress between the Jewish and non-Jewish population. Friendly forces moving into the settlement will engage on the side of the non-Jewish population. If the settlement is taken then, from henceforward, the settlement is considered "Friendly". If, however, the friendly forces attempting to intervene are repulsed/forced to withdraw due to nightfall or supply issues the settlement will become Hostile thereafter.

If "raided" (see below) the raiders are deemed to have aided the Jewish side in the civil struggle and the settlement becomes Hostile. 

Type 4) Hostile; The settlement/location is in active revolt. Once approached by a Friendly Force the Hostile Garrison is calculated by throwing a 10D.

Multiply this number by 100 if a Settlement or Feature, or by 50 if the location is a Fort. This gives the total number of garrison troops.

Throw again to determine the number of experienced close combat troops in the garrison 1-4 = none. 5-8 = 400, 9-10 = 1,000.

Ten percent of the remainder are light close combat troops, the rest are skirmishers.

Hostile locations do not contribute supplies and cannot act as Safe Places for Rest.


Type
5) Hostile Fortified Settlements:
All as above, but the Resistance has taken steps to enhance the defensive capability of the location and increase the garrison.

Their garrisons are diced for as per ordinary hostile settlements, then doubled in strength. If assaulted on the Table they have proper walls.

Fortified Settlements may be besieged. They do not surrender until their garrisons fall to less than 20% of the besieging force, and only then on a dice throw of 1 or 2 on a 6D thrown for each Move the garrison numbers fall below this percentage.

Notes on Hostile Fortified settlements and Fortified Places/Bases/Features not themselves settlements:

Raids; Once identified as Hostile any location, other than a "normal" Hostile Settlement, can act as a base for raids on other Settlements linked by road/track to them and which have been/are identified as Neutral, Friendly or in the course of Civil Strife.

To do this every such known Hostile location dices 6D each move. On a throw of 6 it will attempt a raid on a Settlement adjacent and linked to it by an unbroken road/track or road and track link.

If there is more than one potential target then decide which is raided by a dice throw.

To raid a Settlement location the Hostile location throws 1 dice.  On a throw of 4-6 the raid has been successful.

Once all adjacent targets have been raided, thereafter, on a throw of 6 it may raid (via an existing hostile or previously raided settlement) a settlement one road/track link beyond those immediately adjacent to it (selecting targets as above).

Once successfully raided a Settlement is deemed "Ravaged". It can no longer be use as a source of Supply, a link in a LoS chain or a Safe Place. However, a garrisoned Marching Camp can be built on a Ravaged Settlement and act in a LoS chain and as as safe Place.


Forts and Features:
These are used in a different way from Settlements.

Forts: These are fortified arsenals. Their loyalty is discovered as per settlements.

If the fort is friendly then Roman units can rest in a fort for up to five moves and/or supplies may be drawn from them five times without penalty. After being drawn from five times they are deemed "exhausted" for the purposes of supplying mobile forces. Garrisoned Friendly/Captured Forts can still act as part of a Line of Supply even after being exhausted.

Once entered, Neutral Forts are simply taken over, and become Friendly, without the need for fighting. However, in order to remain Friendly they must be garrisoned.
If abandoned they revert to Neutral.

Each fort may be garrisoned by a unit of 500 (or less) without the need for a Line of Supply. Such small Garrisoning units do not count as "drawing supplies".

Hostile forts act as hostile settlements re. approaching but do not lose their Supply capacity on capture. They can raid if Hostile. If Hostile they do not surrender, whatever the Garrison/Besieger ratio. Once captured, if garrisoned, they remain Friendly.  If abandoned they become Neutral.

Fortified locations (mountains): These are always hostile. They have no supply capacity. They cannot be garrisoned and once taken/visited by a friendly force, are deemed "destroyed". They can raid. They do not surrender.

Jerusalem: Jerusalem acts as a Hostile Fortified Settlement throughout. Its garrisons is diced for as per ordinary hostile settlements, then doubled in strength. Should any settlements have surrendered (see above) keep a Tally (one point per surrendered settlement). Multiply the tally total by 100. This number of men are added to the garrison. Dice for type as usual. Jerusalem does not Surrender. It must be besieged in order to capture it.

C) Risks When approaching a Hostile Location, Battles and Sieges:
Approaching a Hostile settlement via certain terrain risks being engaged outside the settlement. On reaching a Hostile location there will be fighting.

Risk 1)
Approaching Hostile Location along a road in Hills (on both sides of the road): there is a risk of being intercepted or ambushed. Throw a D10.

Result of 1 to 3: the friendly force is ambushed in the hills while in marching order. Friendly forces must move in marching order across the board. Each move a dice is thrown. On the throw of a 5 or 6 the enemy attacks from a concealed location. Number of enemy units revealed/distance from the column/location etc. decided by dice.

Result of 4 to 6: the friendly force, in marching order, comes across a blocking force in a position of advantage (Throw 16D again; 1 & 2 - blocking force in a narrow valley/defile with rough field defences (stone walls), 3 - blocking force in a narrow valley/defile (no defences), 4 - blocking force at the top of a steep ascent with rough field defences (stone walls), 5 - blocking force at the top of a steep ascent (no defences), 6 - blocking force on hilltop commanding the road, with hidden ambush party concealed somewhere on the table.

Result of 7-10; The enemy do not seem to have attempted an intercept. 


Risk
2)
Approaching Hostile Location along a road in Wooded Hills (on both sides of the road): there is a risk of being intercepted or ambushed. Throw a D10.

Result of 1 to 5 the friendly force is ambushed in the hills while in marching order. Friendly forces must move in marching order across the board. Each move a dice is thrown. On the throw of a 5 or 6 the enemy attacks from a concealed location. Number of enemy units revealed/distance from the column/location etc. decided by dice/location of cover.

Result of 6 to 8 the friendly force, in marching order, comes across a blocking force in a position of advantage (Throw 16D again; 1 & 2 blocking force in a wooded, narrow valley/defile with rough field defences (stone walls). 3 - blocking force in a wooded narrow valley/defile (no defences), 4 - blocking force at the top of a steep ascent with rough field defences (stone walls), 5 - blocking force at the top of a steep ascent (no defences), 6 - blocking force on hilltop commanding the road, with hidden ambush party concealed somewhere on the table.

Result of 10; The enemy do not seem to have attempted an intercept.

In addition: each move throw a 6D. On the throw of 6 a concealed enemy attacks from cover. Number of enemy units revealed/distance from the column/location etc. decided by dice/location of cover.


Risk
3)
Approaching Hostile Location along a road with a River Crossing: An enemy force is in place across the river and will dispute our crossing. Throw a 6D.

Result of 1 the enemy have placed hidden stakes/pits in the water. These will need to be dealt with before a unit can cross. A foot unit must remain in the water until this has been done (throw of 6 on a 6D, adding 1 to the dice throw w per move unit is in the water).

Result of 2 or 3 the enemy have placed stakes across the ford. these count as "an obstacle" to any attack.

Result of 4 as above, but the opposite bank is very steep.

Friendly scouts may seek other crossing points at 12" intervals, locating an alternative crossing on a throw of 6 on a 6D. However,, on first crossing attempt throw a 6D. On a result of 1 this crossing point has also been "staked" as above.

Risk
4)
Approaching Hostile Location along a road/track with a Defile: There is a risk of the column being ambushed in a defile. Throw 1x6D.

Result of 1 to 3: the friendly force is ambushed in the defile while in marching order. Friendly forces must move in marching order across the board. Each move a dice is thrown. On the throw of a 5 or 6 the enemy attacks from a concealed location. Number of enemy units revealed/distance from the column/location etc. decided by dice.

Result of 4 to 6: the friendly force, in marching order, comes across a blocking force in a position of advantage, with hidden ambush parties concealed on or off the table which emerge on a throw of 4-6 (dice per move).

Result of 7-10; The enemy do not seem to have attempted an intercept.

Surrender: Any ordinary Hostile Settlement will, following an unsuccessful intercept attempt (i.e. the intercept test failed or the intercepting force was defeated on the table), surrender to any Roman force if said force outnumbers its remaining garrison by twice that number of Legionary troops or three times that number of Auxiliaries/Foederati/mixed troops. If the settlement surrenders add 1 to the Jerusalem Garrison Tally (see below). 

Fighting at the Location/Sieges: If Surrender Conditions are not met then:

1) If the Location is an unfortified settlement  there will be a battle fought at the settlement edge, using the garrison/remaining garrison determined as above or from an ambush. improvised defence will be present, but no solid walls.

2) Forts and Fortified Settlements may be besieged or assaulted. Assaults take place on the table. Sieges are an off-table activity. An unsuccessful assault can be followed by implementing a siege the following day.

Previously calculated garrisons (now possibly depleted by previous actions) will be used by the defenders. 


3) Table battles: These will be fought using my usual House Rules. Fortified places will have proper walls, other hostile locations will have makeshift defences only. When designing ambush terrain for tables I will use the very useful tool of Google Maps to get a feel of the type of terrain in the locality and the terrain features likely to be utilised by the ambushers. My usual Solo methods for placement, activation, decisions and surprises will be used.

4) Sieges: These will largely be a simplified off-table activity, especially since, from the Roman point of view, this will primarily be a Time-eating/Attrition exercise more than anything else. Besiegers MUST be in Supply.

At the end of each WEEK (rounding up) of the siege there will be a simple dice throwing exercise;

The Romans will throw 2x6D for every group of 500 legionaries (actual strength/rounded down) committed to the siege that week and 1x6D for each 500 Auxiliary/Foederati
(actual strength/rounded down) also so committed. Each week of a continuous siege the Romans add 1 to each Legionary dice thrown (only).

The defenders throw 2x6D for each group of 200 defenders (rounded up).

If the Roman total dice score exceeds that of the defenders the target is taken. Draws act as a Roman failure. If the Romans succeed they throw for casualties as normal. The garrison is deemed eliminated.  

Every week the Romans fail to take the target a 6d is thrown for each group of 500 Romans (rounded up, but dice separately for troop types) and each group of 200 defenders (rounded down) and multiplied by 10. The resulting totals for each side are the number of casualties suffered by the side testing.

(E/G. A Roman force of 1200 legionaries and 800 Auxilia attack a settlement with a garrison of 500.

At the end of the First Week the Romans throw 4x6D for the legionaries (2 dice  per 500, rounded down) and 1x6D for the Auxiliaries (1die per 500 rounded down).

The resulting dice throw comes out as 20.

The defenders throw 6x6D (2dice per 200 rounded up). They are lucky, and throw 24.


Each side throws their casualty throw: The Romans throw 3x6D, throw a total of 5, and so lose 50 troops as killed, wounded, feeling poorly or just plain knackered. The Auxiliaries throw 2 dice, and lose 30 troops as a result.

The defenders throw just 2 dice (500 rounded down) and lose 40 troops as effective. 

The next go the same number of Siege Dice thrown is unaffected (the Roman and defender casualties were too light to affect this), but this time the Romans add 1 to each Legion dice thrown.  Their thrown total is 28.

This time the defenders only throw a total of 15. The town falls. Romans throw for casualties as normal.

The Romans MUST rest for a minimum of two full days after taking a location by siege. Roman total siege casualties are assessed in the normal Post-battle way to tally killed/fit for duty/wounded as after a normal battle.

The taken location is now deemed "Ravaged". Unless occupied by a Marching Camp it plays no other part in the game other than to block Lines of Communication.

I will fight a siege of Jerusalem (if any) using the AH board game. 


D) Roman Forces, Command and Control:

 
Roman Forces: The Roman Order of Battle will be as follows:

The fifth Legion, 4 cohorts, 4 mixed cohorts and 2 Alae of Auxlia, plus Antiochus of Commagne with one thousand footmen that were archers, and a thousand horsemen.

The Tenth Legion, 3 cohorts, 4 mixed cohorts, 2 Alae
of Auxlia, plus Herod Agrippa II (Marcus Julius Agrippa) with one thousand footmen that were archers, and a thousand horsemen.

The Fifteenth Legion, cohorts, 4 mixed cohorts, 2 Alae
of Auxlia, plus Sohemus of Emesa with one thousand footmen that were archers, and a thousand horsemen.

Malchus, king of Arabia, with thousand horsemen and five thousand footmen, the greatest part of which are archers.

Command and Control: Units under my direct command as C&C will do as directed move by move.

Detached forces will be given a "route map" from which they may not deviate unless 1) a Courier is sent to them, in which they will receive new orders, 2) a Courier Card is in play (see below) 3) a commanding officer is replaced due to death, betrayal etc. - in which case he will arrive with new orders.

Couriers move a "full day's journey at speed", stopping overnight for two periods at Safe Places only.  They cannot pass through Hostile Locations or Settlements in Civil Strife.

Roman Reinforcements: If there is a Roman Disaster (i.e. more than five Legion Cohorts are destroyed/routed in a singe engagement) then, each move thereafter throw 2x 6D. On a score of 12 then five Legion Cohorts and five Auxiliary cohorts will arrive the next move at Ptolemeis. This will only occur once in a game.


E) Random Events: As well as the imponderable factors above, Random Events will also affect the campaign.

1) Event Cards: A 1x6D will be thrown each day. On a throw of 6 a card will be taken from the Event Pack (a selection from my "This Ain't Siluria" pack) below.

"Provincial Trouble": There is trouble elsewhere in Syria, and the Governor needs men. Choose 6 cohorts of any type and remove them from the board.

"Unexpected Death": One of your staff has succumbed to the weather or local ills or been hit by a falling roof-tile or just fallen from his horse. Dice for each of your detached commanding Legates/tribunes. Lowest scoring officer dies. In the event of a tie continue dicing till one dies. His command will wait three days plus 1x6D before your message to say who will take command arrives.


"Unexpected Reinforcements": The Emperor wants a speedy end to matters. You receive 6 cohorts (dice for type; 1-2 = legionary cohort, 3-5 auxiliary infantry, 6 = mixed cohort).

"Betrayal": Throw a 1x6D. On a throw of 4-5 a Neutral Location turns hostile. If this Location contains a garrison throw again. On a throw of 1 or 2 that unit is destroyed. On a throw 3-4 the unit retreats towards the nearest Friendly Location/Safe Place, but if this means passing through terrain likely to prompt an ambush treat as if approaching a Hostile Location in column of march. If 5 or 6 Roman Player may chose where the ejected garrison can go to. If passing through terrain as above it will still be attacked, but will be in expecting an attack, and so eployed at players discretion.

On a throw of six, dice for all Force Commanders/Legionary Tribunes. The lowest scoring officer will be removed from the map, with his command. Nothing personal. just politics...

"Raid": All non-garrisoned Friendly/Neutral Locations in Samaria, Judea and Galilee dice. The lowest (dice till one is lowest) is deemed "raided"

"Appalling Weather": No movement of any kind permitted.

"Good Going": Good terrain, guides or tracks result in movement bonus equivalent to one Period.

"Harass": Enemy force attacks a baggage train or friendly rearguard of any force currently in terrain which would prompt a possible ambush. Dice for friendly force affected. Fight as table skirmish, dicing for scale of action where appropriate. Baggage train damage may result in loss of Supply Train and/or Legion Artillery.

"Unexpected Bonus": Receive 2 extra Supply Trains at ant detached Force of your choice.

"Courier Ambushed": Immediately cancels any Courier card in play OR any other Courier on a mission is eliminated (if both are a possibility dice for which is affected).

"Supply Issue": Rain has got into the stores. Lose 1 Supply Train.

"Hill Fever": A detached garrison commander has got the heebie-jeebies in those hills. Dice for the garrison affected. This unit will at once commence a march, by the shortest route towards the nearest Safe Place. Supply restrictions andAttrition apply.

"Courier" - Hand Card: Allowing a designated vexillation currently detached from the main body to be controlled for three moves as if under direct control (vexillations detached from the main force and more than two zones from the Legate have set orders from which they cannot not wildly deviate - local Tribunes & Prefects have minimal imagination.... This allows for more, if temporary, control by the Roman Player).


2) Outside Intervention: Each move where there are more than 14 known, unsubdued hostile locations in play a 6D die must be thrown. On a throw where the total of Hostile Locations and the dice score add to 20 or more there is outside intervention by an opportunistic power.

If the majority of Hostile Locations are north/west of a line between Gaza and Selucia then there is Parthian Interference. Any non-hostile settlements in Gaulantis, plus Selucia, Canatha, Dium and Edrai will become Hostile. No more Roman reinforcements will be forthcoming.

If the majority of Hostile Locations are south/east of the Gaza and Selucia line then there is Nabatean intervention. All Nabatean settlements, plus Ebus are deemed Hostile and can raid into Palestine.

Once both Parthians and Nabateans have been activated there is no need to test for Intervention further. Neither of these powers may be activated more than once.

F) Victory Conditions:
Oh yes. Those...

1) To take Jerusalem and all Hostile Locations in Samaria, Galilee and Judea within six months.

or

2) To identify and regain control of all hostile locations, other than Jerusalem, within six months. In addition, all locations with a direct, unbroken road  link to Jerusalem must be either friendly, conquered, occupied or the road link broken by a Marching Camp.


Quite a tall order. If the Rebels become active with raids, sieges drag out, or the Nabateans or Parthians chip-in this will make life more difficult; especially since all the Nabatean locations will also need to be subdued.


G) General: As indicated above, this is a stylised campaign, but one which will hopefully give a flavour of this (one-sided?) conflict.

The map is a compromise; conflicting sources, historians' opinion masquerading as fact, location name changes/variants abounding (how many names does a city/town need over time?), the same town moving location ("urban shift?"), different towns having the same name, towns not being towns at all, but geographical terms, modern politics, religion and fashion influencing interpretation etc. etc. all conspiring to make life troublesome.. But I have a workable map; thanks to the Web...... Old school library work would have taken weeks...!

I have set the Romans a challenge. How things pan out will be down to a number of imponderables, and not just strategic nouse.... Watch this space...


Saturday 4 May 2019

Yet another Interim Post...


Excuses, excuses... And Displacement Activity...

Paid work has been petty bloody the last few weeks and my car brewed-up, so one's mind has been concentrated elsewhere... Am progressing on things generally but Displacement Activity has been strong with me lately.....

Some board gaming.. My old copy of SPI's Chariot got an outing... Probably the best of the PRESTAGS stable in my book - once one had realised the errors re. the scenarios and chariot use for Shock not being carried over from the previous version...  Great fun....


Down in the ol' Texas town of El Taco.....
Also, a quick game on the "Oh, Little Town Board" before it was dismantled - a Western Gunfight, using solo-ised rules based on The Shootist" rules. THAT was FUN...

The narrative was that sheriff has heard that the "Calamity Gang" have been in the cantina overnight while their steeds get liveried-up in the stables on the other side of town... Some of the townsfolk are willing to be sworn in to help with an arrest....


The Bad Guys (and Gals) split up - which made my life a tad more difficult: I was playing the Sheriff.....


Unfortunately, on reach the square with the main body of the gang, Calamity Kate smelt a rat, and they hustled back to the cantina..
..


Meanwhile, the Kellerman brothers, separated from the rest of the gang (sent to get the horses) enter the square. The sheriff attempts to arrest them.
Billy Kellerman gives up, but brother Bo skedaddles - putting the sheriff on the ground with a lucky snapshot as he runs...


Hang on.. I'M the bloody Sheriff..... What THIS means is that I lose all Command and Control - all movement decisions re. the townsfolk and deputies become randomised; all I'm allowed to do is "call the targets" IF they decide to shoot/get involved...
As the shooting continues in the streets and square, and Bo goes down, the gang hold up in the cantina.. As some of the townsfolk converge There is a firefight..


One of the gang,
"Reb" Butler nobly agrees to hold off the (now somewhat disorganised) townsfolk while the rest of the gang skip out the back door, Reb following after two moves, but not before he has been wounded twice...


Discretion takes over from valour, and the rest of the gang high-tail it for the countryside, but with no horses their long-term future looks bleak....


Simple, quick action. Basically I used "probability" dice for decisions, activation and spotting - very simple but a lot of jolliness - and a surprising ending, which to me is what makes solo so good..

 
"Not the Judean Revolt"; Part Two..

After two days of hair-pulling (and we pull hair pretty durned hard in these parts, partn'r) I finally got my Second Phase "Not the Jewish revolt" underway; with a schematic map, based on the concepts of the "Peasants Are Revolting" article mentioned last post, finished to a "just about acceptable" level....


Life made more difficult by:

Conflicting secondary sources...

Historians' opinion masquerading as fact....

NAME CHANGES !!!!!!!! (How many names does a city/town need over time..!!.

Joesphus-haters (sorry, but any OTHER contemporary sources worth the candle?).

Disagreement over locations.

Modern politically-laden interpretation v archaeology etc. etc.

But I have a workable map (thanks to the Web...... Old school library work would have taken weeks...!).
Typing out the rules is 80% done - then we can get playing... Onward and upward...


New Year. New House. New Plans..

New hope...? Well, we're in the new house at last.... I now have: A garage to convert into a workshop for, amongst other things, modelli...