The Resistance Continues.
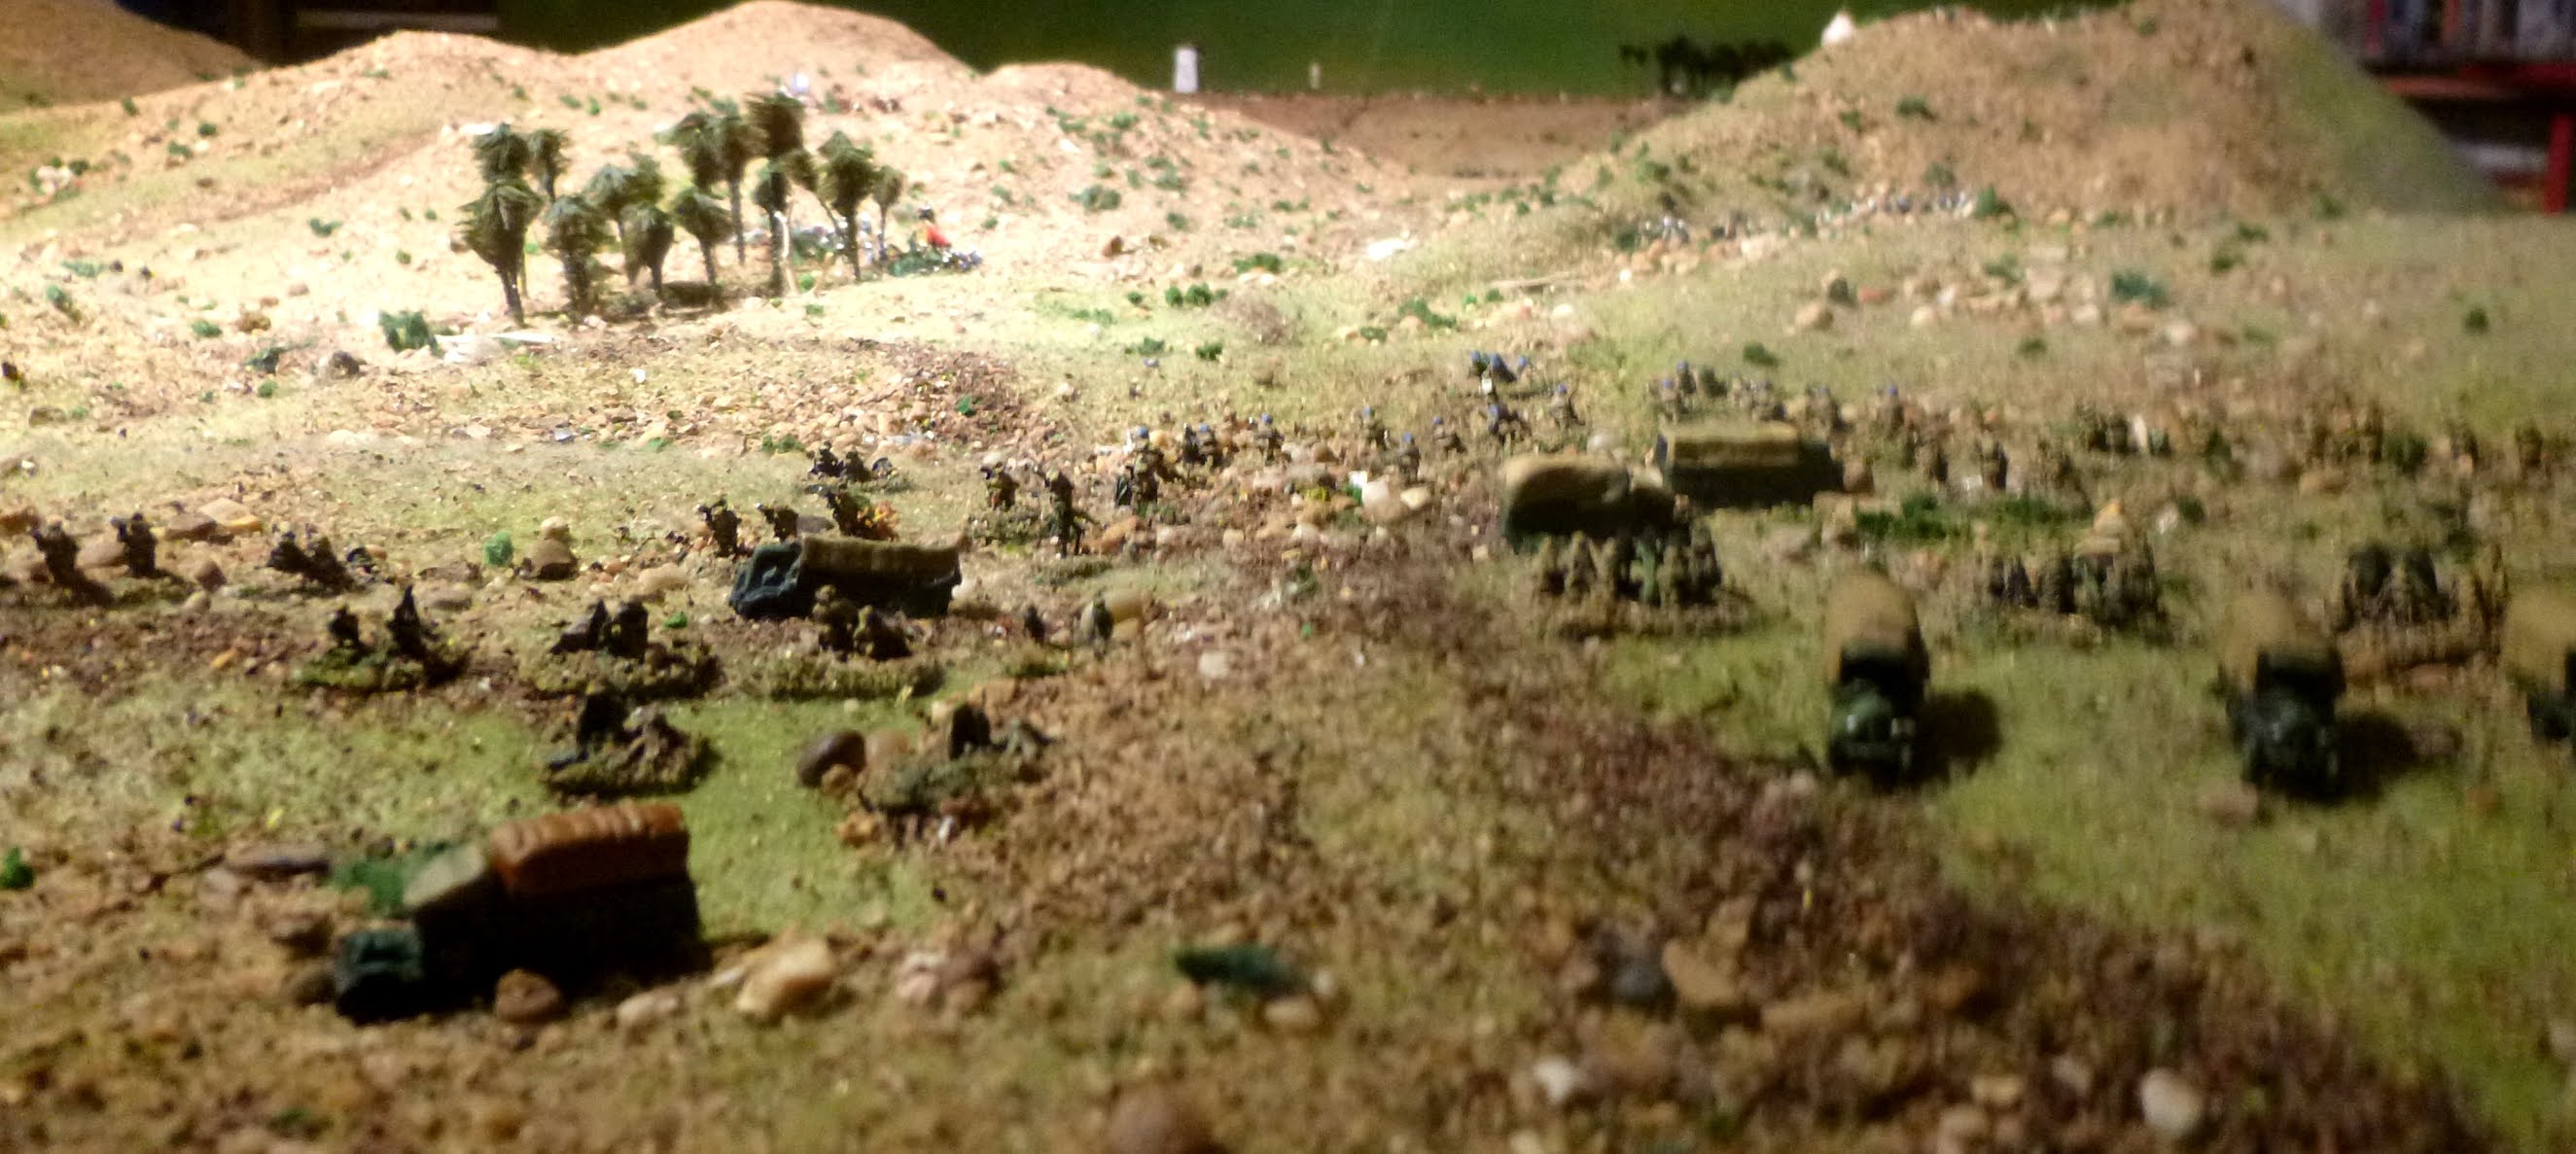
From my position on the slopes of Djebel Omar I can see the invaders' unarmed machines arrive. Seven of them. From experience we know these are likely to contain troops. However, several appear to be pulling guns. This is a concern. They halt and men begin to emerge from the back of the machines. They set up the guns; three of them.

Uncle Omar's band is nearest, but they have been asked to keep their heads down until the enemy come close. Likewise Ali-Reza's band. Both parties do as I have asked.
[Technical Note: My guys nearest enemy test. They remain hidden. Enemy draw their first card; seven, black suit "Very cautious advance.]

Suddenly the ferengi begin firing their guns at the heights of Djebel Barga. A number of machine guns also open fire, raking along the ridgeline facing them. We can see Sikhs, enemies of our blood and bone, and ferengi infantry rushing towards Djebel Barga under cover of the guns. These work in a "fire and rush" sequence. It is clear they mean to clear or take the Djebal.

The enemy guns and mortars rain death upon Ali-Reza's band (even though the enemy do not know for certain that they are there) causing several casualties and killing Ali-Reza himself. As shells continue to drop among them the leading band pulls back towards the shrine. For another move the artillery shells the now abandoned line of sangars at the edge of the djebel.
Omar's band below Barga opens fire on the advancing Sikhs at close range, causing some casualties, but then the enemy mortars adjust their sights, targeting Omar's men. Despite casualties Uncle Omar's band holds, but it is already clear that the enemy's guns and mortars are going to be our biggest headache.

Omar's men continue exchanging fire with the Sikhs, but the ferengi infantry start working round their northern/left flank.
Suddenly an Event is triggered: there is confusion among my Reserve. Younger brother Fazal doesn't seem happy that the enemy have come tooled-up with serious artillery (the pounding of the guns can be heard all along the valley). He leads his Asvaran away and off the field; taking with it one of the units of the Pushanis. I do NOT need this so early in the proceedings. Maybe he has his eyes on the family inheritance..? We will be having words after this is over...

So far we have barely ended move three and one of my bands has lost its leader and is falling back, half my cavalry have given up and scattered - taking some of my foot with them. Not good.
Aaaand it gets worse: a signal from Djebel Kourine indicates that more of the enemy have arrived on the track to the east of there. Oh dear....

Next move Omar's men on the slopes of Barga break cover and run to join their mates. On the top of Barga half of what had been Ali-Reza's command cannot pull themselves together and fall back further. The only good thing is that the enemy guns and mortars are spending their ammunition on abandoned placements, rather than raising their sights.
[Technical Note: Enemy unit decisions - as opposed to the general thrust of the detachment orders - are all ad hoc decision tests, dice run based on IMP, but in the case of artillery/the mortars firing indirectly the decision to change target - in the absence of any visual sign as to where to shoot - is simply down to dice; cease fire or raise or lower sights or lower one dice worth of inches. Hence enemy "friendly fire" could occur if infantry or others are working too close to the barrage - or the shells may hit more of my concealed guys "by mistake"]
[Technical Note: Enemy unit decisions - as opposed to the general thrust of the detachment orders - are all ad hoc decision tests, dice run based on IMP, but in the case of artillery/the mortars firing indirectly the decision to change target - in the absence of any visual sign as to where to shoot - is simply down to dice; cease fire or raise or lower sights or lower one dice worth of inches. Hence enemy "friendly fire" could occur if infantry or others are working too close to the barrage - or the shells may hit more of my concealed guys "by mistake"]

To the east of Djebel Kourine one of the enemy armoured cars rushes up the track between the peaks, while an infantry platoon debuses and holds and one of the tanks halts to cover any advances.
On the enemy right the Sikhs move to occupy the sangars deserted by Omar's band at the base of Djebel Barga. The enemy artillery here cease firing at the (now empty) slopes of Barga, decline to send forward an FOO - and instead turn their attention to the only group of enemy that they can currently see - ME and my group of aids..!! Luckily their ranging shot is way off...
The Sikhs move so at to be able to shoot at Omar's band as they run towards the oasis, these running as fast as they can out of trouble (they fail to rally).

I move my staff to somewhere less obvious - between the ridges of Djebel Omar; from whence I can still keep an eye on signals and developments on Djebel Kourine but am out of sight of the main enemy position.
A staff car with the enemy CO and an armoured car arrives at the force to north of Kourine. This MAY prompt a change of approach next move.
An enemy machine (the Sappers in a proxy Crossly half-track - purists look away now) and one of the enemy trucks pushes up the track between the peaks of Djebel Kourine, following the armoured car. They seem to assume the road is clear....
Suddenly, using Command Tokens, the ferengi get a second chance to activate a unit which has already moved. I dice, and the enemy tank No. 2. sends a volley of speculative machine gun fire (presumably covering the Sappers, armoured car and lorry making their way up the track) into the rocks on the north peak of Djebel Kourine. Two of my men there are hit, but the band retains cohesion - and does not reply. Preceded by the armoured car the enemy trucks struggle up the slope. My men keep their heads down....

I send a rider to the Shati, asking them to swing round the south of Djebel Kourine, picking up the Pushna-Kells on the way. These are then to fall on the flank of the ferengi on the east side of Kourine.

The enemy armoured car, followed by trucks, pushes up and over onto the Kourine saddle. If the trucks come just a little further and my men hold their nerve we could be in with an opportunity......

An Event card triggers: and Cousin Musa, up on the plateau, seems to have got bored. He leads his men down out of their prepared positions and down to join the Reserve. Seriously, it's like herding cats sometimes....

Over on the north side of Djebal Kourine one ferengi platoon climbs Djebel Barga while the other (with machine guns) digs in to protect the artillery.
Then "Shabash!!".. Enemy trucks climb up onto the Kourine ridge and mount the Pass AND the Pushani Band activates. Close range rifle fire rips into the trucks from the north end of Kourine, with supporting fire from the southern peak. All three trucks are hit and the drivers killed; a truck carrying a full platoon and an artillery truck go off the steep, treacherous track and crash down the western slopes.

The tracked vehicle with the Sappers also comes off the road on the plateau between the peaks and in the area of crossfire, smashing into the rocks - and bursts into flames! The resulting explosion (this is the truck carrying the enemy's explosives) kills four of my men, but also all the Sappers. THIS is a result.

However, my men on Djebel Kourine, by opening fire and showing themselves, have now been revealed to the enemy down in the flat land to the north. The enemy mortars shift and open fire on the north peak of Kourine. Five of my men go down, and despite their moment of triumph the band is badly shaken. Then one of the enemy tanks machine guns the summit. Another three men lost. Worse than this: the appearance of my men on the heights overlooking his flank appears to have enraged the enemy commander. He orders the three artillery pieces to also shift, and open fire upon the peak; nine men and the band commander are killed in the first bombardment.

At move end two wounded artillerymen, three battered but sound and two wounded soldiers, including the officer, emerge from the crashed enemy vehicles on the western slopes of Kourine, close to the enemy armoured car. They try to make off towards the main enemy set up.
Next turn Omar's band opens fire on the Sikhs, causing casualties, but then come under fire themselves from an advancing enemy platoon with machine gun support, then mortar fire from the main enemy group.
The ferengi artillery again target my warriors on the north end of Djebel Kourine - who have come into the open and have been shooting at the wounded among the fallen trucks on the west face. We suffer badly from the shellfire and I feel sure that the band here will soon be falling back.
One of the enemy tanks starts moving up the track on Kourine, then the other. Despite my local success we are likely to lose these heights shortly.
We get an Event Test (again!!) and the Pushna-Kell Band move from the palm groves up Djebel Shatar, seeking the high ground - presumably spooked by sight and sound of the heavy shelling of Djebel Kourine. Meanwhile the enemy armoured car on the western side of Djebel Kourine machine guns my men on Kourine as they move away from the southern peak. From their elation at their successful ambush, these men are now severely shaken; having been machine gunned and hit by shellfire.
My rider reaches the Shati Band, and they move off on their outflanking movement round Djebel Kourine; but slowly... Another move comes to an end.
Or does it.. The enemy armoured car west of Kourine ends the move within 6 inches of one of my groups of concealed petrol bombers. They are auto-activated. Three molotovs are lobbed. One goes wide, one lands beside the machine but the third is a direct hit. The crew successfully bail out (dice test) but the vehicle goes up in flames. Result.

So far we have suffered about 60 casualties (of all types; unlike the enemy my guys go home if lightly wounded) and two leaders killed (mainly though mortar/shellfire) plus losses through desertion. But the invaders have lost three trucks - with all their Sappers (along with their demolition charges) plus a gun crew and most of a Platoon killed or wounded with the trucks - and an armoured car. The exchange could, to my mind, have been much, much worse.
I am very concerned about their artillery and mortars, but if my plan to work the Shati band and the Pushna-Kells round Djebel Kourine and fall on the enemy from their southern flank comes off I may be able to cause enough concern or damage that the enemy withdraws. I may need to sacrifice part of the reserve to distract the enemy while trying to carry this off. But the Ghazis can be a nuisance in peacetime, and I never really liked my Brother in Law anyway, so.....
Next move my dispatch rider gets to the Phusnah-Kells, and they, with the Shati, start moving around Djebel Kourine. The ghazis get activated, decide to take matters into their own hands - and head off down the Barga Valley towards the enemy. No problems with that. I get the chance to ride over to the reserve, and set Abdul-Ahad on the move along the Omar Pass. All well and good - especially when they get a bonus move.

The Pushanis on Djebel Kourine retreat into the western valley between Kourine and Djebel Omar; not unexpected, and at least this takes them out of the firing line.
On Dejbel Barga and enemy platoon breasts the eastern slopes and takes cover. My men there react, and make the mistake of opening fire. No enemies fall.
Meanwhile the Sikhs and the enemy guns and mortars turn their attention to Uncle Omar's Band at the oasis. Losses ensue, but the band holds together.
The ferengi beyond Djebel Kourine suddenly spring into action. The infantry start moving up the slope, supporting the First Aid truck. The tanks already in the saddle between the peaks of Kourine moves to the edge of the saddle - and can at once see the bands of Abdul-Ahad in the pass along the centre of Djebel Omar. The infantry move up to support

[Technical Note: both tanks have wireless connection to each other. If activated next move the tank on Kourine can pass a message to the command tank at the base of Kourine. That tank can then send a message to the expedition HQ. It is therefore perfectly possible next move for the tanks to act as spotters for the artillery, who are next to the HQ wireless. NOT good for me.]
An armoured car machine guns Omar's band. Two men fall. Then the enemy get another chance to re-activate any unit. The artillery open up on the oasis. Omar is badly wounded, with eight of his men becoming casualties. His band up and runs - the pounding from two platoons, the mortars, the artillery and several machine guns, unsurprisingly, too much for them.
As the move ends the situation is as follows:

The ferengi have taken the saddle of Djebel Kourine, the edge of the oasis at the east end of the Barga valley and the east end of Djebel Barga. We have had severe losses in terms of men running or currently scattered.
However, the loss of nearly a whole platoon of soldiers will have hit the enemy hard; as the man said possession of the ground "is ten points of the Law in War, and the infantry the bailiff's men". Their guns can blow apart those of my men whom they can see, but can only be sure of achieving their mission objective if they have feet on the ground to get them, or their FOOs, safely in view of the target.
Next move the enemy takes full possession of the oasis and the guns target what remains of Omar's command; scattering it completely. Then the artillery FOO scrambles up the slope to join the infantry platoon on the south east edge of Djebel Barga: thus giving him a view of the Barga plateau and shrine, the Barga Valley, my Reserve nestling at the west end of that valley AND all of the Mission objectives.... Oh dear....

On Djebal Kourine the enemy infantry platoon dig in on the saddle, followed by their truck - but NOT far enough to see my guys working round their flank. They are soon joined by the First Aid truck.
In the Barga Valley the ghazis swarm forward. I get the chance to order the cavalry and Musa's men to follow up. It's a gamble, but officially I know nothing about the FOO and, thanks to the lie of the land, the guns and mortars do not have direct sight of the middle and west end of the valley.
In the Barga Valley the ghazis swarm forward. I get the chance to order the cavalry and Musa's men to follow up. It's a gamble, but officially I know nothing about the FOO and, thanks to the lie of the land, the guns and mortars do not have direct sight of the middle and west end of the valley.

Parallel to the ghazis Abdul-Ahad leads his division along the Djebal Omar defile and out into full view of the enemy guns. This could get nasty. The tank in the saddle of Kourine opens fire on Abdul-Ahad, as does an armoured car by the oasis; but no casualties are caused.
Meanwhile my Shati lads and the Pushna-Kells are slowly sneaking round the flank of Kourine.

On Djebel Barga my men exchange fire with the enemy Platoon, which has dug in. My guys come off worse and are pinned.
Suddenly the ever-dangerous Sikhs open up with machine gun and rapid rifle fire on my cavalry. Long range but men and horses go down. Not good.
The ferengi mortars also get activated, but on checking Line of Sight I find (to my surprise) that the high trees of the oasis are blocking their view of Abdul's men and a small ridge crossing the Barga valley any view of the men there. Given that the mortars' FOO is also still their side of the oasis that have no targets.. Phew... They know the Sikhs are shooting at something (they can see THEM) but have no idea at what or where. However, by move end the mortar FOO has established himself on a small rise with a clear view of the Barga Valley. Not good.


The enemy Tank Commander takes his vehicle on to Kourine. Again, not good for me to have another spotter on high ground.
More bad news: the enemy commander gets a reactivation chance. He elects (IMP dice decision) to get his No. 1 Platoon (with machine guns) at the oasis to make some protective scrapes, then open fire on the Ghazis - who take a couple of casualties but are unphased - and Abdul-Ahad; whose men are pinned.
Next move the enemy machine gun and a squad at the edge of the oasis join one of the tanks in shooting at Abdul-Ahad's command at the end of the Djebel Omar defile. My troops fall, and falter. On Dhebel Barga my men are hit by sustained rifle fire from the dug-in enemy platoon at the edge. They remain pinned.

Meanwhile my ghazis come under fire, suffer some losses, but rally; running forward. The cavalry also regain their composure and also rush onward, overtaking the ghazis. They are shadowed on the southern slopes of Djebel Barga by Musa's men. My carefully concealed petrol bombers in Barga Valley get swept up in the excitement and tag along.
This is not exactly what I planned; I had wanted the enemy's attention focused on the Barga Valley while my lads at Kourine worked round the flank and Abdul-Ahad's boys used the oasis as cover to support them. But the "demonstration" in Barga Valley is now looking like an Old School charge; seriously the wrong approach against machine guns and modern artillery, but my men have got the bit between their teeth and are off... This does not bode terribly well....

On Djebel Omar the Pushanis leap-frogs the stalled leading unit with Abdul-Ahad and bears down on the oasis. Thanks to amazingly lucky dice they actually swarm up to and over the ferengi platoon dug-in there - a platoon which has ALREADY been/is shooting at the ghazis. A fierce hand to hand ensues at the edge of the oasis. The enemy at the west end are slaughtered to a man. Their colleagues at the east side pull back, along with the armoured car also stationed there.
The Sikhs are activated. They have a choice; hold position and open fire or pull back - to protect the guns but exposing the flank of the platoon on Barga. A quick test: and the doughty Sikhs decide to stick where they are. Their two machine guns and rifle fire tears into my cavalry, sowing destruction and confusion.

On the south side of Djebel Kourine my men continue to work around, now creeping to get sight of the armoured car at its eastern base, just in time to watch it crawling up to the saddle to shoot at Abdul-Ahad and his band. Meanwhile the enemy platoon and the lead tank already in the saddle between the peaks also open fire of Abdul-Ahad's men, causing even more casualties. I have a feeling that his leading band will shortly decide they have had enough. However, because his band has drawn the fire of the enemy platoon on Kourine no pickets have been sent by the local ferengi commander to the peaks of the djebel. Thus my flanking force has STILL not been detected.
Another Event (seriously against the odds) and one of my units will get an unauthorised advance. I dice: Musa's men again! They rush up the last dozen or two yards of Djebel Barga and straight into the flank of the ferengi platoon dug-in there. The FOO and most of the enemy make off, but two soldiers are killed by the sudden attack, with no loss to us.

I move my figure and staff to the east end of Djebel Omar so as to try to regain some kind of control over events. Things have not gone as planned, but thanks to pure luck of the draw two enemy platoons protecting the enemy guns have been driven from their sangars and rifle pits with minimal loss. My ghazis and three bands are now poised to charge down into the enemy base - only about three to four moves away.
The move is nearly over, when Abdul-Ahad activates, managed with VERY lucky dice to rally his leading unit, then throws his second band down towards the oasis.

Last token of the move: the enemy C.O. gets activated. Decision time....
[Technical Note: OK... The C.O. has to make an ad hoc decision based on rapidly changing circumstances where his Battle Plan decision matrix goes out the window. As this is a critical one I'm going to run through the process I use for ad hoc decisions.
First factor is what does he know....?
He can see enemy troops on and flooding down from Djebel Omar towards the oasis and his position... He can see that there are enemy troops actually at the oasis (though he does not yet know for certain that that position has been lost)...
He can see Musa's men driving his No. 2 Platoon from Djebel Barga......
He can see the wounded remnants of the ambushes at Djebel Kourine hobbling back towards him.....
He and the mortar company FOO can see (I know; I've crouched down and put my eye on the table) rapidly-moving standards heading his way along the Barga Valley. Can he also hear the yells of the approaching ghazis? He can certainly hear and see the Sikhs firing as fast as they can at something...
He is also likely to have had a radio report from the tank commander on Djebel Kourine about what HE can see from his vantage point (I think it's fair to assume that). However, that officer has been firing a machine gun and may be thinking about something else entirely (this sector has been a bit busy, plus everyone's a bit shaken by the loss of the three trucks and the armoured car). Let's say that what with him being somewhat distracted by all this and the task in hand (and the reasonable assumption that other observers like the FOOs are keeping HQ up to speed), there is a 50/50 chance the tank commander sends a message relaying what he can see (i.e. Abdul-Ahad's men making their way towards the oasis at speed and the ghazis and cavalry rushing up Barga Valley towards the HQ area....). Dice check: he sends a message. The C. O. definitely knows that the guns and mortars are at risk from the enemy cavalry and ghazis.

Second, what are the factors affecting his decision: These seem to be
1) The risk to the guns and mortars.
2) The risk to his men of Platoons 1 and 2 and the Sikhs, who are in close proximity to the enemy.
3) The risks to the wounded making their way towards him.
4) The risk to the troops on Kourine.
5) Risk to himself and his reputation. With this we've got to consider any character flaws. I do a quick check on TMWWBK matrix; he is a better than average officer with no weaknesses other than being advised to keep his helmet on when in the sun. So a brave and professional officer likely to adhere to the traditions of the service. He will look after his men.
Looking at the above I reckon his options on a 12D dice throw should be:
11-12: Load the wounded into the trucks asap. Open fire with two of the guns on the nearest visible enemy on Djebel Barga. The third gun is to range on the standards in the Barga Valley, as are two of the mortars. The other two mortars are to target the nearest visible enemy on Djebel Omar.
Order the units at Djebel Kourine to move rapidly down to vigorously attack the enemy at Djebel Omar, take the heights there, then shoot at anything in the Barga Valley.
If the dice allow get in the staff car and drive to rally the armoured car, No. 1 Platoon, the Sikhs and No. 2 Platoon and get a perimeter established to protect the guns.
7-10: Load the wounded into the trucks asap. Open fire with two guns on the nearest visible enemy offering a direct and immediate threat to his men; in this case Musa's men who are chasing Platoon 2 and the gunner FOO and likely to flank the Sikhs. Order the remaining gun and all mortars to range on the standards in the Barga Valley and fire in the hope of hitting something.
Order the units at Djebel Kourine to disrupt with fire the enemy at Djebel Omar. The tanks and armoured car are to move down to vigorously attack these enemy, then move to command the head of Barga Valley.
Order the units at Djebel Kourine to disrupt with fire the enemy at Djebel Omar. The tanks and armoured car are to move down to vigorously attack these enemy, then move to command the head of Barga Valley.
If the dice allow get in the staff car and drive to rally the armoured car, No. 1 Platoon, the Sikhs and No. 2 Platoon and get a perimeter established to protect the guns.
4-6: Load the wounded into the trucks asap. Open fire with all the guns on the nearest visible enemy offering a direct and immediate threat to his men; in this case Musa's men who are chasing Platoon 2 and the gunner FOO and likely to flank the Sikhs. Order the mortars to range on the standards in the Barga Valley and fire in the hope of hitting something.
Order the units at Djebel Kourine to hold position and disrupt with fire the enemy at Djebel Omar.
If the dice allow get in the staff car and drive to rally the armoured car, No. 1 Platoon, the Sikhs and No. 2 Platoon and get a perimeter established to protect the guns.
Order the units at Djebel Kourine to hold position and disrupt with fire the enemy at Djebel Omar.
If the dice allow get in the staff car and drive to rally the armoured car, No. 1 Platoon, the Sikhs and No. 2 Platoon and get a perimeter established to protect the guns.
2-3: Load up the wounded. Fire one round with all mortars into Barga Valley then get them into the trucks. Fire one round with all the guns at Musa's men, then limber up the guns and get them out of harm's way.
If the dice allow get in the staff car and drive to rally the armoured car, No. 1 Platoon, the Sikhs and No. 2 Platoon to make a fighting withdrawal.
Order the units at Djebel Kourine to pull back off the table as soon as possible.
1: Load up the wounded and mortars into the trucks and get them away. Limber up the guns and get them out of harm's way. If the dice allow get in the staff car and drive to rally the Sikhs and No. 2 Platoon to make a fighting withdrawal.
Order the units at Djebel Kourine to pull back off the table as soon as possible.
Decisions, decisions...]

I throw. The dice throw is an 8... The guns open fire....
[Technical Note: to shoot "blind" I simply toss a small item, like a blob of blu-tac towards the enemy. Where the blob ends up is where the shell lands. I am fair when doing this... Anyway, it's fun..]
Next move the ferengi troops on Djebel Kourine open fire on Abdul-Ahad's men, causing casualties but no morale effect. The tanks and armoured car rush down the road, spitting fire, but with the same effect, then (routes chosen by dice throw) the tank commander's vehicle drives over a mine. Bang - and it brews up... So far so good for me...
In Barga Valley the ghazis rally and rush forward, joining with Abdul-Ahad's men, who - ignoring the fire from Kourine and the tanks, have scrambled down to the oasis. The enemy mortars open up again, hitting the ghazis and cavalry. The ghazis (amazingly) shrug off the casualties caused.
My bands moving round Djebel Kourine now reach the track on that side of the heights; the line of communication of the ferengi southern force. My men here have still not been seen by the enemy.

I move my figure and staff across the valley to Djebel Barga to inspire the troops there.

The enemy guns open fire, killing some more of the ghazis, some of my men at the oasis and hitting Musa's men hard on Djebel Barga. Musa himself falls, along with more than a dozen of his men. They falter, and come to a standstill. Worse; the Sikhs now open fire, at close range with rapid rifle fire and two machine guns on the ghazis. More than half a dozen men fall, including Suleman, their commander, and they come to a halt.
My various band captains, leading from the front, have been falling at a rate I cannot afford and their old-fashioned approach has proved costly. I have a bad feeling about this.
The enemy platoons and the FOO with them sprint for the flat ground.
In the valley, amazingly, Ghulam gets his cavalry together, and leads them forward. They rush until they are less than 300 yards from the enemy mortars and gun lines. They come under machine gun fire from the flank. Men and horses tumble; but they STILL do not falter.


Alongside the cavalry the Pushani charge from the oasis (VERY good dice); overrunning the Mortar FOO.. They have with them one of the petrol bombers; and the nearby armoured car goes up in flames. One of the crew scrambles out, but is cut down by the tulwars of the Pushanis. THIS local success is all unexpected - and out of my hands; all down to luck and enthusiasm (the dice and tokens). The armoured car from Kourine (a lucky reactivation for the enemy) rushes along the track and fires desperately into the flank of the Pushanis. A couple of men go down. Will they hold ? They do..!!
Up on Barga (inspired by what they can see in the valley?) what is left of Musa's band rally... End of move...
I have been VERY lucky, with good token draws and VERY good dice; but the enemy guns can now fire with open sights at close range on my nearest troops.
I suspect the next move will see my men in the valley and flatlands blasted into running away by the ferengi guns and machine guns. I still have four unbruised units by Djebel Kourine of course, and the enemy has received a very bloody nose.

Next move, the enemy mortars target the Pushani, as does the last remaining armoured car. Men fall, including their leader. They stall.
Next to them the cavalry charge - but for the easy target of the gaggle of wounded around the trucks - not at the guns or mortars (dice decision). They cut down the wounded, but lose a number to the men's sidearms and scatter towards Kourine after killing all in reach.

Time for another ad hoc decision for the enemy commander. His options are limited to affecting those units directly next to him. His choices: get the guns out of here before my men swoop down upon them. Stand and fight in the hope that he can blast my men away with his guns BEFORE they make contact. He elects to make a stand. One gun tears into the Pushani, the other two at what remains of Musa's men. Both get pinned markers.

The remaining enemy tank rushes up alongside the east of the oasis, machine gun firing. This final assault on the Pushani rear is enough; harried by machine gun fire from flank and rear, hammered by the mortars and artillery, and with their leader dead, this is NO surprise... They are seen on their way by the remains of No. 1 Platoon and their machine gun.
The Sikhs again fire at close range at the ghazis; a dozen men fall. This is too much even for them, now their leader is down. They rapidly withdraw, then, when called upon to try to rally, they break; running back down Barga Valley.
I signal to Abdul-Ahad to pull back to Djebal Omar. The ferengi platoon on the lower slopes of Djebel Barga turn and shoot at my men at the top of the slopes, pinning them. I ride up to Djebel Barga, rally the men there and order them to hold. I then ride down to try (unsuccessfully) to rally the ghazis.

While all this is going on the enemy platoon coming from Djebel Kourine, and the First Aid truck, make contact with the ferengi No. 1 platoon.
There is a pause. For the next two moves the enemy pull back to form a defensive perimeter. I rally the ghazis. My guys get to the top of Djebel Kourine.
The situation is now:

I have suffered what seem like severe losses, particularly among my commanders; but many of my "warriors for the working day" no longer on the field have either run, gone to ground or are slightly wounded, and so will return some other day. My men on Djebel Barga and in the valley have been mauled, but have rallied and are out of sight of the enemy guns. I still have keen and untouched bands on and around Djebel Kourine, Djebal Omar and on the main Plateau. All I have to do is sit where I am and make the enemy come to me.

On his part the ferengi commander has already suffered severe losses in men and machines; more than enough to negate any credit gained by destroying the targets - to which he is no nearer than when he started. He does not know that some of my men are near breaking point (though he may suspect it). He still has not encountered many of my IEDs or petrol bombers. He knows I still hold the heights overlooking his base with a thus-far unblooded force. ....


With his platoons providing cover he loads up his guns and mortars and pulls away.
**************************************************
Conclusion:
Again, an exciting game which could have gone either way at various points.
I had a LOT of lucky dice throws and some insubordination (prompted by "Events") on the part of various leaders actually worked in my favour at the end (had the unauthorised moves not take place I would likely have been more cautious).
My biggest problems were Command & Control of my independently-minded guys and the firepower of the enemy artillery and mortars. Once these fellows got the range and drop on any of my units my guys suffered hard - with casualty numbers per salvo being high enough to bring down leaders with comparative ease.
Another critical factor was the (random) luck and pluck of the Sikh platoon. Had they pulled back instead of sticking it out on the small ridge dominating the eastern end of the Barga Valley the ghazis might well have swept into the artillery lines.
Gut feeling is that without the incident at Kourine and the unexpected charge the enemy would simply have secured the Barga and Omar djebels, established good locations for their FOOs, and blasted the targets at a distance; while making ME do any uphill attacking....
*****
I will play some more with this table before I put it away..
As always; snipes, thoughts and queries welcome...


