Showing posts with label Hidden Enemy. Show all posts

Saturday, 17 May 2025

Some More Crossfire Play..

The Empire etc.... Crossfire Experiment Two

The Attack..

Since our reconnaissance, the enemy has aggressively been pushing patrols across the stream and, it is suspected, digging-in. It has therefore been decided that an attack in company strength, with tank support, is to take place in order to clear the enemy from the valley.

Three tanks and a first wave of two platoons will lead, with HQ and the fourth platoon as second wave/reserve.


[Rules as before, but with some tweaking for the armour and the enemy possibly having set up some kind of defences.

I've been looking at with some of Lindybeige's house rules
 
re. multiple attacker variants etc. - some of which look really worthwhile experimenting with.

Also, as this is a more of an "attack against an enemy occupied area" scenario, rather than a scouting mission I will use a throw of 6 on a 6D as the card trigger.

Second wave and stationary/hidden units will trigger on a two throw process (i.e. a 6 then another 6 to trigger).


In the deck I will use all red cards but Spade Ace and Court cards only (i.e. both red suits, one black).

The court cards and Aces will act as follows (and be discarded after one use).
The deck will be reshuffled after each court card draw.:

Red Jack: MG. fire from previously-concealed enemy blockhouse (first wave/attackers only. Ignore and return to pack for second wave/stationary).

Red Queen: Enemy AT rifle fires at nearest tank to testing unit.

King of Hearts: Enemy tank appears and fires.

King of Diamonds: Enemy infantry counter attack. (Note if this card is drawn at once draw another card. If that card is ANY Red card then there is, immediately before the enemy infantry are placed on the table, an artillery barrage of ten "bursts" across the table targeting my troops. The second card is then returned to the deck.). Throw one Ave D. Throw 2x6D per pip shown on Ave D. This is the number of enemy charging.

Spade Jack or Spade Queen: Mine (A/T or A/P as per triggering unit).


Spade King: Friendly artillery barrage of 2xAvdD bursts.

Once used this is returned to the pack, which is shuffled, but value changes to "Infiltration Success": one enemy flank has been turned by forces operating on our flank. Dice for which.

Enemy on this flank come under fire from 4 x AvdD friendly troops.

Ace of Spades: IF my men have reached or crossed the stream I get an Order to Withdraw - the flanks have gone. I must pull back in good order. ALL friendly units must test for cards. The enemy will pursue.

Jokers: mortars (black friendly, red enemy) - as before.

Also, in the last game I forgot to clarify the use of scouts and snipers. 

Scouts can prompt the enemy to expose themselves. However, a scout being pinned or lost does NOT automatically mean that the side affected loses it's Initiative, but IF the scout IS lost or Pinned in clear line of site of a friendly unit THAT unit must Test for Pinning. If it fails the test then treat as a normal loss of initiative. Likewise, Initiative is not lost simply because a sniper fails to achieve a Pin result.]


The Game:

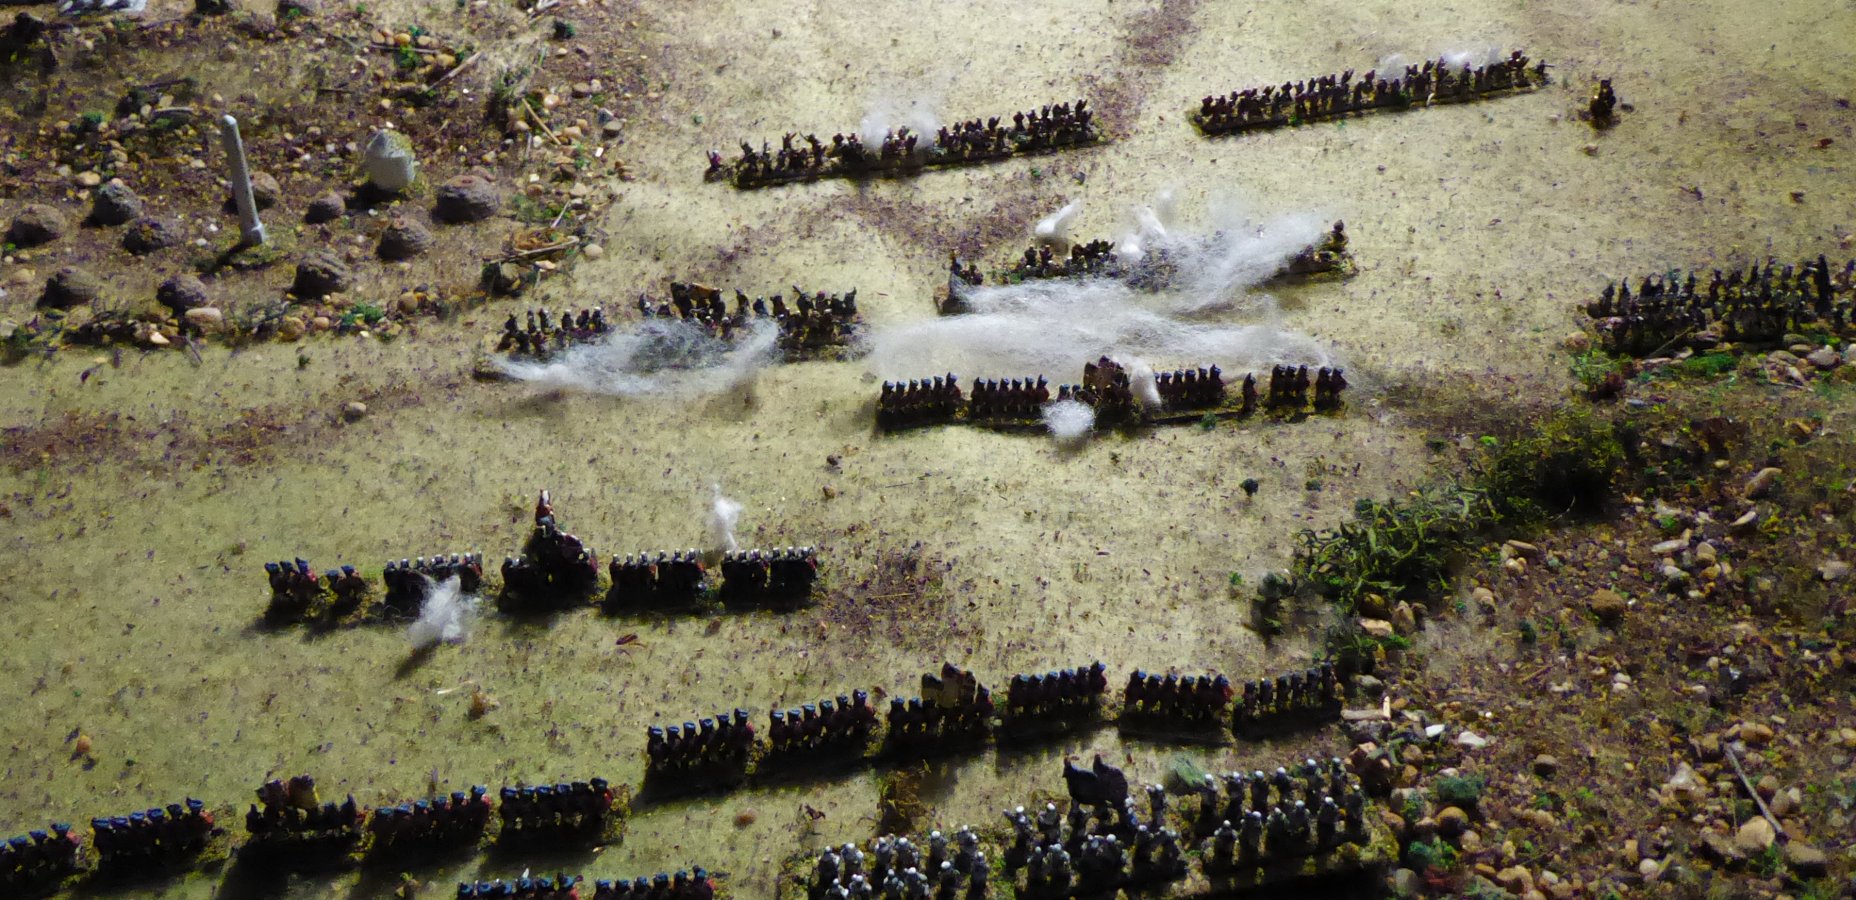
The game played out well.

Initially my right and right-centre made good progress, but enemy fire held my left centre. 

There was also some opposition in the village, but a couple of shells from one of the tanks soon cleared that.

Another of my t
anks got the opportunity to clear the enemy my side of the stream on my left by flanking them along the riverbank. My left and left centre had been slowed, but not disastrously.


While my left and left-centre were sticky, things were looking good elsewhere, with my right making progress right up to the stream.

But, as they pushed across the riverbed, my right units started running into problems. Sudden enemy fire pinned them in the swampy patch, then, to make matters worse, towards my rear right flank some more enemy entered the field and pinned my LMG support there.


I lost the initiative for a while, then, when I did get it back, my right centre rushed the river to support my right. Again, all good.

With my centre stilled pinned down, s
uddenly an enemy light tank appeared to pepper them. Things looked sticky - but a lucky hit from my own armour soon dealt with THAT.


Then I lost initiative again when the cards prompted a friendly mortar support barrage which failed miserably and, to top that, my men on my right did the enemy no damage at all.

Meanwhile, enemy
 fire from beyond the swamp downed two platoon commanders. Unable to rally, and taking casualties, my men were driven out of the swamp and back across the river. The same then occurred with my right centre...!! My right and centre scurried back to the village to regroup.


To add to my woes, more enemy appeared, facing my left. These pinned, then forced my leftmost platoon, rushed the hill with the stupa as my men withdrew, destroyed my leftmost LMG and set themselves up by the old walls to outflank me. 


On my right rear the enemy advanced - few of them, but enough to cause me grief.

With my attack blunted, several officers down, my tank commanders
becoming cautious and the enemy threatening to cut me off in a pincer movement I decided to hold in the village and try to rally my guys enough to break out.

The enemy (still
outnumbered) did not press the issue, but with too many officers down, and my men's morale fragile after our 
significant losses, it was clear that the attack had failed.


Conclusion:

Again, a tense, unpredictable fight. 

My men did well on the right, till the attack was blunted when they tried to push through the swamp, but the hidden enemy delaying and pinning my chaps in the left/left centre - and then the (small) enemy flanking force coming in to run interference on my right - were key. The tanks were useful to clear guys my side of the stream - and had I had better luck retaining the
initiative, might have been more active and been able to  provide supporting fire to the chaps crossing the watercourse.. 

The Crossfire concepts mixed with my Hidden Enemy conventions DO work very well for Solo - forcing me to make hard decisions in the face of unknown quantities. My "tweaks" work for me, but I need to write everything up and formalize further some aspects (there was a wee feeling of "Free Kriegspiel" at times; not itself a bad thing in my book, but....). The Lloydian ideas for "Phasing Fire" for larger forces will be worth looking at I think. 

I maybe need to think more re. "Overwatch" and other reactive mechanisms, but all in all this gave me an interesting, challenging game and, best of all, what I want out of a game; a convincing narrative flow, with plenty of imponderables, and with C&C issues being key. 

As always, thoughts, comments etc. are 
welcomed.


Tuesday, 15 April 2025

A Touch of Crossfire...

 A WW2 Exercise:

Some experimenting done with a WW2 skirmish.


Sgt Nakamura has been sent ahead by Lt. Kawashima to scout the river valley and associated hamlets around Spring Bridge; a small wooden structure over the Mau Stream. The bridge is believed to be suitable for local carts only, but is the only vehicular crossing of the stream in the immediate area and must be checked.
 

The sergeant is to ascertain if there is any enemy presence this side of the bridge, order any civilians in the hamlets to leave, and establish control of the bridge zone. Lt. Kawashima will be following on with the rest of the platoon later.


[Movement and shooting will be based on "Crossfire" principles but with friendly movement limited by "bounds" between cover patches or 8" of open ground, with a Test for hidden enemy/event action per detached unit/individual at "bound" end.

For this exercise a throw of 0 on a 10D on such a Test for moving testers will trigger a card draw.

Stationary testers will carry out a test as above, but then perform another test in the event of a 0 result. In this second test a 6D will be thrown and on a 4, 5 or 6 a card is drawn. Testers in cover take 1 from the second dice throw. Testers prone take 1 from the second dice throw. Testers which have previously fired from their current position add 2 to the second dice throw. All modifiers are cumulative.

Units on ground previously gone over by friendly units do NOT have to test in the same way UNLESS there has been enemy Infiltration

Hostile movement/actions will be as per usual Crossfire principles, with priorities of "Rally", "Seek Objective" (if any), "Shoot", "Advance", "Other".

The Card Draw test results will be based on my "Hidden Enemy" standard playing card-based system to generate events and enemy action.

The card pack will consist of the red suits, one black suit and the two Jokers of a standard card deck. The card draw results will be applied as follows:

The red cards will be violent enemy action - usually shooting - from a previously unknown enemy body cover in at a maximum distance decided by 4x6D. In this scenario Red Court cards will represent 12 shooters (in other scenarios court cards may represent other things; armour, artillery, infiltration, charges, reinforcements, booby traps/mines, other special circumstances etc.).

The Black cards will produce "Blinds" in cover which cannot be identified until a clear Line of Sight is established. These will then be tested for on the table below.

Civilians and Domestic Animals Dice for Number. 

In this scenario the Jokers will represent off-table mortar support (black for hostiles, red for friendly); the number of mortar shells incoming being based on the number on the next Red card drawn. Any Black card drawn thereafter in a mortar number test means that that session of off-table shooting has stopped. A draw of a Black card when testing for mortars the first time will mean six smoke shells are dropped.

Drawn cards in this scenario are returned to the deck. This may not be the case in other scenarios.

Lt. Kawashima's arrival will be tested for a 6D per bound/move. He will arrive on a thrown 6.]

The game starts with the sergeant's arrival on the table.

He orders Cpl. Suzuki with the machine gun section to set up near the stupa so as to command the approaches to the bridge and the space between the nearest hamlet and the stream. Private Tsuchida the best sniper/scout is sent on ahead to scout. He will be followed by the sergeant and three other soldiers. 
Tsuchida pushes ahead to the central hamlet without incident. 


The sergeant's party catches up with him by the buildings and Privates Yamakawa and Tokuda are ordered to search the huts - but in the very first hut entered they see through the window something moving the other side of the fields.

[Event test and Black card draw. Blind placement.]

The sergeant orders them and Tsuchida to hold at the hamlet while he and private Iwata creep round the nearby patch of woodland to see if they can identify the source of the  movement.


[On reaching the woodland the sgt's party prompts another test - and another Black card draw, with the distance test placing it by the first Blind.] 

Nakamura steps out to identify the movement - and finds eight cowering civilians crouched behind the fence. He orders them to return to their homes, gather their belongings and get out of the area. He gives them fifteen minutes to do this. Meanwhile he gathers his party and begins moving towards the stream and bridge.


While all this is going on Lt. Kawashima arrives with the rest of the platoon. He is happy with the placement of the machine gun. Leaving some of his men to support the machine gun on Stupa Hill he intends to move the rest round the nearby trees to head for the hamlet.


Suddenly though the situation changes [Test.]; there is shooting from a clump of trees by the stream and casualties are taken by the men grouped by the stupa. The men here are pinned .

[My
 Japanese lose the Initiative so the enemy continue shooting.] 

As the enemy continue firing more men fall on Stupa Hill and the machine gun section is pinned. 

Luckily, some bad shooting from the enemy ensues [Losing them Initiative for a round.].  But then "disaster" ! [We lose the initiative again. Then:..] Enemy mortar fire falls around the machine gun team!!


[The result of a Black Joker triggered by a standard test. To simulate the mortar fire I toss "shell-bursts" from the enemy side of the table to the number marked on the numbers red card towards the triggering unit. Where these "bursts" land is where a mortar shell lands - a bit random, but works well for me. IF a "burst" bounces - they are lightly weighted - more than six inches from where it landed it is thrown again. Men withing a blast radius of the "burst" test to see if they are hit.]


The first mortar rounds do no harm, and with the help some successful rallying we keep Initiative. Kawashima leads some of his men to a more sheltered area behind some trees. Nakamura too makes some progress along the stream towards the enemy firing.

However, for the next four rounds shell after shell lands around the men on Stupa Hill, causing serious casualties. 

This bombardment is VERY bad for me. Not only does it take down my men, but also the Pinning and the casualties caused keeps the Initiative with the enemy; effectively paralysing my side. Eventually all of my men on the hill in view of the enemy have fallen - and the enemy rush the hill [Result of a Test].


But they are premature  - and lose a man to friendly fire as one of the mortar shells falls short. However, more of my men fall to the mortars - including Lt. Kawashima himself. 

But the enemy, flummoxed by the friendly fire, now come under small arms fire from Nakamura's party, now on their rear left flank and Kawashima's men by the trees. Caught in this crossfire the enemy by the stupa are reduced to one man, then none. 


Things are looking better - but my luck doesn't hold....

Another test, and  there is shooting from the other side of the stream in Nakamura's rear -  catching my men here in the open. Nakamura gets his men into some cover - but one of his men falls and they are pinned...


Then, another test (!!!), and MORE shooting; there are about twenty enemy out there, including some LMGs... Nakamura's men start falling and he is briefly pinned. Things don't look good, but he recovers, and he and his only surviving man pull back to the cover of the hamlet.


With only one of his men still on his feet, Nakamura falls further back, to join the handful of men left from Kawashima's command, who have come down the hill.  

The enemy are not pursuing - seeming to want to stay on their side of the stream. We will dig in and hold the line of tree trunks by the track from the hamlet, and send a runner to Company HQ.

I think it is time to call it a day. 


Aftermath:

So.... We lost heavily. Of the men brought down around the stupa there are few survivors due to multiple hits from the mortars. We were able to drag back some of our nearer wounded (three from Kawashima's men and Kawashima himself; badly wounded and unconscious). One of Nakamura's lads staggers in later, hit but treatable, but the rest are lost. 

So, what did we gain...? We explored a good part of the ground our side of the stream and assessed the bridge (sound, but unable to take heavy traffic). We told the civilians to clear out (though they went to ground in the houses during all the shooting). We think we brought down about half a dozen of the enemy at the stupa, but haven't investigated their bodies (we will wait for nightfall to do this) and have no idea if any of them got back to their lines afterwards. 

The enemy aren't crossing the stream (yet), as far as we know, but are clearly in force (mortars and maybe two platoons?) in cover on the other side.


Conclusion:

That was a tense, challenging (!) fun game. 

The Crossfire principles work well. I may need to refresh myself on them, and perhaps do some tweaking (a run of bad luck on the dice really does make or break a plan) but all in all I was happy with the flow.

The uncertainty of what was going to come up (or be thrown at me) felt "right" and deciding how to use my "initiative" when it happened challenging.

The mortar barrage was a MOST unpleasant surprise which I could well have done without - and which scuppered me completely (35 mortar rounds!!??); but life (and war) isn't fair. 

Altogether things hung together well, and I'll have another few plays while the table is up.

As always: thoughts, comments and queries are welcome...      

Sunday, 29 January 2023

Post Xmas "Crossfire" etc.

Delayed Follow-Up..

Alas, seasonal duties and a series of seasonal bugs delayed my experiments (and some deliveries tempted me into some displacement activity), but here at last is the threatened "Crossfire" experiment write-up...

First thoughts were that this would work fine with a terrain-heavy table, say for an ACW or AWI game, where men are not necessarily standing in full view of each other in a "please shoot me" manner, but on a classic 18th, 19th, medieval or Ancient style "open battlefield" - or battles on wide sweeps of veldt or steppe or deserty scrub ?  Hmm.. My thoughts here, for those types of fights, were "This isn't going to work"...

So that, of course, would be the type I would try...

Normal "Hidden Enemy" rules would apply (i.e. test for each Potential Ambush Point approached) and anticipated that these would work fine in generating enemy reactive fire/presence, but my main concern was how I would manage any examples of long movement in the open and broad flanking movements, out of LoS of the other side's artillery and in areas uncontested/uncontaminated with PAPs and hostile troops.

My answer was, in the event of such moves, to test for enemy action for each significance terrain feature crossed/approached as I would for a PAP and also perform a scenario-specific Events Table test per such "move" (standard movement per troop type + 1x6D x inches) to allow for poor guides/getting lost/officer incompetence/ unexpected halts or delays ("Nice strawberries...") etc.


So, to the game. I foresee a simple scenario of two armies facing each other, with me playing one side and the AI the other. A quick set-up, and....

The field is the ground facing a corner of the friendly city of Feroozabad, which, for the sake of the narrative, is being blockaded by the enemy. MY job (coming in from the left of the top of the pic below, on the "Wrong" side of the river) is to see off the hostiles facing me, and get my lads over the bridge and ford.


I expect the immediate action to take place in the area below. There are plenty of potential PAPs, but also some large (in "Crossfire" terms) open areas where long movements could be made without interruption.


I must deploy and formulate my Plan and orders first. My troops arrive (below): three infantry brigades, in roughly three lines, two guns (in the centre) and some squadrons of cavalry in two units (one on my left, one in reserve behind the infantry left of centre). I make my plans.

My Right will advance to the ford, supported by the Centre. Once the ford has been secured we will then cross the open ground, dealing with any resistance, take the Bridge and cross with the main force there. No enemy are in sight while I make my plan. 

Oh, there they are (below)....

Six large regiments of infantry (in two brigades; each regiment being half as big again as one of mine) deployed in two lines on my side of the river between the Palace and the Royal Tombs. Also visible are two large bodies of cavalry (each roughly numbering my whole cavalry strength), on the other side of the river: one on a low ridge above the bridge, the other the other side of a nullah within attack distance of the ford. However, these are just the enemy I CAN see......

I dice to see who has the Initiative and I get it.

I move two regiments (one European, one Sepoy) on my right wing towards the mill, so as to attempt to control the ford. Under normal "Crossfire" rules there would normally be no measuring, but I throw a red die (to see how far beyond normal move my guys have to test other than for PAPS) and get a One.

The PAPS they would pass en route (the scrub by the river and the walled enclosures under the hill) prove "safe", however, at move end, approaching the Mill, we test again and get a 6; we must make a card draw for possible enemy action/reactive fire. 


This proves to be a false alarm (red numbered card). We throw to move again as we still have the Initiative. We can move nine inches (red dice) but must test at move end for enemy action (card draw again).


My chaps complete their move, blithely approaching the mill.


Then I draw the card - at the same time dice testing for the flanking PAPs.


Nine of Spades... This produces nine stands of enemy opening Reactive Fire at close range from the mill. Bad result for me.


My guys get nastily hit, their brigadier is killed, they are staggered - and the enemy gains the Initiative. Their two brigades facing my guys test - and will advance.


As the enemy start moving my artillery are permitted Reactive Fire, but I have to decide when to shoot - at long range - and keep them at a distance while reducing hits, and my chance to take the Initiative, or wait till they get closer - maybe even up to close range....

I decide to open up at medium range and my gunners shoot at the enemy.

Great result. Two enemy units are staggered by my guns. as a result. I regain the Initiative

My right flank units come under reactive fire (they don't need that), make a decision test (dice) and elect to fall back. 


Meanwhile, my left wing advances, triggering a hidden Enemy Test at "move end".


A six - I must make a card draw.


Oh dear... Joker - a enemy mass attack by previously unseen assailants. I throw a dice to see how many dice worth of Stands of three I face. 


Five - so five dice loads. 


I score eleven on the five dice - not too bad. But eleven stands of three enemy per stand. Now to discover where they are coming from. I throw three dice - one pip = one inch maximum distance - and get fourteen.


An enemy cavalry charge of eleven stands launches from the graveyard towards my Left.


As they charge my guys shoot reactively at close range, and the enemy are staggered. Excellent. The Initiative is mine.


Over on the Right my general trots down the hill to try to stabilize things. He rallies my leading regiment, but his actions prompt reactive fire from the mill, and although more Shock is received it is not enough to allow the enemy to seize the Initiative.


Over on the left the enemy cavalry pull back, and as I still have the Initiative I advance my left wing. I am also able to launch my nearest cavalry at the discomforted enemy horse..

My donkey wallopers take serious casualties in the resulting melee, but the larger body of enemy is routed. 


The enemy perform long range reactive fire at my moves on the left, but to no effect.


I still have Initiative, so move back to my Right. My European regiment opens fire at the enemy at the mill and their Sepoy supports charge home; intent on taking this troublesome building. This action produces reactive fire from the mill.... 


......and THEIR supports.


My Sepoys manage to charge home, but are thrown back, staggered - and I lose the Initiative.


The enemy now have the Initiative, on my Right they continue to shoot at my troops, and stagger my guys. They then advance a regiment to the base of the central hill unchallenged, then attempt to rally other units in the centre, but are only partially successful - so lose the Initiative again.


Over on my Right my men simply take in cover behind some walls - prompting some ineffective reactive shooting from the enemy. I decide not to risk losing the Initiative by a failed rally attempt, so look elsewhere.. This is where Crossfire excels; decision-making, assessing risk  and prioritising is a key - and worrying -factor. None of the comfort of "I still have PIPS left" or "I still have plenty of tokens in the tube".


I focus on my Left, advancing and opening fire on the enemy's already Shocked infantry, hoping to force the day.


The enemy responds in kind, but causes only slight Shock and one of my regiments charges home, as I move my cavalry up to support and threaten the enemy flank.


The enemy Right is discomforted and withdraws.

With most of the enemy army shaken or pulling back, and only the men near the mill seeming determined to contest the field (and a
s this was a one-off, experimental fight, rather than part of a campaign) I decide that will do. 

I have tried the method as much as I feel necessary with this fight - and anyway have to clear the decks for visitors....    

Thoughts and Conclusions:

I felt that the procedures had definite merits. Certainly the Hidden Enemy elements I like worked fine with the "Crossfire" concepts - and would work equally well if applied to the kind of fight the rules are actually intended for. Next time I go down the WW2 skirmish route I will give certainly give Crossfire a solo outing.

I liked the fact that, as with the skirmishes for which the rules were designed, the Initiative aspect meant I spent a lot of thought in considering where and what actions I should carry out; balancing my wishes and needs with the fear of losing the initiative. I wondered if a timer or stopwatch, to limit my thinking time, and add more stress, would be good. I suspect that it would. 

As the game had to be played in spurts (due to other commitments) I did get a little lost at times - so some kind of marker system indicating who had the Initiative at any one time would have been be useful to me. Simple to sort now i know.

When the Initiative lay with the enemy things were a bit scary - not a bad thing at ALL - as at any time a mass attack could come in, with me having to decide at what point to risk using my reactive fire (long, effective or close range). Luckily for me the AI had some dreadful failures in attempting to rally his Centre and Right. 

I'm not sure that the system doesn't make certain moves over-powerful (big, sweeping attacks), on the other hand that may be more realistic than the chess-like conventions of most wargames, where you have time to think and ponder (SO unlike the real world)

I will have to think a bit about the Reactive Fire and Morale aspects a bit, but feel that it will be worthwhile thinking and tweaking the concepts. The game was fun - and certainly MUCH quicker to play than my usual "Activation Draw" way.

So, there are. A worthwhile exercise.. Thoughts and comments always welcome.


Round-up.

Meanwhile, I have started the new year with some reading, researching and musing over 6mm gaming/Solo campaign priorities for 2023... 

Should it be the "This Ain't The 45" project (which I feel needs more Jacobites. The Irregular Miniatures ones are lovely, but ideally want mixing with the H&R ECW Highlanders, which are sweet and compatible, but which have not been re-issued yet) or the "This ain't Turkestan" one (which needs more folk painting up/converting)...? Hmmm....

Re. the former: an hour or two spent looking at lovely, lovely maps (links) may have swung the balance....

https://maps.nls.uk/military/scotland_text.html#roads

https://militarymaps.rct.uk/other-18th19th-century-conflicts/jacobite-rebellion-1745-46

We history lovers (& gamers) are SO lucky regarding the resources at our fingertips these days.

There will likely be a hiatus here on the old Blog - as we may well be moving house in the next few weeks and my playroom activities are likely to be mothballed as we tidy, titivate, throw all hands to the pumps and attempt to generally make the place look ship-shape for selling..
.  

Meanwhile, as always, comments, snipes and thoughts welcome...


A Little 6mm Ancient Action..

Somewhere in Anatolia. . The army of Antiochus Elehohkhromahtistis has approached the free city of Erimoupolis with intent to subdue. The go...