Saturday 23 June 2018

I Really Should Be Painting.......

Middle of the Working Week for me (night shift) so have been lazily looking at bods and sorting through the Plastic Mountain for the projects "kinda on the go" before my pre-work nap...

On the cards some time this side of Xmas are:

  • A revamp of my old Colonial Campaign (loosely based on the world of "Sanders of the River" - I found my old campaign map & scratchbuilt river boat "Zaire"last year).

  • A Romano-Judean thang (I'm part way through painting up a Judean force & lots of flat-topped houses) and more testudos.

  • Getting That Schiltron done (It's O.K. Robin.... The Bishop of Huntingdon has just brought in some Scots mercenaries.. Nothing to see here, just move along...).

  • FINALLY getting my Napoleonic & FIW skirmish-only figs painted (Hah!).

  • Possible pipe-dreams: Mid 19thC colonial - small scale skirmishing/Maori wars/Sarawak etc. Lots of conversion necessary though - unless I'm going to switch scales (shudder)...... I REALLY need to read less Flashman.....

  • Dad's Army WW2 - but am finding the ol' "One-scale-fits-none" issue when trying to mix & match manufacturers a tad trying (yes, "other scales are available", but "shudder", as above)....

"WILL paint you - under one condition... That one of you reveals the true size, approximate or exact, of the scale known as 1/72.."


Also dabbling in some RPG work (25mm-28mm); sci-fi, board game proxies & modern policing.

Or maybe I'll just carry on with the traditional wargamer displacement activity of re-boxing the bods, online (i.e looking at more figs.  "Curse You PSR!!"), fiddling with board games - and dreaming up more projects....

Meanwhile, back on earth; I posted this pic below on the FB groups last year.... 


May be of use/interest to someone. I find that for a "Generic Western Barbarian" (Yes. I Know.. But sometimes you need as many bods on the field as you can get..) army they all mix in pretty well once on the table - with the odd Irregular Miniatures 20mm chap thrown in and some 15mm slingers etc. for herd boys and over-eager kiddies...
I "rationalise" the HaT Germans (generally thinner figs. - and sparingly clad) as "youths & low status folk" - on the basis that they ain't been getting the nutriments or are at that teen "gangly" stage..

I will try to do more of these comparison things ("Denyer ! You should be painting !!!!") for different scales as I set up for games/dig things out of boxes since, when I stumble across them online, I find them really useful - given the horrid worlds of scale-creep, pumpkin-heads, "I still really live in the 1970s so never put pics of my products on my website" manufacturers (WTH ?? I gave up buying blind from classified ads in wargame magazines in 1985 !! ) and bloatism (Climbs down from soapbox... Shakes bee from bonnet..).


I will also post some more re-vamps of "How I roll" techniques, event & decision table and "Movement Spiders" previously posted on FB groups, but there will be a brief "radio silence" here, since I'm trolling off to "A Small Town In Germany" to fight our dear friends the Jerries (1504 reenactment, deep down in
Baden-Württemberg) next week.

I shall return - unless they give us "Inselaffen" too good a good pasting (most of 'em are half my age these days.. :) ).  


Wednesday 20 June 2018

And now for something un petit peu différent

A "Where the Heck Are They?" Scenario
Or
What enemy..? Oh, THOSE enemy.....


Between projects - so a quick re-hash of something posted on the FB "Solo Wargaming with Miniatures" group some time back. "How I fight an invisible enemy...".


The scenario (as might already be clear, I love a backstory for my little clashes. I just find it more satisfying.. As usual, click on the pics to make 'em big).

"Commandant Codé of the Legion has been tasked with capturing and bringing to justice that arch-criminal, slaver, gun-runner and ex-Zanzibar Grammar School all-round bad egg "El Crim"; believed to be holed up in a compound just this side of the border; allegedly for a meeting with a well-known white renegade Johnny "Ginny" Guthrie, notorious dealer in "Square-face" and dodgy rifles.
Cmdt. Codé has two Sections of Legionnaires (under Cpt. Entennille and Lt. Pigéon) and one section of Marine infantry (Cpt. Coer-de-Boef) to accomplish this task.


The exact number of hostiles likely to be encountered is unknown. El Crim is known to have at his beck and call up to four score badmashes and ne'er do wells; many with a range of firearms. Guthrie generally works with a small band of similar roughs or alone, but is usually very well tooled-up.

The capture of El Crim (as opposed to his mere elimination) is the main objective. Guthrie, if encountered (and if the situation makes it practicable) is likewise to be taken alive - officially (though a trial is almost certainly likely to lead to an aquittal). Codé's colonel has intimated that things would be far simpler were he (ahem..) to be killed resisting arrest*....."

(* In some scenarios I like to add a "moral dimension" or set of "decisions" that junior officers, away from my steely glare, might take in ways I would not approve. For example; in this scenario the Marine officer and Lt.
Pigéon would certainly have no truck with "summary justice").

In this style of game Activation of my bods' "Big Men" is by card - as SP -  but using a scatter of black cards from a standard playing card pack rather than SP style tokens (e.g. an Ace for the Commandant, a card specific to each for each of the Junior officers, and a card per section for their respective sergeants).


The enemy, El Crim and his dastards, are NOT placed on the board initially, so basically I have no idea what my lads will come up against.  Perhaps, potentially, there will be NO resistance.

Instead, as they move across the table, on every move each of my units throws a dice (1x6d). This throw is accumulatively modified as follows for each of my units:

Did not move/carry out action this turn -1 from the dice throw

Concealed/sneaking and so far unobserved (i.e shot at or in clear view of an already revealed enemy) by the enemy yet -1

Each 12" from the baseline +1

Within 12" of the compound +1

Sounding bugle to pass orders +1

If the resulting total is 6 or above a card is drawn from the "enemy pack" (all the Hearts from a standard playing card pack).  The effects of any such card is applied immediately (see below) and enters the draw pack with the "Big Man"  cards.
This is now an "enemy action card" and will henceforward be used as that unit's Activation Card.


How the Enemy Cards (hearts) work:

A card is drawn when activated by the dice as above.

Number Cards: Number cards indicate number of shooters in cover and opening fire on the friendly unit that is dicing. Shooters can be a lone marksman, small groups/pairs/trios or actual units (8 or more).


1/Ace = Lone marksman/sniper

2-7 = Potential accumulator. If desired, place “smoke” not figures. Next activation of this group throw a dice to see if more folk are also hidden there. A  resulting 6 (added/subtracted from as above) = Yes, there are. Draw another card from the Hearts deck and add that number of shooters to the group to a maximum of 10 (e.g. a group of 2 shooters is activated. The next time the card is activated - assuming it hasn't been "dealt with" in the meantime" - a 6 is thrown. Another card is drawn, a 7;  that number of of shooters are added to the shooter group. Had the first card been a 6 and the second a 7 the maximum group size of 10 only would be placed). 

8-10 = Number of Shooters. Place figures and unit flag/leader. Leaders may form "formations". The troops associated with these cards can be added to smaller group but do not accumulate other than by the leader forming "formations" - as SP rules.


Once we know how many shooters we have we throw 4 dice for this card/group. The result is the maximum distance the shooters are the from target (i.e. the “range”). This “range” is measured out on a rigid measure/tape & “swung” in an arc from the target. The figures/smoke involved will be placed behind/in the cover furthest  from and with a clear LOS to the target within that range (e.g. 4 dice are thrown producing a “range” of 12”. “Sweeping ” within the 12” arc the furthest cover turns out to be only 8” away. The figures/smoke is placed there).

IF there is no cover within the arc range throw an extra dice to add to the "range" until cover is found (e.g. a score of 6 is thrown on the dice. There is no cover within a 6” radius. Another dice is thrown & result is a 1. There is no cover within 7”. Another die is thrown – result 5. New total 11". There IS cover within 11”. The shooters are placed there).


Where the number of shooters are such that they cannot reasonably fit in/behind the nearest cover they are placed adjacent to it (ideally use prone/kneeling figures). These figures are presumed to have made hasty scrapes/sangars or to have dragged light under-brush to use as cover to match those of their companions (small stones/shreds or lichen etc. can be placed to simulate these but these do NOT constitute cover once vacated by the original shooters). 


Colour Cards:


Jack/Queen; A body of enemy charge from cover at the target unit. Throw three dice or more to discover their point of origin as per shooting arc rules above. They will charge in a body from the leading edge of the furthest cover within the resulting arc.
Jack = Charge 11 figures + 1x6d (+ unit flag/leader)

Queen = Charge 12 + 2x6d (+ unit flag/leader)

King; Either (depending on scenario or a dice throw if all three are possible options) Charge 20 + 2x6d (+ unit flag/leader as above) OR a cannon fires from cover (as for shooters but throw 6 dice for range) OR enemy reinforcements arrive


In this particular fight (there is more of a blow-by-blow on the FB Group) I was constantly juggling my forces as they coped with an unknown enemy; individual snipers (who carefully selected officers as targets), less selective groups and the occasional bunch of charging ne'er-do-wells. My own casualties needed to be kept to a minimum and my wounded (I had throws for wounds for each of my men hit) were to be kept safe from the knives of the savage foe. 

Oh, and did I mention? Once the firing started I diced for El Crim (holed up in the compound) to check (simple dice throw) if he had the bottle to stay - or if he would scuttle off-table to safety...

As it happened, the gun-runner never showed and no cannon appeared. My own casualties were light, but I lost two officers (inc. the C.O.). Thank heaven for my stalwart sergeants.... There was a sharp firefight for the enemy compound, but before my chaps charged home the villain in chief surrendered.

This was a seriously fun little exercise. When I get my Colonial Campaign up n' running this system, for fights in close country and "exploring", will get a further outing (and no doubt tweaking). 

Like a lot of my on-table mechanisms, this "hidden enemy" card system needs no special equipment, isn't terribly original (or desperately clever) but it DOES add to the Fog of War which I personally find adds to the fun of solo play....

As always, any queries, comments, snipes or ideas are welcome.....


Tuesday 19 June 2018

Messages. Manouvering. Money - and a word meaning "Endgame" staring with "M".....

How To Lose Friends and Influence, People.....

The campaign suddenly rushes to its finale....  

Cotta's destruction of the raiding party is is good news - but my subordinates are not working together - no scouting worth the name, so it took ages for them to know where the other was, and Cotta's request for Porcius's spare Tribune to be used to help persuade Tribal Chiefs to come-in peaceable-like (a nice, well-bred Tribune can do this. A crusty Primus Pilus lacks the necessary charm) was turned down. Oh dear.......

Cotta stumps off to the hills from whence the raiding party came, bent on pacification by the only method left to him; the old Roman stand-by of burn & butcher... There is no resistance and, after ravaging two previously unpacified zones, he heads to rejoin the Main Force in the west.

Meanwhile, Porcius's North Vexillation heads north to Fort Firmium, where they 
receive the Legate's orders to proceed into the hills to pacify the Serova-Bagadiffa Highlands. 
Thanks to a turn of the card the Garrison at Ft. Occamium get a touch of "Hill Fever" - rumours of raids and burning to the east, no news from The Front and the mist and spookiness of the silent hills gets to them. They desert their post and head off for the Main Force, eventually taking refuge with the garrison of nearest fort (Nidanum).

Over the following turns further cards bring bonuses, in terms of movement and forage, while pacification of the
Serova-Bagadiffa Highlands and along the Isca by North Vexillation proceeds without incident and the Main Force slowly subdues the Coastal Strip and the areas close to the north-south rivers. The locals are so cowed that on the 11th the chiefs of five zones come-in to make submission of their own accord (another lucky card). Things are looking good.. 

BUT..... 

On the 13th (unlucky for some) an agent of the Procurator arrives at Isca (card). A dice throw decides that it take 5 days for him to make his report. The drastic measures (zones subjected to ravaging) and damage from the raids are going to come back to haunt us. To save costs, the time allowed to complete the mission has been reduced by a week.


The next ten days are spent in frantically trying to get round as many zones as possible without exposing the columns to too much risk. In the west I make a couple of bad calls route-wise, losing time unnecessarily, but there is no formal resistance.

Porcius sends his "spare" Tribune off to deal with a zone up in the north east, missed during the early advances. This is successfully pacified, but on the last day of the campaign, after succeeding in their mission, this unit is attacked and severely mauled in the hills en route to join Porcius, causing it to seek refuge in Fort Firmium.

The campaign ends on a bad note: several zones still unpacified, a military defeat (minor, but bad for prestige) to add to the not insignificant losses of the previous fights, and a hostile force loose in the hills; small, approx. 2,500, but more than capable of ravaging several zones before I can catch up with it with my main force. I have NO confidence in Porcius and his crew of cautious officer-advisors dealing with it on their own initiative.....

I pen my report knowing that the Governor will NOT be impressed, and suspecting that, even though the mission will dressed-up as a success in despatches to Rome, my recall to a less lively posting is imminent... 


 **************************************************************
Well, that's that...... Times Up & Game Over... Mission failed - only just, but failed (see map; the blue bits are unvisited and unpacified, the pink pacified, the green ravaged).

It was the ravaging (by my guys and the hostiles) that led to me not having the time to complete the task (bloody civil servants...)...


The main force was left alone for whole of the game, and the cards and dice were generally very kind throughout the campaign - there was very little fighting this time - but only a couple more raids/ambushes could have been enough to scupper me.

Had I been able to predict how kind the cards would prove to be I would have split my forces more - but then would have been very, very vulnerable to bad cards....

My inept North Vexillation commanders (the first getting himself hors de combat and the second showing about as much initiative as clam) were a nuisance, but from reading about real missions that's part of the "friction" of campaigning, so while frustrating at times, the experience was also strangely pleasing....

A fun campaign with minimal bookkeeping - keeping track of all the couriers was the worst part..

My biggest problem was Communication; e.g. at one stage two detachments were a zone - a mere 10-15 miles - apart from each other, but with neither knowing the other was there because couriers were still en-route, and as neither were slinging patrols in the right directions, they might as well have been on different sides of the moon. But again, pre-wireless that reflects a potential reality...

Mind you, at times I was SO crying out for Signal Stations or a good old heliograph.....

Overall this was an interesting, fun trial of different "decision" mechanisms (for the various parties) and a campaign that kept me guessing the whole time. The cards work well, and added tension and flavour....

This will be a system I will try again.....

Saturday 16 June 2018

The Battle of the Ebbuna

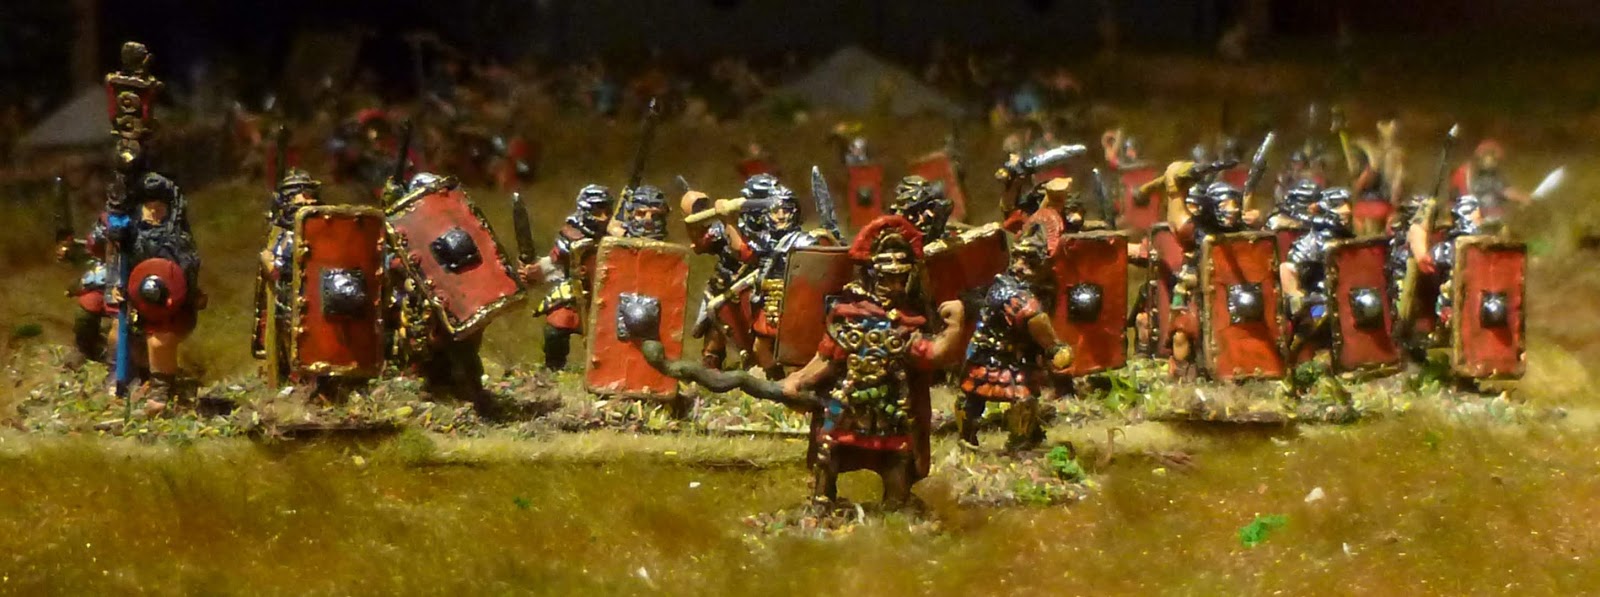
So at last the enemy have come to grips..
 

Having come up with the enemy, Cotta has a decision to make. He needs to smash the Celtic insurgents, hopefully with as little cost as possible to himself. But how best to smash 'em...? 

Now, had this been the main force under the Legate (Me) I would make that decision. But here, Cotta is in charge... I draw up a range of (reasonable) options for him and dice (as usual - click on the pics to make 'em bigger).


He plumps 5-6 for hitting the enemy right with two of his cohorts, keeping one in hand, and probing the Celtic left with his cavalry & auxiliaries....


And so we come to kick-off.

Command tokens and an "event" (Weather only, as before. Had the force under Porcius been more active, or were we not in a pacified region, other possibilities - wandering roman patrols, just as restless, hostile war parties - might have been added to the options).


Things start off reasonable predictably; the Celts C.O. advances his javelin skirmishers and chariotry. These prove to be a minor nuisance to start with, but soon become more than an irritant. The chariots get behind the Roman line. The javelin bods prompt the Roman reserve to shift forward.

As the activation tokens get pulled the Roman cavalry pushes forwards.

During the next move a bunch of chariots rush to run interference with the cav. then scuttles off to get to the safety of the Celtic left skirmishers, behind the wood.


But the Roman cavalry again get activated
and catch up with them at the double and there is a running fight between the smaller cavalry regiment and the chariots.

(Note the little shield with the arrow markings near the cav. unit in image to left. This is a "What speed are we going?" token: one arrow pointing forwards = fast trot. Two arrows = gallop/charge speed.

Also, re. c
hariot casualties: I throw a dice for
each hit on a chariot. 1-3 = a hit on a horse. 4-6= a hit on a crewman.

If a horse gets a "kill result" the chariot crashes and I make saving throws for the crew.

If a passenger gets hit he suffers as normal. If a charioteer gets killed then I dice - 5-6 the passenger manages to get control of the chariot from the dying charioteer. Any other result and he is too slow and the chariot crashes.)

All of the pursued chariots go down (two crewmen survive and run off) and the triumphant cavalry rush through the gap between the woods...

 
....only to be severely mauled by the slingers beyond.

The horsemen pull back - this unit has lost its commander, taken casualties and been severely shocked by the skirmishers.. It will remain pretty much useless for the rest of the fight..

Over on the Roman left the 2 cohorts tasked with assaulting the settlement are VERY slow - they don't like the chariots hurtling round behind then, neither do they care for the quite heavy barrage of arrows & shot from the fields fronting the settlement. T
hese (outrageous?) slings and arrows, though causing few casualties, are seriously upsetting the leading legionaries and the shock starts piling up...

Note: Folks who have been on the rough end of even a blunt arrow-storm - as I have on  many occasions - will know that while body and head protection n' shield stops the actual pain, it does NOT stop the rather disorientating unpleasantness of being walloped, neither does it reduce the desire to keep your head down...


I have only been under very mild sling-shot "fire ", but wo
uld project that a real sling-shot storm would be far more unsettling than Celtic arrows..

 
Over on the Roman right the enemy skirmishers, flushed with success at their seeing off the cavalry, push though the woods and start peppering the Roman forces on the other side.

In response the Roman auxiliary foot press forwards, driving the skirmishers back the way they came...


Emerging on the other side of the wood they are charged by the Celtic close-combat unit supporting the skirmishers. Hand to hand ensues, and the Celts are driven off. .

M
eanwhile, front and centre, the Celtic skirmishers and remaining chariots are doing sterling work, and the shock points are piling up on the cohorts.

The leading cohort has taken a severe battering,
so, at an opportune moment (Activation & CP costs) the Romans do a "cohort switch", pushing the less affected unit to the front (in the pics. each of the spears are 1 shock point, the shields 5 a piece and the dead fellows 10 each).


After a bit of hesitation this cohort charges into the fields around the settlement. The Celtic skirmishers evade, but one of the enemy's two close combat groups soon takes advantage and slams into the flank and rear of the attacking cohort, wounding the cohort's senior centurion. There is a prolonged fight, and the Celts are forced back, but a volley of stones and arrows following their withdrawal finally shatters the cohort's morale, and they break... Cotta will NOT be impressed by THAT.......


On the Roman left we have a stalemate. The Roman centre is taking shock and the odd casualty as missiles come in from front and rear, and one cavalry unit is basically shock-happy and will not move.

Then, suddenly things go dramatically the Romans' way.

The larger cavalry regiment gets activated, and their commander decides to ignore the woodland path and rush his guys into the centre-right - scattering and running down (they get rubbish evade dice) the enemy javelin line.
Meanwhile, in the centre rear, pilae are used by the cohorts there to destroy the last of the circling chariots. Good enough as it stands....But then, as the move proceeds, the Roman player gets a build up of Command tokens - reaching the magic "4" and "YAY!" (as SP2) the cavalry C.O. gets a free new "go"....


Swinging round the side of the woods they complete the rout of the javelin men, then sweep into the flank of the recently-repulsed close-combat unit and the skirmishers of the enemy left, taking down not only a whole slew of troops, but capturing the enemy commander (wounded). These events are enough to trigger a Force Moral drop that shatters the Celt resolve....

With their leader gone, every unit having at some time either had to scuttle to safety from the enemy or withdraw after being beaten in close-combat, and with the feared enemy cavalry ranging the field, the Celtic army breaks....

Cotta's infantry are too pooped to do very much, as is the small horse regiment, but Petra's Horse (the large cavalry unit) is unleashed - to harry and kill off table.....

With their leader captured, the gung-ho charioteers now on-foot or eliminated, their close combat lads having all been bested on the field and the hue and cry of Roman cavalry behind them, the War Party breaks up.... Cotta has succeeded in his mission.......

However, this little enemy raid has caused not insignificant damage to our project. To add to previous losses we have:

Legionaries: 60 dead, 160 seriously wounded, 112 slightly wounded.


Cavalry: 22 dead, 80 slightly wounded.


Enemy dead on and off the field estimated at 1,300.

Cotta will send his seriously wounded to Isca, send a message to the Legate, and another courier to seek Porcius. He will then proceed to ensure the pacification of the point of origin of this raiding party before marching to rejoin the main force.... The boy done good,  but we have a long way to go to clinch the campaign...


I LOVE THE SMELL OF OLIVE OIL IN THE MORNING.........


Wednesday 13 June 2018

Quick thought re. terrain…

How do I decide what the Table should look like in my ongoing campaign, it might be asked..?

Good question… My map has very little actual detail  - just stylised “zones” – so how the Dickens do I decide what kind of country my wee bods should be battling over - esp. as period maps, descriptions etc. are very often of no help at all......?


Well, if I’m feeling lazy -  or if it’s a random/encounter battle where neither side has ambushed, waited for or prepared positions to resist an enemy – I might have a quick look at the relief map for that area (this Ain’t Siluria, but the approximating South Welsh terrain acts as the basis for the campaign), apply IMP, throw some lumps on the table to go under the mat (height & number based on the nature of the terrain), close my eyes and chuck on some random bits of lichen to decide where woods etc. should be placed and put down watercourses if appropriate to the campaign map or if the topography resulting from the above screams “this will be wet/muddy” et voilà…..

My bods then have to cope with what they’re given. If the terrain is “unfair” to one side or the other, well that’ll teach ‘em not to have a plan (or scouts. Basically, this what I do for random one-off games where I don't have a particular theme or purpose)

However, if I want to “realistically” model a battlefield,  particularly in the case of a “Let’s wait here till they come” scenario I am a bit more regimental about things….

As mentioned above, this isn’t Siluria, BUT…. The magic of the Interweb obviously provides a range of images from walkers, hikers and others showing the kind of terrain roughly corresponding to the type of country found in the area of the UK where the skirmish/battle is to take place.   Also, “NOT Siluria” – or South Wales - like most of the UK is very well covered on Google maps, inc. the birds-eye 3d variant and street view.  This gives me not only a general feel of the “lumpiness” of the ground height and slope pitch-wise, drainage, “rockiness” etc., but - especially from the air - sometimes supplies an idea of the kind of land use practicable/likely, even in Ye Olde Tymes…


What WILL be necessary however are often considerable allowances for changes in:

a) Width, path and nature of rivers (e.g.  a modern 
dredged, embanked river with wide, flat, drained farmland on either side was almost certainly a wider but shallower water feature with boggy “water meadows” – if not outright marsh – alongside) and lowland drainage considerations (Most important!! Esp. in England; where what was once marsh became water-meadow, which became drained farmland, which now regularly turns into flooded housing estate).

NOW I remember why we built the Abbey on a hill......

b) Changes in farming practice/land use – esp. the amount of woodland (certainly NOT always “more than now”.. Seriously dependant on period and place) and arable cultivation, the type/extent of woodland management (e.g. For medieval fights what is today “wild, unmanaged woodland” would  almost certainly be tidily-managed woods and coppices  or even more carefully managed and closely supervised “forest”).

c) Settlement/population density will very, very, very likely be subject to considerable “backdating”  - always remembering that local population density and populations of towns can go down as well as up....

 
d) Industrial and other changes to topography.

e) Roads. Roads and tracks move - and what we think of as a "good route" today" was the very opposite of what what would be deemed a good route in the past (
"Lovely, flat straight highway for miiiiiiles.. "Put your foot down" aka "Horrid, wet, muddy river valley. Stick to the lumpy, but dry, hills").

For the particular part of the UK we are operating in (see image from Google maps birds-eye 3d below) there are going to be some big differences in drainage, settlement, land use and even topography (e.g. Is that a natural hill - or a greened & landscaped slag heap? is that woody coomb actually an ex-quarry where a hill used to be? Etc. etc.).


For the battle about to be fought/documented however IMP is going to have a BIG effect on what the battlefield terrain is likely to be like... The salient questions are:

1) Why is the battle being fought?  In this case it is because the high-status leaders of the Celtic army - particularly the charioteers - want to fight it out (this decision itself being more to do personal reputation than with military expediency).

2) What type of ground is likely to be chosen by those choosing the ground - and in this case waiting for the enemy?

Given that the charioteer commandeers have proved to have the loudest voices in Council they want a clear, flattish field to race around on. However, the skirmish element of the army want some cover to feel more secure from the enemy cavalry.

A "compromise field", with a bit of both would be ideal. The zone in question extends into the flatter, wider land south of the hills proper, so the Celts "choose" a location at the point just south of where the hills end, but where farming isn't too intensive (not too many hedges, walls or fences). 


Hence this rough plan. There will be small irregularities, but this will be the general thing the Celts want... 

The Romans will be coming from the bottom (actually the north), debouching from the valley.

The Celts will form a line east-west from the settlement, with chariots at the front.


Let battle commence...


Friday 8 June 2018

Sit & Chat - or Seek and Destroy...?

The campaign rumbles on.

In the west the Legate, satisfied that his detached juniors know what they're doing (?), pushes on; calling in the chiefs of the hills abutting the Nida Valley to submit peacefully and building (another!!) fort and depot. This will effectively tie him up for another six days - unless he decides to break off.

In the north east the cautious C.O of the North Vexillation, Porcius Licinius, sits at Fort Serovium - neither pursuing the recently seen-off Celts (currently moving southwards) NOR heading north to complete his main mission...


What IS he about? Shame... He started so well as a junior officer. Looks like it's the classic "Fine regimental officer. Hopeless divisional commander" syndrome in action.

Yes, the fort needs rebuilding.

Yes, he has orders to comply with.

But letting a hostile force run off like that will NOT do his career prospects ANY good at all..

To quote G. Suetonius Paulinus (from Shipway's "Imperial Governor" anyway - cover pic. below a fine novel, IMHO) "From her officers Rome will tolerate much - corruption, inefficiency, vacillation, lechery, venality. Only two sins are unforgivable; overweening ambition and desertion in the face of the enemy".

It hasn't come to actual desertion, but...........

Meawhile, Primus Pil. Caelius Cotta, sent east from the Main Force with HIS vexillation, is on a "Seek and Destroy" mission.... He doesn't know about the recent battle further north (how could he - nobody actually knows where he is?).

Force-marching in stages (seem ap above) he reaches the Abana headwaters, is pointed in the right direction by friendly locals (diced for - but it's amazing how three legion cohorts with cavalry supports buys you a LOT of friendly faces who suddenly DO know the way after all, up in them lonely hills - see table below) and moves into the valley of the Ebbuna.


Picking up a recent, southbound trail of the hostiles (again, a dice-throw decision - see above) his cavalry fan out and locate the enemy, who realise they have been spotted. However THEY have no idea that this is a new force ("All them Romans look alike, dun'ey").

Even so, the Celts have a choice: turn and fight, run for somewhere safe - or call it a day and scatter the force.

A council is called - and practically all of the chiefs are for fighting it out - after all, the Roman commander didn't make a good showing last time out, did he..?

They happen to be in a zone with a cluster of hilforts. They COULD take over one of these and make the Romans and come get 'em - taking advantage of the defences and using their slingers to good effect... They discuss this...

Maybe it's contempt for the enemy force they recently fought, or overconfidence -  or maybe horror stories of how these tin-clads dig like moles, hem you into your forts with ditches and palisades, then use infernal machines to pepper and burn you out like a badger from its den - that's decided them. .

Whatever the thinking behind it the council decide to fight it out in the open. I note that the chariot commanders are loudest in calling for this...


Meanwhile, as we know, Cotta has no idea what the North Vexillation has been up to. He knows the overall plan - and that there is a minor fort at Serovium. Co-ordination between the Roman forces, which would be pretty useful right now, ought to be being considered I reckon......

But WE already know what Porcius Licinius is doing; Nada... He has no idea that Cotta is anywhere hear him, and as he has pulled in his patrols he is unlikely to stumble across Cotta's force.

As for Cotta; as far as he is concerned the North Vex. should be pushing west along the river valley north of the Black Mountains - three to four days march away by now (and not, as they are, sitting just over the hills to the north of him and less than ten miles away...).

Fort Serovium, to the north, is just an auxiliary outpost (Cotta knows nothing of the attack on the fort or the subsequent battle). He could send someone to see what they know about what has been going on locally - and as a courtesy - but in all the excitement of making contact with the hostile warband this gets forgotten (diced for).

He considers sending a courier to look for the North Vexillation requesting support - say their cavalry, despatched post haste - but decides it is pointless (A simple dice decision. Command by committee for the Primus Pilus ..? I should cocoa....) since the Northern force is bound to be too far away to help quickly - and he certainly can't afford to wait for a response before acting, in case he loses touch with the hostiles..

After a brief rest and a few hours of snatched kip it's "Caligae et Sagmae", straps tightened all round - and his command jogs off on the trail of the hostiles....

And Next Episode: "The Battle of the Ebbuna Plain".

Hopefully Cotta won't let me down, but things are not going as well as they started... G. S. P. would understand the frustrations, I suspect........

Wednesday 6 June 2018

A Word about Casualties...

If you've followed the last couple of table-spats in the ongoing "This Ain't Siluria" campaign you will have noted the casualty round-up at the end of each battle.

Now, hopefully obviously, in a campaign project casualties are important, and this post may well seem to be very much a "Suck Eggs Seminar" to some, but I thought I'd do a quick run-through why the stats. are not a just a gleeful (or doleful)
"Scores on the Doors" - and the (really, really basic) way I handle this kind of issue..

During an actual fight the figures removed will not just be representing the actually dead, but also folk removed "from play" for a range of reasons -physical or psychological damage (temporary or permanent), helping mates or important officers out of harm's way, shirkers, deserters etc. etc.  Afterwards, however, there is a need to separate out the halt and the lame and the "not coming back"....

I use a really, really simple post-battle method: each figure removed through combat figure is diced for (1xd6).  Throw 5-6: slightly wounded. 4-5 Seriously wounded. 1-2 Dead. Shimples....

Then we come to what those categories actually mean.....


The dead/those logged as fatalities: Generally speaking these are the fallen. These will not be available again.

The slow (or swift) attrition of a force on the "board" through lack of supply or through combat is largely going to determine the outcome of the campaign and certainly going to affect the ability of a force to function (Well, like "Duh"). The need to log these - since "equal sided battles" or "points" battles aren't my thing - is obvious.

However, this number will also represent those so seriously physically/psychologically affected that they are permanently out of the game (succumbing, in time, to their wounds or permanently disabled), the "Missing" and the "Sod this for a game of soldiers" guys who have decided enough is enough and won't be coming back to play.

Now, in this project these latter categories are not differentiated. In more modern games/projects these definitions may well be important "politically" (e.g. some of my 19th/early 20thC "Colonial Conflicts") or from the point of morale, and I will look at historical stats. for the period/conflict and apply methods to calculate likely percentages (though always with an element of chance), but basically my "dead" are figures no longer in play for the duration.  


WTF...??  Last Time I buy Strezvda's "IXth Legion" pack.....

Slightly/Lightly Wounded:


The walking wounded. The physically or psychologically damaged who will, with treatment, be available for work or combat in a few days. These will have made their own way off the field/been helped swiftly off by mates or medics.
 
In extremis (such as "The Last Stand at Fort Horrible" type scenarios or
even during an extended battle) these guys may be returned to the fray (faster than they might like) with a reduction in effectiveness.

Seriously Wounded: 


These will potentially recover in time. For some short campaigns this category may not be important for operational purposes, but (as above) in some projects this figure will have a political or moral-related significance.

Note: these guys are deemed not to be able to make their own way off of the field and cannot be helped off out of harm's way during the fight unless either 1) there is a serious lull in proceedings of at least four moves or 2) their own army has a formal, in-combat casualty treatment/removal protocol. Unless these conditions prevail they are left on the field at the end of the battle - which means they are captured. What happens to them next will depend on the cultural and moral characteristics of their foes. Some may end up as prisoners.  Some offered for ransom or exchange. Some, um, not..........


"Bending River or Estuary Convention..? What Bending River or Estuary Convention..?"

In certain scenarios these guys will not be coming off of the field if their positions are overrun or their unit is routed/wiped out during the battle (i.e. any wounded are summarily "dealt with").


Oh, and one final thing: you know all those Shock markers still in place at the end of a fight? I count those as "Slightly/Lightly Wounded". No real reason, but when I'm "scaling-up" from the table (e.g. 1 bod represents 20 guys or whatever) it makes the casualties list look a bit less even... 


Well there we are... Quick, simple, not entirely necessary - but adds a bit of colour to proceedings....

Funnily enough, the same thing has been said about me.. ;)   


Tuesday 5 June 2018

Meanwhile, Somewhere in (Not) Siluria....

The battle of the Serova Hills..

With the Northern Vexillation having marched south we fight the encounter battle....

This will hopefully highlight methods used for when decision-making/activity occurs.

As with all good "Method" scenario designers (ho, ho. ) I have to go through the "What is my Motivation here" process (I always do this, even for one-off fights. This is because unless I "know" why each side is even on the table to start with I very soon get bored..). What I need to "get" is what the commanders' basic plans and intentions are. So how do I do this?

To start with, apart from any campaign factors (very relevant here), I look at the general situation (odds, army make-up, terrain etc.), I.M.P. (Inherent Military Probability) and any known character notes (e.g. we know here that the Roman C.O. - new to the job - is cautious and heavily reliant on a "cabinet" approach, plus has BIG job to do over and above this fight) or decisions (the Celtic C.O. has already decided to give battle - albeit before the full situation became apparent to him). 

The lay of the land is as below. Celts will come on at the top, Romans the bottom.


For the Romans matters are pretty straightforward. This is a "policing action" - with maximum prejudice.... "Reasonable Force" don't come into it.  Even the cautious commander knows that his career is on the line with this one. He needs to prevent further looting and disorder in the pacified zones. He needs to kill or capture as many of the hostile braves as possible, while minimising his own losses (he still has a job to do afterwards, remember?).

He has little choice but to attack.......

On the other side it is clear from the make up of the Celtic army (Light & fast. Few close combat bods.) that theirs is a raiding n' revenge force, not an "Army of Liberation". Basically all they really want to do is jollywack about the hills killing, burning, enslaving, looting and getting some heads to put on granny's mantelpiece (or to show the girls back home). All "in a good cause" of course (whacking the dupes of "The Man") but with the least possible amount of actual risk...
 
Numbers are pretty equal, which the Celts are never going to be comfortable with, and man-for-man the Romans are waaaaay better equipped. The Celtic army is skirmisher-heavy. The Romans have a real "divisional" mix, heavy, medium and skirmishers, plus cavalry. Basically it is fairly clear that the Celts have got themselves into the WRONG kind of fight.. The Celtic commander needs to get his guys out of this situation, but with his honour intact.

Luckily the Celtic force is in a good spot terrain-wise: on a ridge with an almost foss-like feature with a muddy stream along most of its front. Standing, making the Romans come to them, causing maximum mayhem with their slingers and skirmishers THEN retiring with honour intact will look much better for the Celtic commander than simply pulling back. 


 Taking all this into consideration I draw up a basic "decision table".
Throw 1x6D:

1: Withdraw, screening with skirmishers pull back and break-off contact.
2-3: Hold position, use skirmishers to cause casualties for a number of moves (after three moves of shooting dice per subsequent move. Throw a 1-2; retire behind skirmisher screen).
4-5: Hold position, but allow individual Formation C.O.s initiative to take the fight to the enemy where appropriate/if activated.


6: Attack.

The Celtic leader plumps for 5.  


The game, thanks to the Activation Tokens, begins with the Romans pushing their skirmishers and the Tungrian mixed cohort on their left forwards. I will take charge of the Roman side. The Celts (with their "hold" orders) will be played by the "AI".

As the Celt activation tokens come up I dice for each activated commander to see if they will be prepared to leave it (simple - 1-4 stand and await. 5-6 advance). On each occasion the Celts decide they are better off behind the stream and on the ridge, with its fosse-like valley in front, rather than risk exposing themselves to the legions and enemy cavalry. Sensible in my book..

Suddenly the Event token comes up. I throw a dice - 6. I throw another dice - 6 again! Gusty wind.... This will seriously affect any missile exchange. It MAY help the Romans, if it continues, by reducing enemy missile effect if they have to storm the ridge. I throw again - "Buggerus!!". The wind is from the east, i.e. from directly behind the enemy lines. It may disrupt their accuracy, but increases their range.....


At this the right hand mixed unit leader takes his men forward. The C.O. gets an activation, but still wants to hold the ridge. The Centre holds.

The Tungrians get activated again, and open ranks to allow their mounted section through, but get lousy dice - they all end the move in a muddle (they should have closed up earlier.. My bad...). I activate the Alpini with my Command chits to distract the advancing enemy. They advance and their slingers try some shots at the advancing enemy chariots, but to no effect..

Third move opens and my slingers get another chance to loose. Despite the wind effects they bring down a chariot. As the enemy seem reluctant to engage, and I'm worried about them breaking off, I decide to bite the bullet - and, as the tokens are kind, advance my right legion cohorts & aux. support (despite having missed an opportunity to move my centre cohorts earlier.. Silly me). Test for weather - no change. Suddenly some of the enemy react - their whole right wing moves forwards, crossing the stream, some getting delayed by the ditch and its marshy bits on the banks.. With my Tungrians still in a tangle this is NOT a good time for them to get active...
 

Next go: My legionaries continue moving, but two cohorts (out of my direct command radius and with no set orders, so dicing to make their own decisions) swing to the left of the pond and "double-up" instead of holding the line, because of the Thracians in the way. My Tungrians are STILL in a mess, while the enemy skirmishers rapidly move through the woods on their flank. The enemy chariots sweep past my Alpini and chuck some spears, but not before  my chaps' slings take out another chariot. However, the enemy skirmishers in the centre are now (thanks to the wind) getting the range of the Thracians & the Alpini, causing upset & casualties. Despite opportunities/temptations the main enemy force stays on the ridge. If we have to fight our way across the marsh I won't be happy.....

The weather tries, but STILL doesn't change.

Move 5: The legion cohorts advance, but so do the skirmishers on the enemy centre - these being protected by the pond and the marsh - exposing two of my Legion cohorts to flanking fire.


I activate my main cavalry unit on my right and bring it forward.

My Alpini disperse into skirmish mode, close - in order to negate the enemy range advantage - and exchange missiles with the enemy skirmishers and chariots forward from the main enemy line. Shock and casualties on both sides despite the wind. Another chariot is disabled - the formation chief with it. The chariots withdraw. My Thracians also expand into skirmish mode, and move forward. On my right my "Yellow Shield" Gauls also advance, leaving my commander (who seems to have his slow-boots on today) to follow on in his own good time.

The Tungrians FINALLY get themselves out of their muddle, but make little progress, just pushing their horse through the gap between the two southern woods. They have not seen the skirmishers on their flank in the southernmost woods yet......

But these lads have seen them. This is a real "target of opportunity" and the Celts have 2CPs in hand. I feel that only a real morale fail on the part of their leader will prevent them from taking advantage. I throw a 6D - anything above a "1" and they will skip to the wood edge and shoot. They don't bottle-it, and a mass of arrows, javelins & slingstones whack into my cavalry, causing casualties and shock..... End of the move, and things are getting messy.


I need to close to contact - and ideally use my cavalry to trap the large number of lightfooted enemy, in case they decide to make off - but the bog, pond and terrain are going to both slow me and leave my cohorts' flanks exposed to missile fire. I want to totally eliminate this raiding party, to prevent it going off into another zone and causing havoc there, but the Celts are NOT playing ball...... And, indeed why should they...?
Sixth Move: And first activated are two of my cohorts. I'd LOVE to hit the enemy skirmishers wit
h pilae, but the wind is against me, so we charge. The lightly clad enemy skip out of the way - but only just.... 

  
On my right my med. Gallic cavalry (milliary) unit breaks into a canter, but the chaps are funnelled & slowed by the farmstead. 


Meanwhile the Tungrian cavalry contingent break away from their infantry lads and make for the enemy main skirmish line, while their foot supports start flushing the enemy skirmishers out of the woodland. As elsewhere on the field, the enemy skirmish bods are quick on their feet and there is no contact. The Thracians skip forward, but still no contact their either.....


Then the enemy wake up. On their left a flurry of stones and arrows hits both my Gallic infantry (casualties and shock) and my right hand Gallic cavalry; killing their Prefect (the perils of leading from the front). On top of this their charioteers move forward, make a decision check, debus and CHARGE MY CAVALRY ON FOOT (!!!), bringing their close combat guys with them. My cavalry cannot evade (they have already moved - and anyway cannot turn, hemmed in as they are by the farmstead) and with their leader down and taking hits in the confined space they recoil....!! This NOT how things are supposed to work.


 My left hand Legion cohorts push on, led by the Alpini - to little real effect. However, the pressure of my guys pushing forwards has freaked out the enemy C.O.  The cohorts, against which he has no effective close combat counter in the middle, are getting too close, and his skirmishers are getting edgy about being trapped against that cliff-like slope. He sounds a general retreat - EXACTLY what I don't want with my cavalry in disarray.....


Looks like move 7 will be the last, as I cross my fingers for some opportunities to actually cause some damage...

The Gods are with me - my two right hand Legion cohorts rush the skirmishers in front of them, who evade, but not all are quick enough, and they take casualties. At this point the enemy C. in C. withdraws himself from the field.  My Alpini loose shot at the enemy skirmishers in the enemy centre, then the Tungrian cavalry move in. They are slowed by the ditch and so cannot charge, but trotting in, against the scattering skirmishers they do well, cutting more down at no physical loss to themselves. Meanwhile their infantry contingent pushes through and out of the woods.


But things do not go all my own way. On the enemy left the infantry ignore the call to pull back and follow up their earlier success, charging my Gallic horse again. The cavalry are in too deep a formation to easily evade, and with command & control gone they are confused. There is a melee. Exchanges are pretty equal.

Meanwhile the skirmishers on the enemy left, just behind the cavalry fight, cause some serious casualties and shock among my Yellow-shield Gauls. Things are not looking good here. The Vexillation Commander rushes over as the cavalry pull back to regroup, shouting them into some kind of order.

In centre left my two other legion cohorts move forward, one crossing the stream/ditch, the other moving forwards, not as quickly -  since the commanding Tribune has chosen to lead the faster cohort personally - but nearly outflanking the skirmishers on the enemy far right.


The move ends. There are still fighting enemy on the field.

Move 8: The enemy right pulls back, but don't get enough momentum to cross the ditch... The fight seems to have gone out of them, but they are too far away for me to do them any damage.

Over on the enemy left the dismounted charioteers take advantage of the Roman cavalry withdrawal to sweep through the farmstead, intending to take my Yellow-shield Gauls in the flank. Luckily for me their dice are rubbish, and they fail to contact. Their skirmishers shoot at these Gauls again, but with little effect this time.

Meanwhile, the Alpini run over to back-up the Tungrian cavalry, only to get caught in the (bloody!!) ditch.. THAT small water feature has been a real pain (only takes three dice pips to cross it, but it has swallowed pips JUST when you need them...).. 


My right hand legions swing round towards the enemy left, causing the skirmishers from the enemy centre to evade right off the table, just as the skirmishers fighting the Tungrian cavalry also make off. The move ends with nearly half the enemy already making their way out of my reach. This is NOT good...

Final move - or not as the case might be.... The Alpini and the Tungrian cavalry get in among the "running away" skirmishers in the centre, but most of them scamper away. But that's about it for this move...

Finally, finally: despite the Tungrian inf. pushing forward, the enemy right withdraws is good order (no doubt shouting challenges as they go..).
In the centre the enemy have pulled out completely.

Over on the
enemy left/my right our Roman C.O. takes charge of the wavering Gallic cavalry, dismounts some of the turmae and advances to engage the enemy at the farmstead.

There is an inconclusive bit of bashing, then the Yellow Shielded Gauls turn
to face the huts, the enemy now have to contend with my lurking cavalry, the dismounted lads and the foot Gauls..

This is enough for the local enemy commander.. Having made his name by driving back my cavalry -  and his flank threatened by the Gallic foot he pulls his men away, remounts his chariots and exits the field, taking his men with him. 

The Roman C.O. orders "General Halt" to be sounded.... The enemy wounded who haven't run off are - um - "treated". Battle ends. Game over... I have failed in my objective and the enemy has escaped......


Or have they......?

This a part of a campaign. The enemy are still in view, albeit off table. The Romans have light troops and cavalry. Whatever happened to "Continuous Combat"? Why should I think there's a final whistle....?

Well there ain't.....

The Roman C.O. has a quick option sheet drawn up and throws a die (maybe the other officers are shouting "Why the "pardon my Greek" have we stopped!!!!!"). Options are:

1 - Halt and regroup.

2-4: Ummmm....... Hang on I'm thinking (Cautious commander, remember? What if the enemy turns, and he loses his cavalry to all those missiles? The main task is still the campaign....)

5 - All light troops and cavalry pursue in good order.

6 - Pursue, with just the cavalry (what's the Latin for "Tally Ho!"?).

And I grit my teeth while he thinks for three moves (THREE!!!) before sending off the cavalry...

I do an off-table "pursuit", with Activation Tokens in the tub as if troops were on a table, to see if the Romans get close enough for action (in which case I''ll fight it out on the Table with bods.).

As it happens the cavalry - who have been chafing at the bit while the boss dithered, race off with speed; but with the enemy having a three move head start they've got some catching up to do. Things start well, but suddenly the weather changes. First the wind drops, then, after two reasonable moves, the heavens open and a storm hits. Visibility and movement affected. Things (and the dice) go pear-shaped...  In the pouring rain, the enemy slips away........ Oh how very dear........

The Butcher's Bill:

Romans:

Yellow-shield Gauls: Tribune dead, 40 dead, 46 lightly wounded
Legion Cohorts: 20 dead, 62 slightly wounded
Alpini: 20 severely wounded,
25 light wounded
Gallic Cav. (Mil) - Prefect dead. 25 wounded.
Tungrian Cav. : 22 slightly wounded 20 wounded.

(Dead: 71. Wounded: 219)

Celts:
 
1 chief wounded, 30 chariots lost, 20 charioteers dead, 10 wounded,  40 warriors dead, 51 wounded lightly, 200 dead or missing skirmishers, 211 lightly wounded skirmishers.

(Dead or missing; 260. Wounded: 273 - a
ll wounded are lightly hurt/walking wounded. The more severely wounded were left on the field or dropped during the pursuit). 

The Day is done.. The Celts move off unmolested.....


New Year. New House. New Plans..

New hope...? Well, we're in the new house at last.... I now have: A garage to convert into a workshop for, amongst other things, modelli...