Tuesday, 7 March 2023

This Ain't Space Hulk.....

 A Bit of Quicky Sci-fi.

An idle day between house-horrors, so a quick game, thinks I... However, the curse of "Mission Creep" cut in and I ended up sorting my Space Hulk bits then making a big layout (DOH!)...


Mission One:

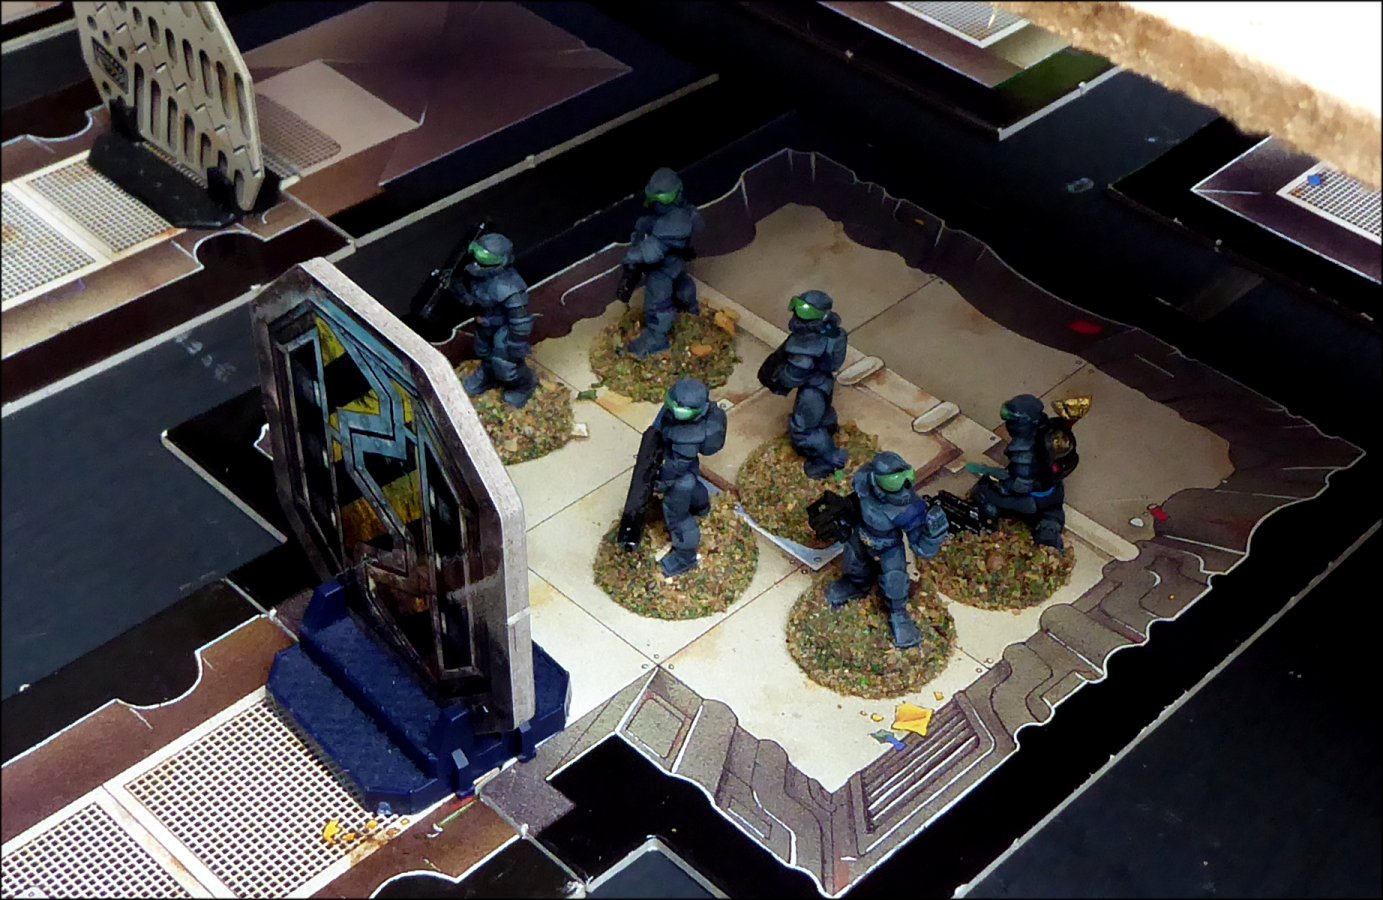
An exploratory game; a squad of troopers poking around to try to find survivors on a previously attacked vessel and bring them back to an Access Point. Scattered around the board are tokens which may represent survivors in "Safe Chambers". These must all be checked. 

Potentially hostile "Blips" arrive on a "6" each move (test for placement with a 12x6D and 1x6D for location coordinates, then throw 1x6D for number of Blips).


Blip/Alien movement decisions are dice-dictated based on ad hoc probability tests unless Rescuers/survivors have been seen or are in LoS.

 Among the Blip token mix are some "survivor group" tokens (I used the mutant/hybrid tokens for this). These guys may be stationary or even lurking around Alien groups (hiding in ducts/whatever and moving on the basis that Aliens may, like the survivors, be seeking the Rescue Party). When seen by the Rescuers a 1x6D test tells how many survivors are in the group. 

All main security doors are locked and can only be opened by the Tech. Crewman on a test throw [+10 on a Dx12D with a modifier of +1 to the throw per previous attempt. Ordinary crew using the Tech Crewman's equipment must get a 12 to succeed and gets no modifier).


Otherwise rules are pretty much as Vanilla Space Hulk.

So to the game... 


The guys poked about, but pretty soon some Blips appeared. It was decided to keep the group together as they headed up towards the crew and command area.


But things started to get pretty complicated pretty quickly and the team were quickly attacked.

They managed the initial assaults well enough, but on approaching the command Area more and more enemy appeared [Unlucky dice]. Casualties were taken.

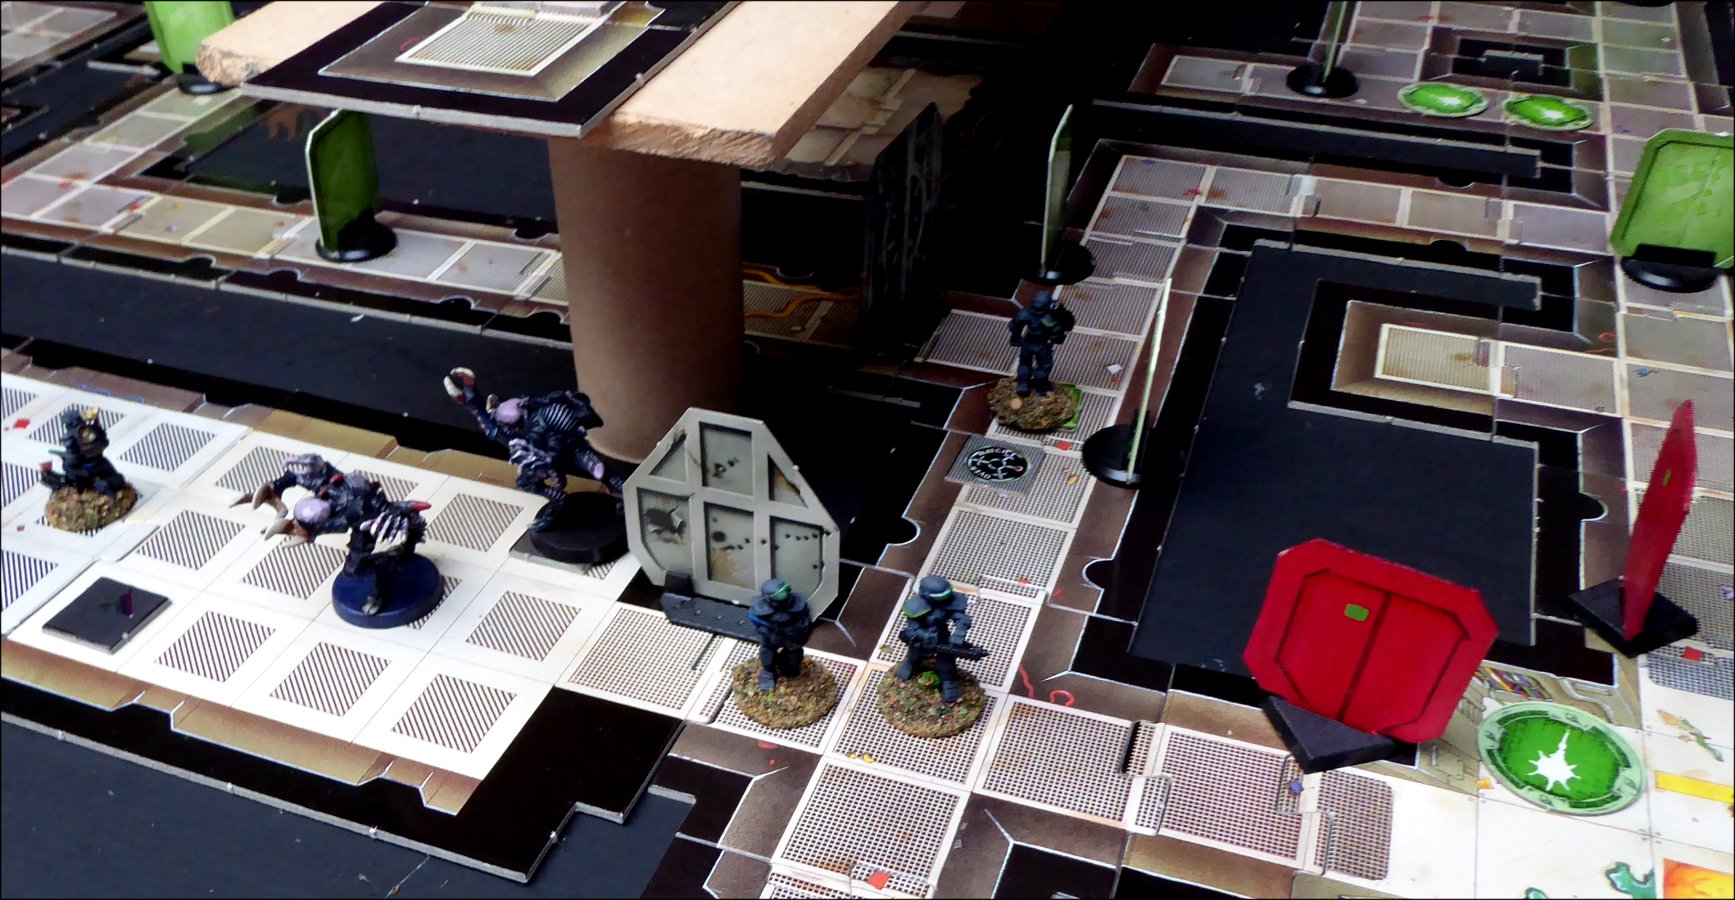


Some survivors were unearthed (Blip)..


But then the Aliens attacked en mass.

In no time at all folk were running for their lives - and only one person (one of the survivors) made it back to the access point. 


A quick and bloody game with my guys trounced but the rules worked well and kept be on edge throughout. The Space Hulk basic game rules, though very simple, always give a lot of fun. You don't need excessive chrome or several score pages of rules for that....


Mission Two:

A bit more complicated. A ship (coincidentally the same design as above) wandering along, minding its own business. The c
rew are scattered over the ship, going about normal tasks in "soft" kit. They carry basic weaponry as standard but are not "on alert".

But then the vessel comes under attack - via the two vents.

[Technical Notes: ; 1x6D attacker blips arrive at either or both vents on a throw of 5-6 (reducing to a 6 after three moves). The Blips want to prioritise as follows:

1) Accessing the airlocks (at "A").  If they access these then they can let their fellows in. Once an Air Lock is broken open 1x6D additional blips arrive each move at that airlock.


2) Killing the crew.

Where there is no clear advantage in a choice of routes or victims in sight then the route is decided randomly by dice throw. Some choice tests may be "loaded" for priorities in an ad hoc manner.
 
Opening an airlock sends out a general alarm across the ship and allows "space" in (or air out). 

This airless zone moves at 12 spaces per move. Aliens can survive this decompression and air loss, but any crew-person without a survival suit finding themselves in an airless zone MUST reach air/be behind a sealed door/in a survival suit within four MPs in the same move they have been exposed to space or die.

Survival suits are found in the five Survival crates scattered about the ship. On opening a crate throw 1x6D. This is the number of suits therein up to a total of 12 per crate. On a throw of 6 when testing for suit numbers throw once again. THIS total is the number of suits in said crate. 

It takes 2MP to put on a survival suit. Each crew-person can carry two survival suits (even when suited-up or carrying weapons; these are flimsy, crisis survival suits - not armoured or deep-space kit).

However, bad for the aliens; opening any airlock sets off an alarm automatically sealing all doors to unauthorised personnel. Therefore, once the aliens open an airlock all doors thus far unopened lock.  Such doors can be opened by crew-persons, but aliens can only access such a door by forcing it open (on a throw of 6 - one attempt per move). 


On the sounding of an Intruder Alarm or the Air Lock Breach alarm the Captain* must remain in the control room and test to see if he gives any instructions over the Tannoy (he does so on a throw of 5 or 6 on a 1x6D test made once per move).

Once he has issued such instructions he must test again (and remain at his station) to see if he broadcasts beyond the ship for help (on a throw of 6).

(*If all this seems odd, remember the captain here is a civilian on a routine flight and could panic/shut down at this unexpected turn of events)

IF the Captain fails to issue instructions after an alarm then all local supervisors (blue caps) and individuals or work parties without a supervisor test to see what they do.

On a throw of 1 they flee to try to reach the Command Area OR the nearest safe space/survival crate.

On a two to five they remain put, securing the area they are in.

On a 6 they go bug-hunting.]

And so to the game....

From move one the Blips started pouring into the ship from the port-side rear and central ducts, triggering an Intruder Alarm. 

Two crewmen were cut off in the port cargo bay by the sudden ingress. They killed a few attackers, but were cut down within a few moves. 


The Captain froze - and issue no orders as he tried to assess what was happening.

A couple of isolated crewmen, Barry and Jules, in corridors on the starboard side ran towards the command centre. 

Supervisor Charles, in a room centre rear with a work crew, held his ground and put his men in Overwatch to repel any boarders heading his way. 
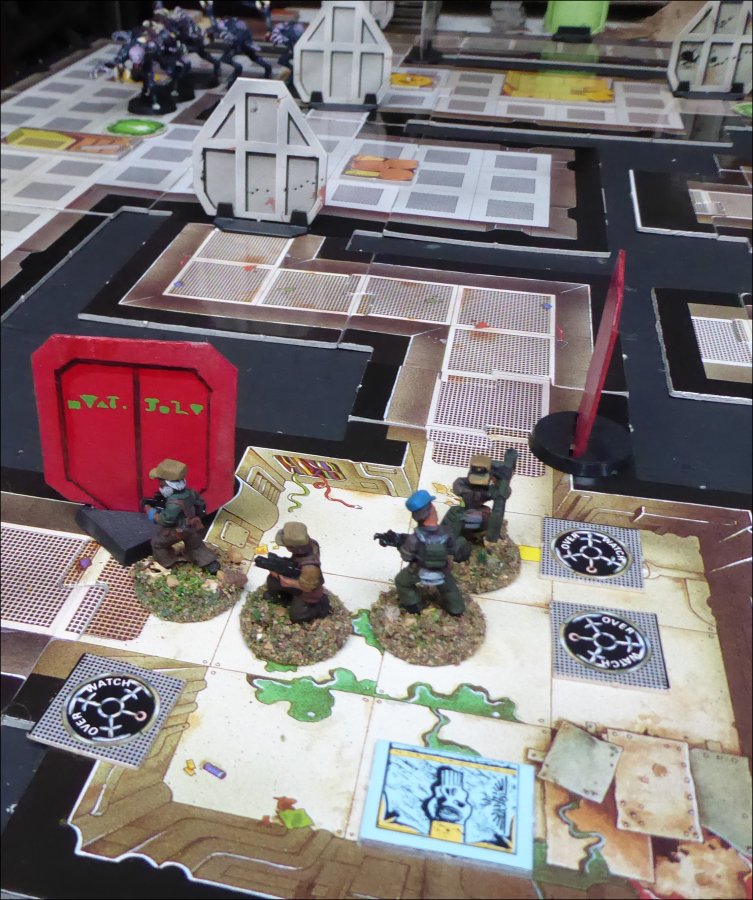


On the Upper Corridor, repairing a floor breach, were Old Mac and Jimmy. They stayed put - Mac couldn't see the point of running about without knowing what was occurring and who was where. He and Jimmie simply drew their blasters and went into Overwatch.


Crew-woman Lillie was alone in the Stasis Chamber (port central). She made for the Command Area, but in her haste forgot about the blocked and bulkheaded passage forward of her - losing three moves as she realised her mistake and returned to the Stasis Chamber - just as Aliens entered it. 
 
[Note: for Command Points sergeants/supervisors and the captain got a 1x6D's worth per move each. Isolated groups/individual outside the Command Area tested individually/per group on a 1x6D. On a throw of 5 or 6 for a group or 6 for an individual they could dice for CPs themselves on a 1x6D.]

The Aliens poured into the ship, swarming through the port cargo bay and heading towards starboard, while others pressed towards the central air lock. A group of others chased Lillie into the Stasis Chamber and/or headed for the forward Air Lock. 

Crewman Jones was alone in one of the port cargo bays. He ran towards where Supervisor Charles was holed up. 

In the Stasis Chamber Lillie clambered up the ladder to to the Upper Corridor, and opened fire on her pursuers.


The sound brought Mac and Jimmy running in Lillie's direction, guns blazing. It was a close thing, especially when Lillie's blaster jammed, but together they dealt with the few Aliens chasing Lillie.


The remaining Blip in the Stasis Chamber pushed on towards the forward Air Lock.

Jones ran towards Charles's room, but luckily for him kept his head (dice test) - stopping and shouting before he rounded the last corner of the corridor leading to the refuge. Had he run out unannounced into the view of someone on Overwatch without warning there was a likelihood (test) that they would open fire on him.


Up at the command Centre the captain still failed to act as the Blips ranged through the corridors and cargo bays.

Suddenly the Air Lock Breach alarm sounded - the doors locked - and there was a drop in pressure; the Aliens had opened the central airlock to their supports. More Blips poured in via the Air Lock as the reduced pressure wave tore along the corridors. Isolated groups of crew now tested - most  in Command Centre rooms went into Overwatch.

Supervisor Charles ordered the doors to his room sealed.

Lillie, Mac and Jimmie ran to the central chamber of the Upper Corridor and closed the doors at either end.

In the Command Centre itself there was still inaction - and no commands from the captain.

The Aliens now had free range in the unpressurised sections of the ship, breaking down doors to get to the Command Centre or forcing bulkheads and debris to get to the forward Air Lock. 


In his refuge Supervisor Charles ordered the Survival Suit crate opened - six suits; one for each in the room and one to spare. This was good. Struggling into the suits his men could soon open the doors - giving them a wider field of fire if the Aliens approached. 

Mac opened the survival crate in their room - one suit between three. Not good.

Barry & Jules got into the Command Area - nearly getting shot down by trigger happy guys on Overwatch - just as the captain decided to take command. He ordered Barry & Jules back to the Survival Crate in starboard forward. Nine suits were found. Over the next two moves eight of these were distributed among the non-operational crew-persons in the Command Area.A  Distress Signal has (finally) been sent out, but there has been no pick up from anyone within range [Test each move 2x6D. Result of 12 means a response].  

Meanwhile, Charles's group came under attack, they fired back - but crewman Wills overcharged an Assault Cannon, which exploded - killing everyone in the room. Disaster !! And just as things seemed to be going Charles's way.... 


Mac Jimmie and Lillie decided who would have the suit; the idea being that this crew member could make their way to safety. Mac (test) wouldn't take the suit. Jimmie wanted the suit, but (test) bottled out of leaving the room. Lillie (test) volunteered to take the suit, but instead of heading to the Command Centre she would try for the Port Cargo Bay and search the Survival Crate there, bringing back any suits found for Mac and Kimmie. She clambered into the suit and set off. 

By now the Aliens were pressing on the Command Area - there would be a prolonged battle, as the eight suited-up crew members set up fire lanes to control enemy access. Aliens fell by the dozen in frenzied attacks - though there were some close calls. By now the number of enemy making their way into the ship had dwindled (tokens had been exhausted), but nearly two dozen Aliens plus half as many Blips remained - and nearly half the crew in the Command Area were unprotected if the doors breached and the life-giving air lost. 
  
In a now quiet part of the ship Lillie made her lonely way to the cargo bay - dealing with one lurking Alien e-route and discovered four suits stashed away in the crate. Taking two of the suits she made her way back towards Mac and Jimmie - while being stalked by another lurking Blip - taking about seven moves to do so. All three now have suits. But what should they do...? 


Once "suited up" the trio decide to go and see if they can help the Command Crew [dice tests]. They do so, drawing off some of the attackers, but then they themselves have to withdraw, eventually making their way to the central air lock, followed by the enemy. 

Meanwhile the Aliens continue to throw themselves at the Command Centre. The attackers get whittled away, but eventually they both breach the defence perimeter and break through to the Command Room.


The decompression kills the unsuited crew. The Aliens cut down the suited defenders. Only one crewman (sent to shut off/control the forward air lock in case of rescuers arriving ) gets away from the massacre, but is hunted down in the corridors. 

The Aliens now have control of the ship. No Distress Signal has been answered.

Despite success in taking down the few stray Aliens in their area the prospects for the trio in the central airlock do not look good....End game.


Conclusion:

Well, that was another fun, furious game with lots of imponderables to make things interesting. Simple rules. The game is almost MADE for solo. Will have to dig out the old Space Hulk tiles more often. 

As always, queries and comments welcome.

Apropos of which....

I put a poll on the Solo FB page about my making links to/continuing this Blog.

The jury seemed to think it worthwhile me keeping-up that practice and the Blog itself) up.

According to the Stats. I seem to have a lot of "silent viewers", which is nice as at least I don't feel that I am crying into the void (they can't ALL be Bots.. ;) ) but as I have said before, any critiques and queries about the Blog itself, expansion on the methods used or even wanting to bounce ideas off of me (such as  "how can I solo-ise this rule set/do you have any ideas to help me/how would you go about this project?") are always welcome...


Sunday, 29 January 2023

Post Xmas "Crossfire" etc.

Delayed Follow-Up..

Alas, seasonal duties and a series of seasonal bugs delayed my experiments (and some deliveries tempted me into some displacement activity), but here at last is the threatened "Crossfire" experiment write-up...

First thoughts were that this would work fine with a terrain-heavy table, say for an ACW or AWI game, where men are not necessarily standing in full view of each other in a "please shoot me" manner, but on a classic 18th, 19th, medieval or Ancient style "open battlefield" - or battles on wide sweeps of veldt or steppe or deserty scrub ?  Hmm.. My thoughts here, for those types of fights, were "This isn't going to work"...

So that, of course, would be the type I would try...

Normal "Hidden Enemy" rules would apply (i.e. test for each Potential Ambush Point approached) and anticipated that these would work fine in generating enemy reactive fire/presence, but my main concern was how I would manage any examples of long movement in the open and broad flanking movements, out of LoS of the other side's artillery and in areas uncontested/uncontaminated with PAPs and hostile troops.

My answer was, in the event of such moves, to test for enemy action for each significance terrain feature crossed/approached as I would for a PAP and also perform a scenario-specific Events Table test per such "move" (standard movement per troop type + 1x6D x inches) to allow for poor guides/getting lost/officer incompetence/ unexpected halts or delays ("Nice strawberries...") etc.


So, to the game. I foresee a simple scenario of two armies facing each other, with me playing one side and the AI the other. A quick set-up, and....

The field is the ground facing a corner of the friendly city of Feroozabad, which, for the sake of the narrative, is being blockaded by the enemy. MY job (coming in from the left of the top of the pic below, on the "Wrong" side of the river) is to see off the hostiles facing me, and get my lads over the bridge and ford.


I expect the immediate action to take place in the area below. There are plenty of potential PAPs, but also some large (in "Crossfire" terms) open areas where long movements could be made without interruption.


I must deploy and formulate my Plan and orders first. My troops arrive (below): three infantry brigades, in roughly three lines, two guns (in the centre) and some squadrons of cavalry in two units (one on my left, one in reserve behind the infantry left of centre). I make my plans.

My Right will advance to the ford, supported by the Centre. Once the ford has been secured we will then cross the open ground, dealing with any resistance, take the Bridge and cross with the main force there. No enemy are in sight while I make my plan. 

Oh, there they are (below)....

Six large regiments of infantry (in two brigades; each regiment being half as big again as one of mine) deployed in two lines on my side of the river between the Palace and the Royal Tombs. Also visible are two large bodies of cavalry (each roughly numbering my whole cavalry strength), on the other side of the river: one on a low ridge above the bridge, the other the other side of a nullah within attack distance of the ford. However, these are just the enemy I CAN see......

I dice to see who has the Initiative and I get it.

I move two regiments (one European, one Sepoy) on my right wing towards the mill, so as to attempt to control the ford. Under normal "Crossfire" rules there would normally be no measuring, but I throw a red die (to see how far beyond normal move my guys have to test other than for PAPS) and get a One.

The PAPS they would pass en route (the scrub by the river and the walled enclosures under the hill) prove "safe", however, at move end, approaching the Mill, we test again and get a 6; we must make a card draw for possible enemy action/reactive fire. 


This proves to be a false alarm (red numbered card). We throw to move again as we still have the Initiative. We can move nine inches (red dice) but must test at move end for enemy action (card draw again).


My chaps complete their move, blithely approaching the mill.


Then I draw the card - at the same time dice testing for the flanking PAPs.


Nine of Spades... This produces nine stands of enemy opening Reactive Fire at close range from the mill. Bad result for me.


My guys get nastily hit, their brigadier is killed, they are staggered - and the enemy gains the Initiative. Their two brigades facing my guys test - and will advance.


As the enemy start moving my artillery are permitted Reactive Fire, but I have to decide when to shoot - at long range - and keep them at a distance while reducing hits, and my chance to take the Initiative, or wait till they get closer - maybe even up to close range....

I decide to open up at medium range and my gunners shoot at the enemy.

Great result. Two enemy units are staggered by my guns. as a result. I regain the Initiative

My right flank units come under reactive fire (they don't need that), make a decision test (dice) and elect to fall back. 


Meanwhile, my left wing advances, triggering a hidden Enemy Test at "move end".


A six - I must make a card draw.


Oh dear... Joker - a enemy mass attack by previously unseen assailants. I throw a dice to see how many dice worth of Stands of three I face. 


Five - so five dice loads. 


I score eleven on the five dice - not too bad. But eleven stands of three enemy per stand. Now to discover where they are coming from. I throw three dice - one pip = one inch maximum distance - and get fourteen.


An enemy cavalry charge of eleven stands launches from the graveyard towards my Left.


As they charge my guys shoot reactively at close range, and the enemy are staggered. Excellent. The Initiative is mine.


Over on the Right my general trots down the hill to try to stabilize things. He rallies my leading regiment, but his actions prompt reactive fire from the mill, and although more Shock is received it is not enough to allow the enemy to seize the Initiative.


Over on the left the enemy cavalry pull back, and as I still have the Initiative I advance my left wing. I am also able to launch my nearest cavalry at the discomforted enemy horse..

My donkey wallopers take serious casualties in the resulting melee, but the larger body of enemy is routed. 


The enemy perform long range reactive fire at my moves on the left, but to no effect.


I still have Initiative, so move back to my Right. My European regiment opens fire at the enemy at the mill and their Sepoy supports charge home; intent on taking this troublesome building. This action produces reactive fire from the mill.... 


......and THEIR supports.


My Sepoys manage to charge home, but are thrown back, staggered - and I lose the Initiative.


The enemy now have the Initiative, on my Right they continue to shoot at my troops, and stagger my guys. They then advance a regiment to the base of the central hill unchallenged, then attempt to rally other units in the centre, but are only partially successful - so lose the Initiative again.


Over on my Right my men simply take in cover behind some walls - prompting some ineffective reactive shooting from the enemy. I decide not to risk losing the Initiative by a failed rally attempt, so look elsewhere.. This is where Crossfire excels; decision-making, assessing risk  and prioritising is a key - and worrying -factor. None of the comfort of "I still have PIPS left" or "I still have plenty of tokens in the tube".


I focus on my Left, advancing and opening fire on the enemy's already Shocked infantry, hoping to force the day.


The enemy responds in kind, but causes only slight Shock and one of my regiments charges home, as I move my cavalry up to support and threaten the enemy flank.


The enemy Right is discomforted and withdraws.

With most of the enemy army shaken or pulling back, and only the men near the mill seeming determined to contest the field (and a
s this was a one-off, experimental fight, rather than part of a campaign) I decide that will do. 

I have tried the method as much as I feel necessary with this fight - and anyway have to clear the decks for visitors....    

Thoughts and Conclusions:

I felt that the procedures had definite merits. Certainly the Hidden Enemy elements I like worked fine with the "Crossfire" concepts - and would work equally well if applied to the kind of fight the rules are actually intended for. Next time I go down the WW2 skirmish route I will give certainly give Crossfire a solo outing.

I liked the fact that, as with the skirmishes for which the rules were designed, the Initiative aspect meant I spent a lot of thought in considering where and what actions I should carry out; balancing my wishes and needs with the fear of losing the initiative. I wondered if a timer or stopwatch, to limit my thinking time, and add more stress, would be good. I suspect that it would. 

As the game had to be played in spurts (due to other commitments) I did get a little lost at times - so some kind of marker system indicating who had the Initiative at any one time would have been be useful to me. Simple to sort now i know.

When the Initiative lay with the enemy things were a bit scary - not a bad thing at ALL - as at any time a mass attack could come in, with me having to decide at what point to risk using my reactive fire (long, effective or close range). Luckily for me the AI had some dreadful failures in attempting to rally his Centre and Right. 

I'm not sure that the system doesn't make certain moves over-powerful (big, sweeping attacks), on the other hand that may be more realistic than the chess-like conventions of most wargames, where you have time to think and ponder (SO unlike the real world)

I will have to think a bit about the Reactive Fire and Morale aspects a bit, but feel that it will be worthwhile thinking and tweaking the concepts. The game was fun - and certainly MUCH quicker to play than my usual "Activation Draw" way.

So, there are. A worthwhile exercise.. Thoughts and comments always welcome.


Round-up.

Meanwhile, I have started the new year with some reading, researching and musing over 6mm gaming/Solo campaign priorities for 2023... 

Should it be the "This Ain't The 45" project (which I feel needs more Jacobites. The Irregular Miniatures ones are lovely, but ideally want mixing with the H&R ECW Highlanders, which are sweet and compatible, but which have not been re-issued yet) or the "This ain't Turkestan" one (which needs more folk painting up/converting)...? Hmmm....

Re. the former: an hour or two spent looking at lovely, lovely maps (links) may have swung the balance....

https://maps.nls.uk/military/scotland_text.html#roads

https://militarymaps.rct.uk/other-18th19th-century-conflicts/jacobite-rebellion-1745-46

We history lovers (& gamers) are SO lucky regarding the resources at our fingertips these days.

There will likely be a hiatus here on the old Blog - as we may well be moving house in the next few weeks and my playroom activities are likely to be mothballed as we tidy, titivate, throw all hands to the pumps and attempt to generally make the place look ship-shape for selling..
.  

Meanwhile, as always, comments, snipes and thoughts welcome...


Sunday, 18 December 2022

A "Crossfire" Experiment...

Initial Thoughts for a Crossfire Principles Solo Experiment

Basics:

The principles follow those of the WW2 "Crossfire" rule set in that having "The Initiative" allows an Active Player to fire, spot enemy or move units/formations as many times or as far as he desires in a single move, until an attempted action fails or until action is interrupted by successful enemy reaction/action. There are thus, generally, no measured movements. 

The "Crossfire" rules are, however, intended for small unit WW2 skirmishes where distances are short and real-life weapon ranges, even when scaled to a ground scale, generally exceed the table dimensions. 

On large scale battles (e.g. in 6mm) and periods where missile weapons have limited ranges within the scale being used this will not the the case and there will therefore be a need for range distances to be applied to firing (as per the conventions of the rules being used). 

In some circumstances movements ("Have they moved into range?") may also need to be occasionally measured. 

Certain periods/conflicts, by their general nature (usually dictated by the scale of operations and command and control issues) involve large areas of open land. Given that "Crossfire" is designed for small (company level) scale actions in close-terrain situations we may find that the rule conventions simply do not work well for the actions I have in mind. However, that is, largely, the point of the experiment. 


1) Hidden Enemy (moving/spotting): 

Clearly, since I will be the "Human Player" I have to make a decision on how the AI will deploy and "act" in advance of playing. I considered using "Blinds" placed on the table, as used in some of my early games and as seen in some videos of certain online games of Crossfire where an attacker is approaching an unknown/unscouted defensive position. While these (a mix of "real" and "fake" Blinds) work perfectly well I have occasionally found them to be an unnecessary (if often visually pleasing) complication in solo games unless the Blinds are themselves called upon to move (i.e. as noisy/careless patrols, search parties,sentries etc.).

I have therefore decided that the standard "Hidden Enemy" conventions used in some of my recent 6mm games will be used initially (being tweaked per game or being Scenario-dependant as usual) i.e. that the Table is "Live" for its entire width and length - as may be its edges (other than, usually, the Friendly Player edge). 

Thus as well as the general "End of Move" Enemy Action test (see below) a unit in the open passing in LoS of a terrain item ("Possible Ambush Point" - hereafter "PAP") providing cover for Hostiles within the scaled "shooting distance "set for the scenario must test for any AI action from said cover (See my Pushna Valley and "Ain't Zululand" reports - among others - for examples).

ANY terrain item sufficient to provide cover for an enemy unit is a PAP and will need to be tested for when approached/passed by any Live Player unit moving with Initiative until "cleared" by a friendly unit (i.e. moved through or Scouted/subject to a successful "Spot" check and thus deemed safe). Once "cleared" no spotting or tests will generally be required for the PAP*.

(*Note however that ranges - and hostile equipment - will need to be taken into consideration and that some Scenario Card Draws may allow for "safe & scouted" locations to become hostile  - the pesky enemy can sometimes both creep about and hide).

Like single PAPs, some linear cover features (e.g. stretches, rather than clumps, of woodland, dongas/wadis, river banks, walls, scubby slopes, military crests of ridges/hills etc. etc) may also have to be tested for as PAPS. This will generally need to be done per six to twelve inches of feature length, depending on scale of figures and scenario being used.

The test is made on a 6D. On the throw of a "6" a card must be drawn from the Actions pack and the results applied. 

The above seems best suited to replicate the "Crossfire" conventions I have seen being used.

2) Hidden Enemy (end of move):

In addition to tests for terrain items, my standard, End-of-Move, card-based "Hidden Enemy" method will be applied at the end of each Human Player Initiative Phase (even if ended voluntarily).

As with PAPs, above, a D6 dice is thrown. On the throw of a "6" each Friendly Unit/Detachment on the table tests with a further D6 to see if it is the unit affected by the possible enemy action. This dice throw is modified as below: 

Units which have carried out an action that Initiative Phase add one to their dice throw (to see if their actions this move have prompted any enemy response).

Units which have taken no action this Initiative Phase have an unmodified test. 

Units which have taken no action this Initiative Phase AND are within one foot of the friendly table  edge take one from the test throw.  

The unit scoring the highest is the one affected and a card is drawn and placed on the table in accordance with my usual Hidden Enemy distance placement rules and the Card Effects Table applied to see what has occurred. 

In the event of a highest scores being a draw ALL the drawing units test ONCE more. 

If a further highest score draw occurs ALL high drawing units are affected and a card is drawn for each unit. 

The affected units draw a card from the card deck and apply the result immediately. 

3) First Move Initiative: 

Unless dictated by the scenario whereby the Active Player is the attacker on the first move Initiative is diced for (1x6D), with the winner commencing the action. The following modifiers to the throw are made: 

+1 to the throw of the Attacker (if any) according to the scenario/campaign, etc.
+1 to the throw of any force consisting of tribal or irregular forces with an Irregular/Tribal commander.

(Note:I had considered a modifier for "Commander Skill", but, seriously, I think that that to do so is best regarded as having an exaggerated effect UNLESS one is talking about a first-rate battlefield improviser/risk taker of Alexandrian or Napoleonic levels with a team of first-rate subordinates. Maybe more a "Boldness" rather than skill modifier needed..? Hmmmm.....)


4) Loss of Initiative:

Initiative passes to the other Player under the following circumstances. 

a) Initiative is always lost due to any of the following negative effects:

Unit/Formation is halted/ by a negative close combat result or fire results ("Suppression", Shock/Disorganisation/Pinning level exceeding the number of Command Stands for the Unity/Formation) or takes casualties.

b) Initiative is potentially lost due to any of the following negative effects. A Test based on the morale/training of the unit is made. Failing the Test results in loss of initiative:

Unit/Formation is Surprised by an attack (i.e. the attack comes from any previously unspotted source).

Unit/Formation is Pinned by negative fire results of more than three Pin Points in any one move.

Unit/Formation takes casualties from artillery fire/explosives (inc. IEDs).

General/subordinate commander falls - even if only wounded. Affects all units/formations in LoS.

Failure to physically cross an obstacle.

c) Voluntary Ceding of Initiative:

Either side my cede initiative to the other. However, the AI Player will ONLY cede initiative voluntarily IF the ONLY moves open to the AI involves exposing one of its units to close range fire in the open.


5) Human and AI Objectives:

The Human Player will have clear objectives set out as part of the scenario (as standard practice).

The AI Player will be working to its own objectives unknown to the Human Player. In general, when the AI is acting defensibly, these will be to hold position and prevent the Human Player from securing his objective/s. Other objectives may be to hold/seize certain terrain features, control/dominate certain access routes, get units off table etc. etc.

I MAY use my "Changeable Battle Plan" card method (a couple of examples on the Blog here) for AI "grand scale" decisions. 

6) AI Tactics:  

In general, tactical terms AI priorities will be:

1) For friendly units at immediate risk to seek cover.

2) To attempt to rally any friendly units suffering Shock/Pinning etc.

3) For friendly units to fire at or close assault any hostile unit currently threatening the safety of an AI unit. 
 
4) When the Initiative lies with the AI player and all actions related to the above have been completed successfully at least once, this action MAY be the action undertaken before any further action (Opportunity Test). 

Whenever there is the opportunity to complete /achieve a scenario objective or to throw units forward safely so as to by-pass or outflank Human Player units, gain a salient terrain feature or gain other advantage (e.g. close combat a weakened enemy, seize a feature offering LoS to attack Human Player forces) then a, Opportunity Test will be made for each unit with such an opportunity. 

If a test throw on a 6D totals 3 or more the testing unit will attempt to carry out that action. Leaders may modify this test throw up or down depending on their quality (Leadership Capability).

If this action is successful then a further such Opportunity Test will be made for every other potentially advantageous AI action. 

IF the AI fails ALL tests, yet still holds the initiative, one last such test for appropriate units to use an opportunity is made. If the AI player fails this last test then Initiative passes to the Human Player.


Pre-Trial Thoughts:

OK, I've set myself a target; time to play. It has struck me that the last "This Ain't Zululand" games would perhaps have proved faster to play using the above conventions. On the other hand I may find that my existing systems work just as well without the "Crossfire" principles. I'm not sure how more "formalised" battles (say, Ancient, Medieval or 18thC.) will work with the "Crossfire" principles. Only experimenting will decide. Watch this space...

Saturday, 3 December 2022

 Time Flies...
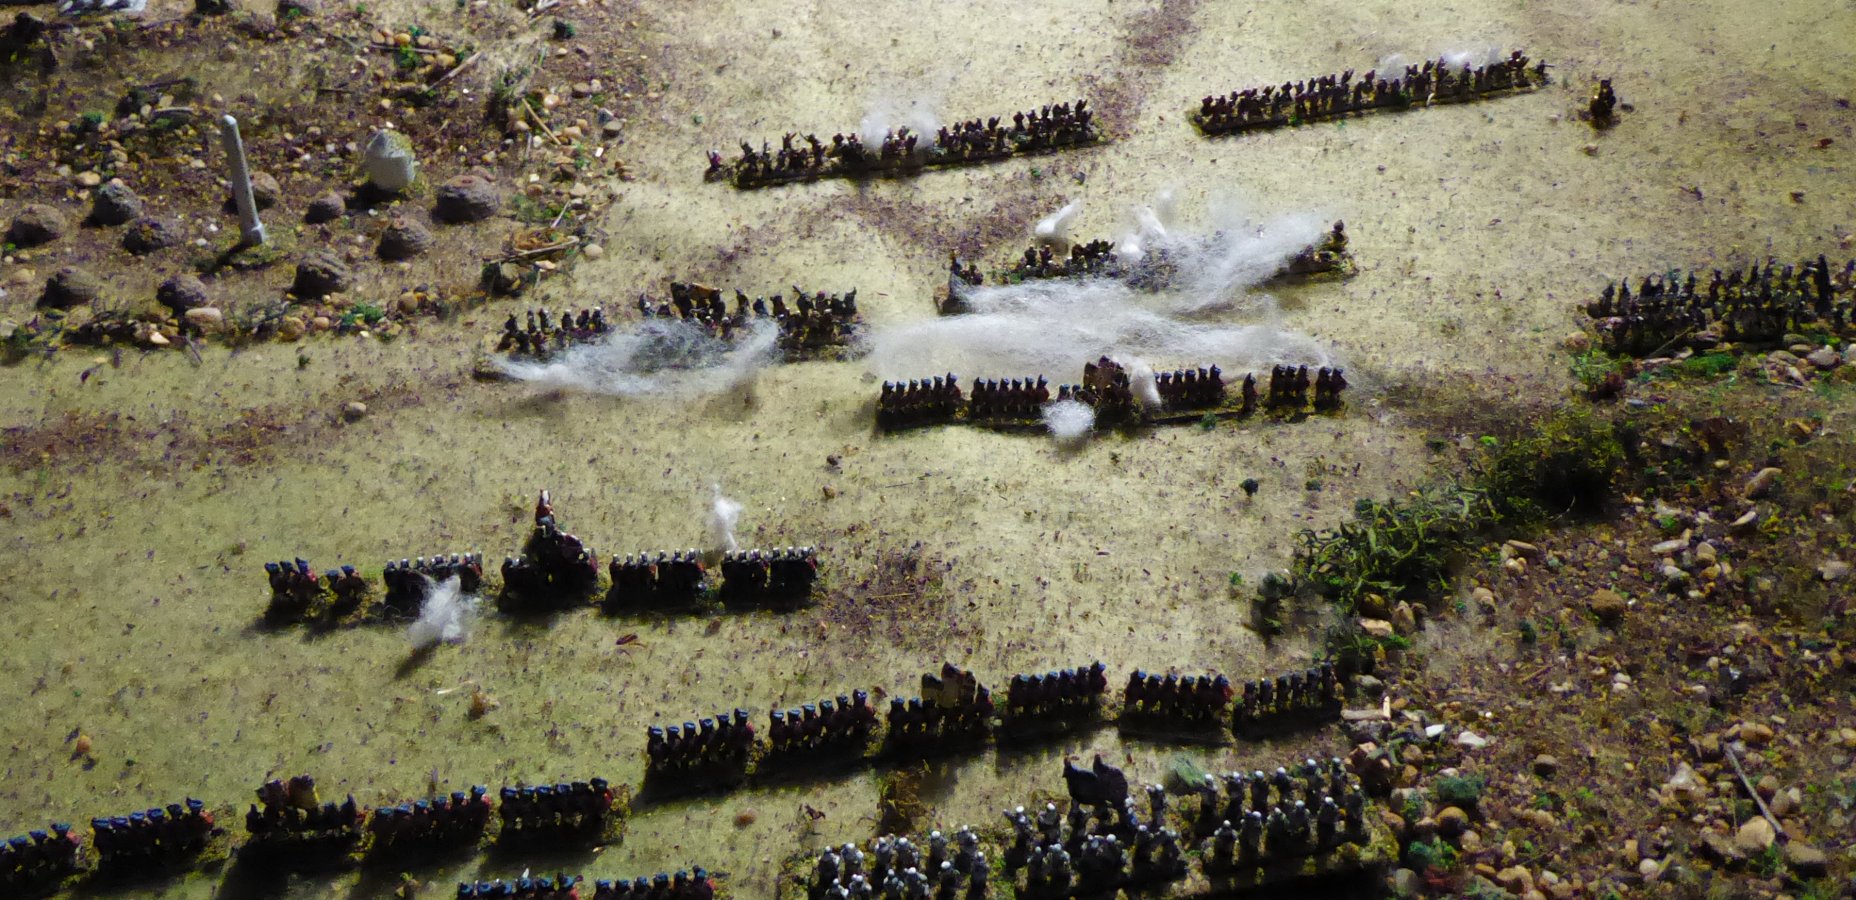
Not a lot to report, so just touching base to show I'm still here..

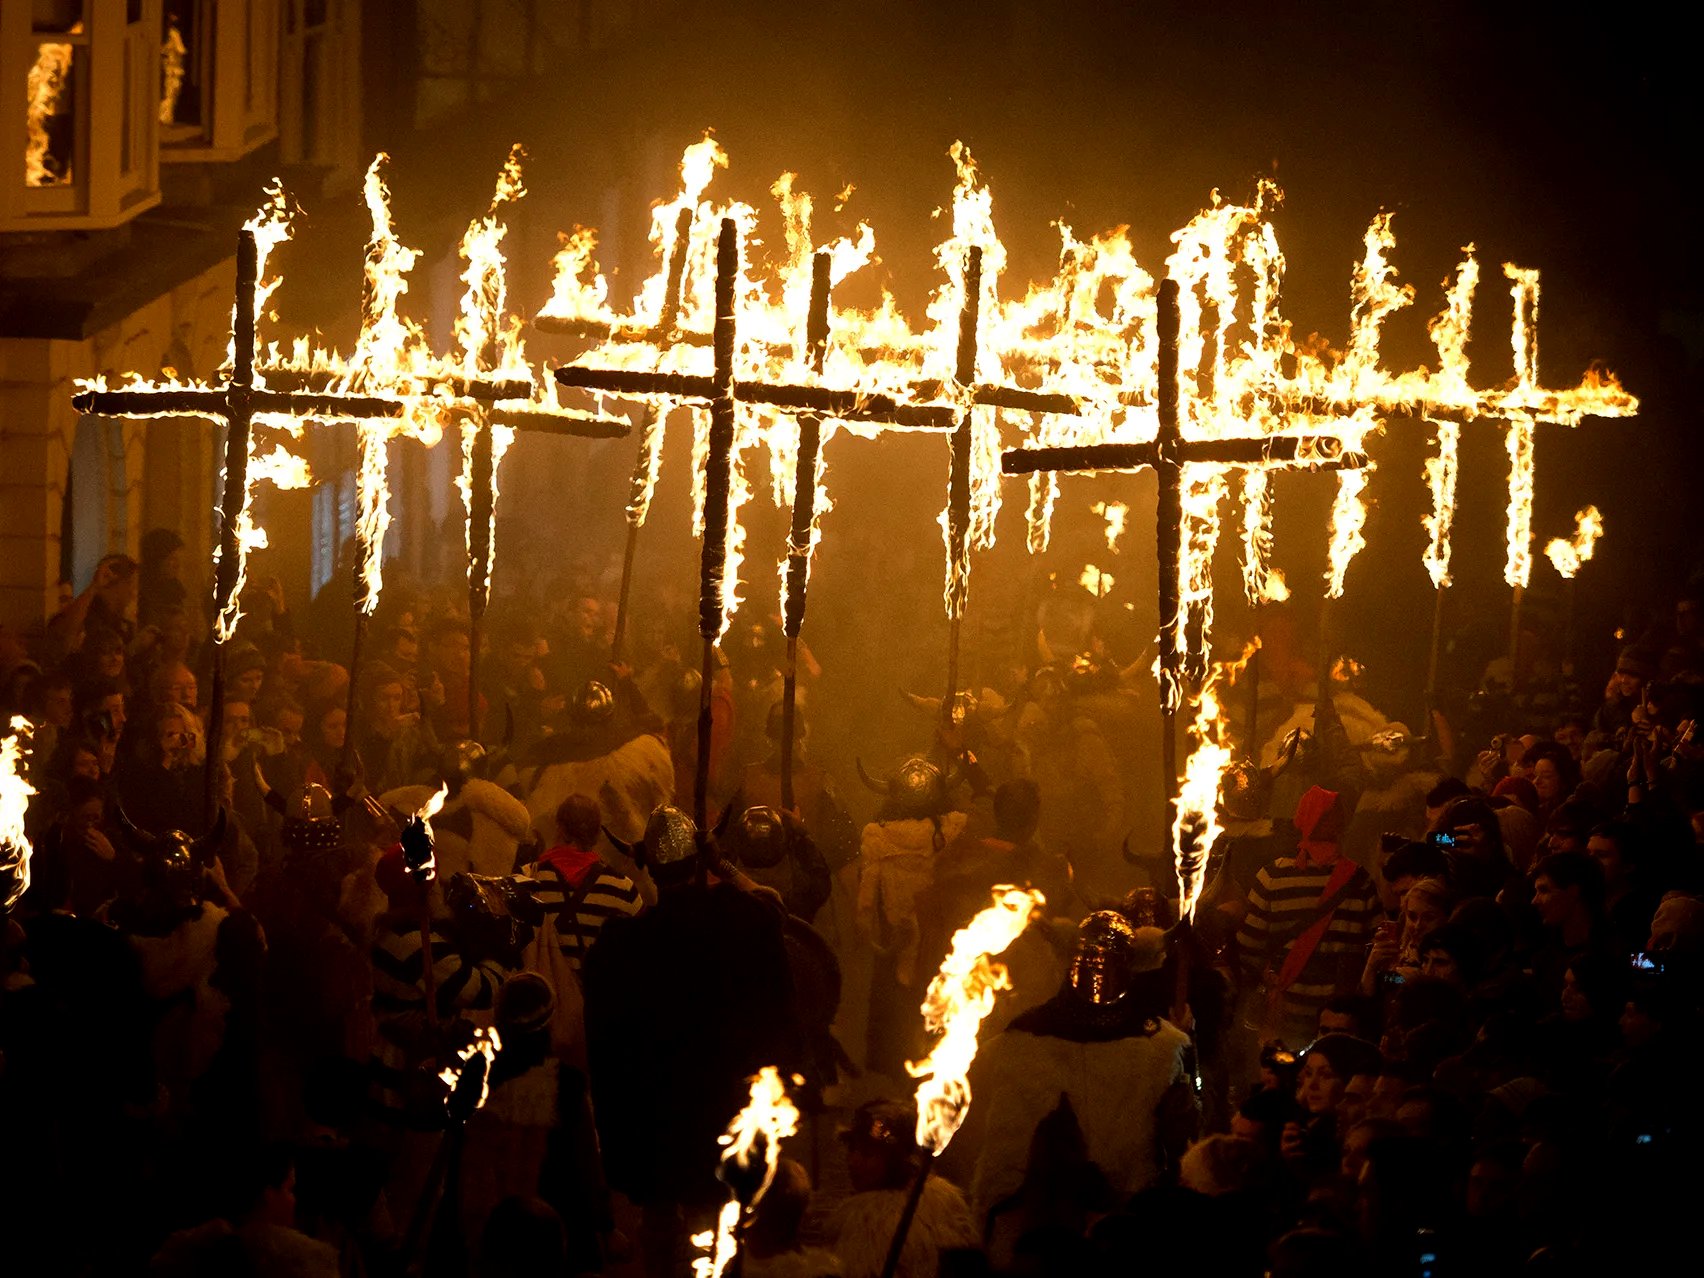
A busy last six weeks.. I was in a play. Our reenactment group marched in Lewes Bonfire March (again - pic) as Highlanders (again). 

Also two birthdays, a family gathering and all the minutiae of life have been getting in the way of gaming. 


I have, however been painting and base-flocking some more 6mms, plus doing some planning, map-making and a little solo board game playing.

Also making some 6mm mid-east-ish buildings and town walls, hopefully soon to see service. I am awaiting a 19thC Russians in Turkestan board game, which I hope to use rather as I used 1776 earlier in the year as a "Battle Generator".  


While painting and modelling I FINALLY got round to watching Game of Thrones - which, of course, set me wondering about a GoT campaign game (based around Risk conventions?) but fighting battles out on the Table in 6mm, which led to me tinkering with a map found online....... 

This would be a big commitment. But we shall see...

Meanwhile, I have this week been wondering about applying/experimenting with some of the conventions of "Crossfire" for some of my games. I rather like the sound of them and have watched some videos. They seem simple and different (though, as so often, I am well behind the curve..).

I don't "do" WW2 (yet) but the system has been adapted for other periods, I see online, and the conventions would, I think, suit my narrative-driven games rather well.

Solo-isation should be simple; my card-driven "Hidden Enemy"  method would be a good start I feel. Watch this space....


So, as may be seen, the old butterfly mind has been fluttering apace...

Hopefully I'll have something more concrete to post - even if it's a modelling update, before Xmas...

As always, any feedback welcome.

A Little 6mm Ancient Action..

Somewhere in Anatolia. . The army of Antiochus Elehohkhromahtistis has approached the free city of Erimoupolis with intent to subdue. The go...