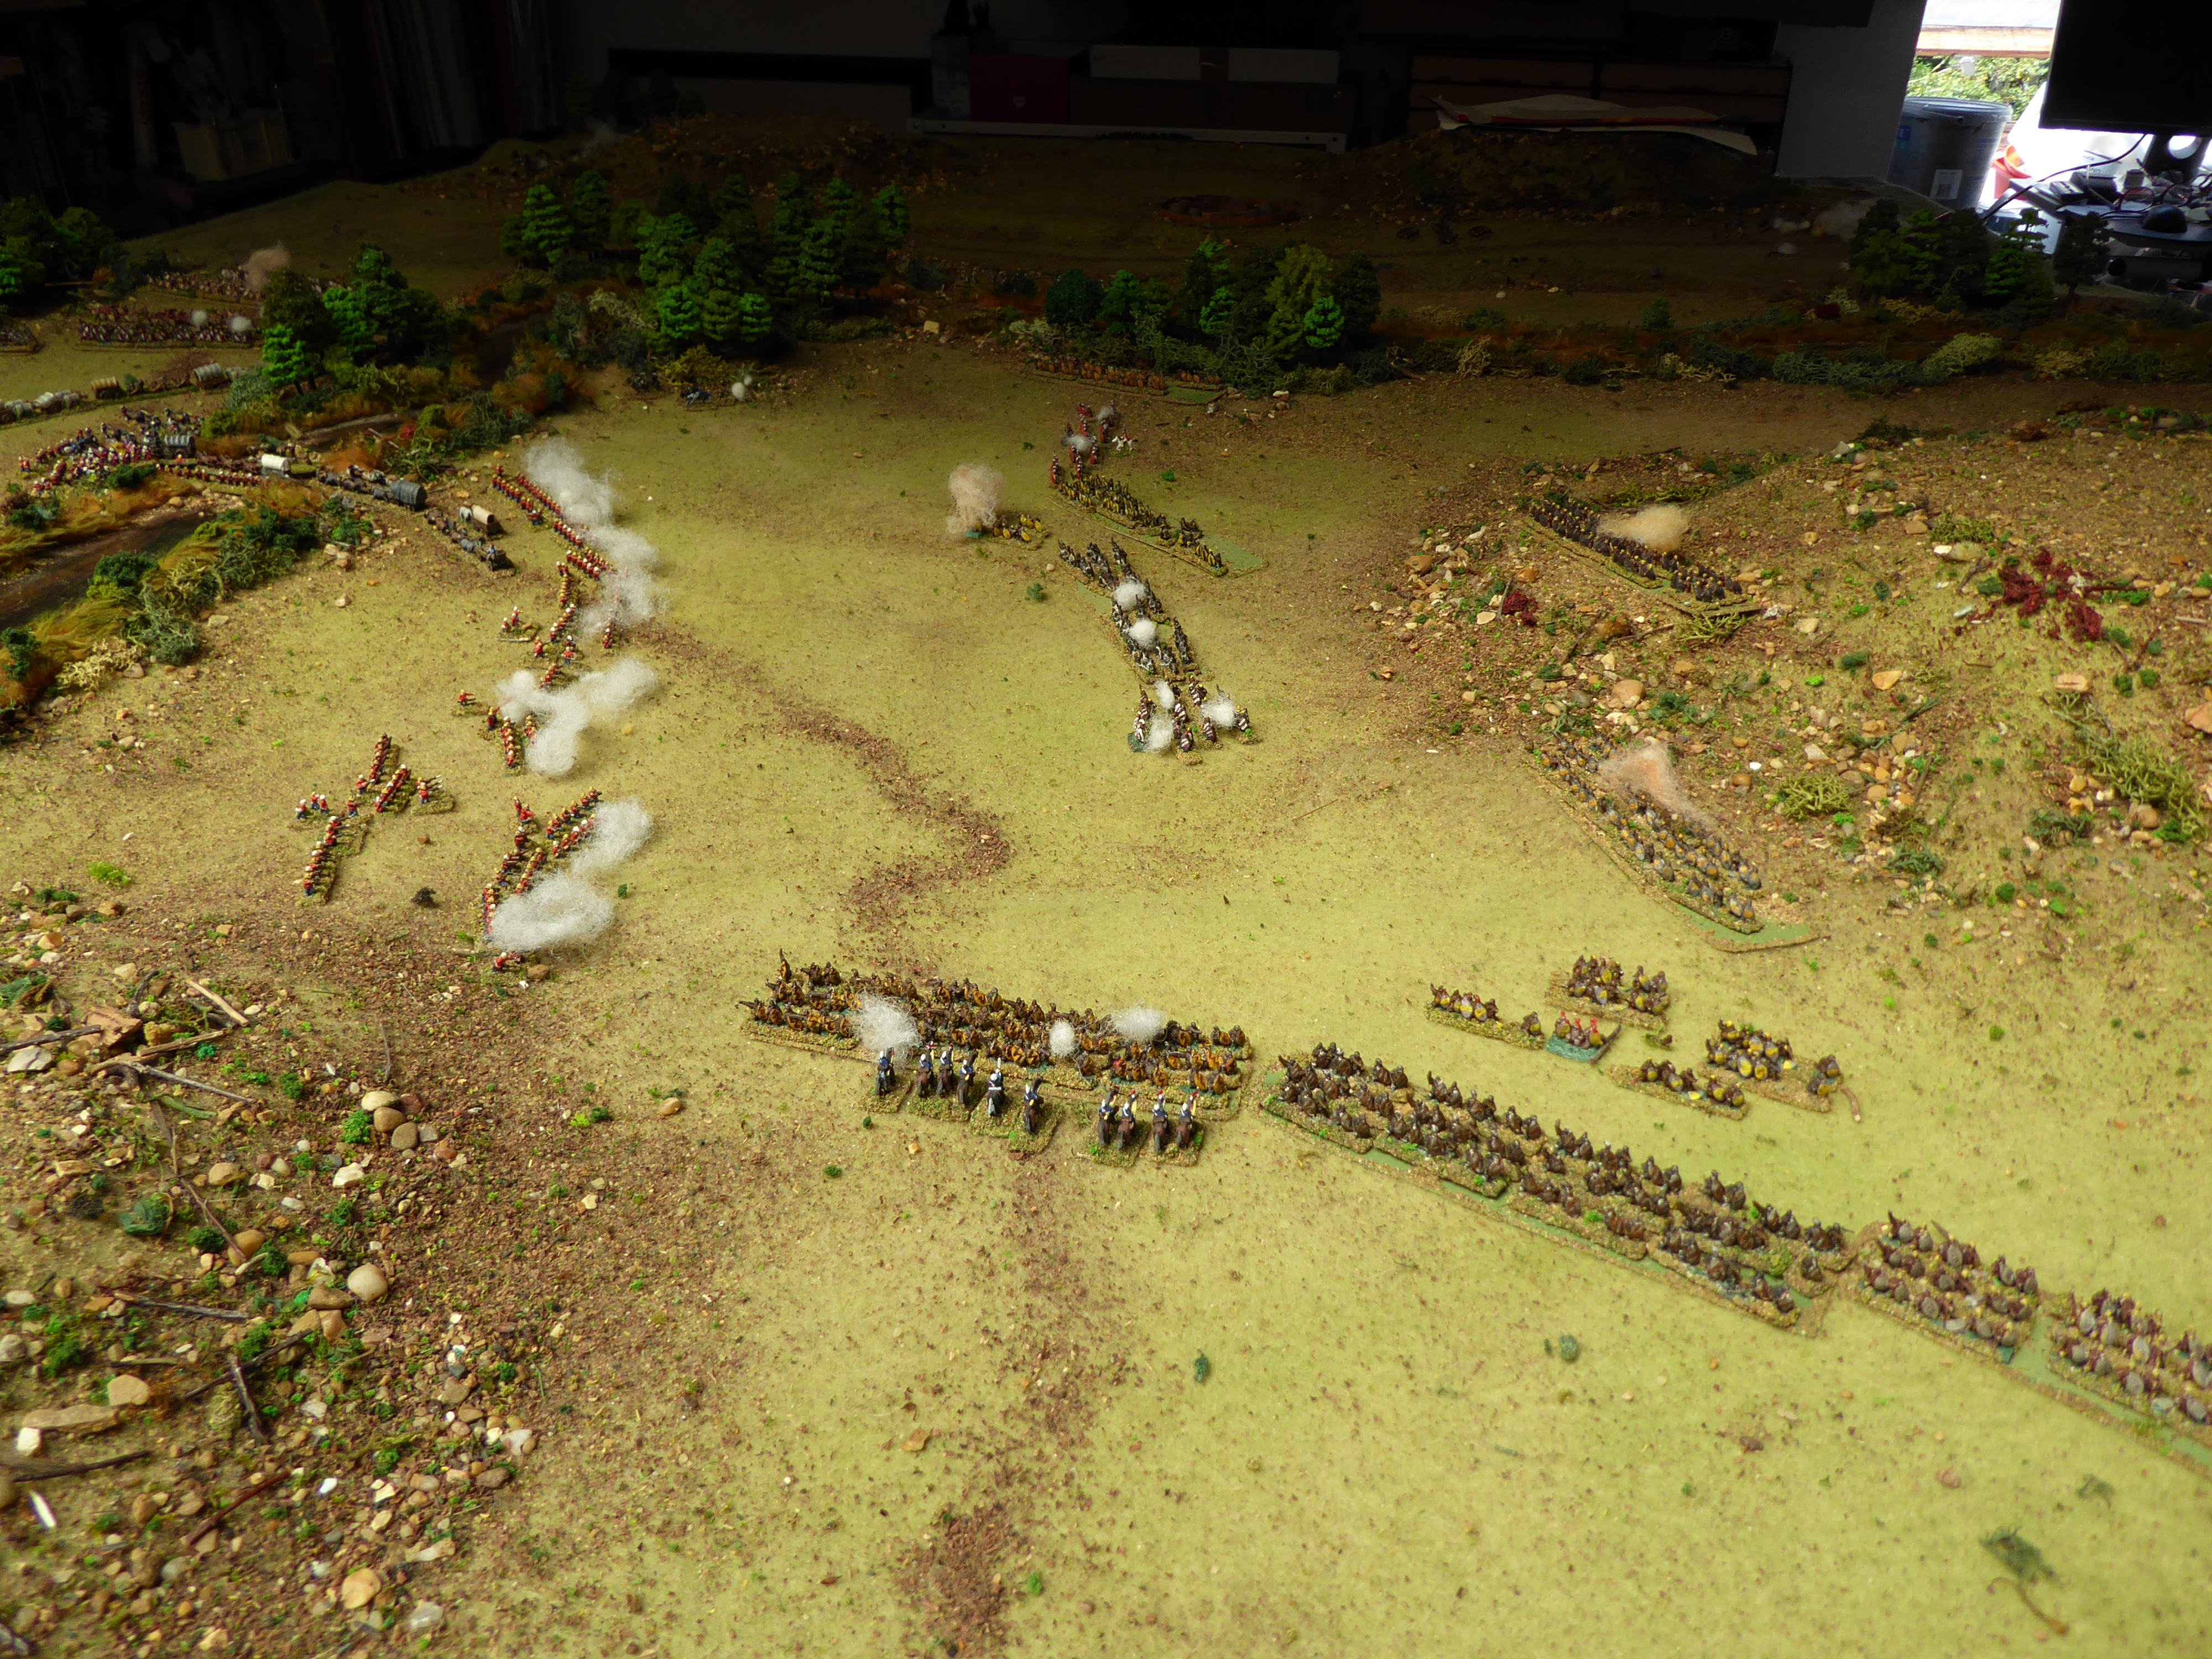
Part Five: Playing the Home Team
Delayed by two re-enactment events (along with associated broken finger and bruised ribs), being in a play, dealing with a family crisis and a long weekend in Spain....
Basically a re-run of the previous games from a different perspective, as described in the last post.
The Plan:
OK. My units are initially deployed in "Dintisni" ("brigades"; each of three regiments and a veteran command unit) as shown on the map. All units are initially concealed in dongas and on the plateaux of the kopjes and their scrubby slopes.
I have covered both drifts with (concealed) brigades.
I have units off-table awaiting instructions by smoke signal.

If the enemy are strung out in column we will wait until they are half across the drift, then launch a mass attack.
If the enemy are already in defensive formation our plan remains the same but we could attempt to slow the enemy advance more by having troops make themselves visible on the eastern kopjes; hopefully forcing the British keep more men on the eastern bank than they otherwise would. This threat may also slow them down, thus making wagon issues more likely and eating-up the time they have to complete their task. In the event that we launch a mass attack the enemy being concentrated will also allow my men to more easily surround them.
If discovered/once revealed my men in the open on the eastern kopjes COULD of course prompt the enemy into an actual attack on them, hence my men have orders to withdraw in the face of such an attack. Hopefully by then I will be "on scene" to coordinate things.
Basically I seem to have unconsciously planned plan a rerun of the last battle; catch the enemy at the drift to blunt their advance and divide their force, then sweep onto them from all sides. What could possibly go wrong.....?
The Game:
The British begin (again), with scouting on the east bank of the river (they again ignore the west bank) and my men on Black Calf and Black Bull kopjes are soon discovered - but not before the lead elements of the enemy column appear on the table.

At this stage I "know" none of this (so do not test to discover enemy deployment). However, an "Attitude test" reveals the enemy as being aggressive; the battle may be starting without me....
Here I need to decide how to handle things. I plump for "Battle Within A battle" mode - a self-contained action over which I have no control until my General is both informed and able to take action. As before, I test to see how the British column commander has decided to enter the field.

Oh dear (?). The advance elements of the enemy turn out to be some four companies of Red Coated Ones, deployed for battle. These move towards the eastern Kopjes. My commanders here test, and withdraw from the actual kopje edges as per my instructions (Phew..).
The enemy scouts push on to check the patches of woodland near the two drifts.
The Commander of the Wasps dispatches a messenger at double speed to tell me of developments (good - especially as the commander of The Bees appears too occupied to do so..)

Next move the enemy seem unsure what to do. One company advances towards Black Bull Kopje. The others remain still. Their scouts are still checking the woodland near the drifts.
On my side the commander of The Wasps seems to have misunderstood his instructions, and pulls his men right off the Black Bull Kopje, falling back towards the (off table) Minnows. Maybe he thinks we are supposed to be luring the enemy onto the kopjes? Who knows?

[Technical Note: All British local decisions are based on dice-controlled ad hoc tables, unit by unit at company level (except for scouting detachments) until a senior field/staff central officer appears within Command radius. Actions by those units of my army outside my immediate control are likewise controlled by tests. Friendly units with Standing Orders will generally abide with these unless local circumstances prompt a local decision. However, those with orders are less likely to react contrary to those orders - or more likely to obey them beyond "the letter of the Law" than those without. Where ad hoc decision tests - single or a flurry - have been involved I will hereafter mark them thus {#}]
The redcoats advance. The scouts continue checking along the river {#}. Strangely the enemy main column does not appear. Not MY problem, they are the ones on a schedule....
However, I come across an unforeseen issue; my messenger from The Wasps cannot cross at either of the Drifts - the enemy scouts are too close. He will have to re-route off table. I hadn't thought of that. Extra friction to be introduced, especially as I have not specified where the nearest off-table drift might be. Let's say he crosses the river off table on a throw of a 6, testing each off table move and adding one to the dice per one full expended turn while off table.

Then, to add to my problems, the Wasps pull off table {#} - they ARE joining the Minnows - and so will not come back until I summon them. My local commander really has got things wrong. The commander of The Bees remains in the dead ground atop the Black Bull Kopje {#}, but I have no idea how he will react to the changing situation.
The enemy scouts carry out their various checks on suspicious ground near the river (on both banks) as an enemy company rushes to the top of Black Calf Kopje (maybe my commander here was right to pull back?), then pushes (next move) towards Black Bull as the enemy line advances and the column makes its appearance on the track {#}. My men on Black Bull remain in situ {#}, but are meant to pull back if the enemy press too hard.

Luckily my off-table messenger has managed to wade (swim?) across the river and in theory will be with me next move, hopefully allowing me some input into the battle.
However, before this happens a body of enemy scouts cross Little Drift {#} and discover The Elephants hidden in the north donga. My men here (steady veterans) hold position {#}, and the enemy scouts run away, but the sight of another group of scouts, on the west bank, also poking about, prompts The Hornets into a wild charge {#}. This is NOT in the plan at all, but my bad; I didn't specify "which enemy" in my orders.
[Revealed friendly units now marked in blue on the plans. Note; to make pics/plans/tables bigger right click and open link in new tab.]

The enemy column presses on - now accompanied by a small force of cavalry.
Their forward unit commander is informed by the retreating scouts of the presence of my forces the other side of the river. The enemy advance companies establish a firing line in the vicinity of Black Bull Kopje and at the southern military crest {#}.
My commander on the kopje sees all this, but does not obey standing orders and withdraw {#}. (Because he hasn't been fired on ?).
My other units, on my side of the river, halt - the Hornets because the enemy now seem to be pulling back across the drift, and the Hornet commander is confused {#}...
I test to see if a messenger has arrived to update me. No messenger has arrived from ANY of my units - and there is no sound of firing. With there being no cause for alarm I carry on with my breakfast (or whatever..).

Next go the enemy press on again. Then, after some confusion/readjustment on the slopes (their commanders seem spooked or wary), one of their companies opens fire on my men on Black Bull Kopje {#}. My men take casualties, and fall back, down the northern slopes of the kopje.

Messengers arrive (Yay..!! Three from three different units). I am now "Activated" and can start to take command. I now know of the enemy pressing on Black Bull and the general progress of the column (the most recent update coming from The Elephants' commander). Next move I have a decision to make - where do I head to to get the best view.....?
I decide I will head up to Cloud Kopje - which gives a good view of Black Bull, some of the plain and both of the drifts.
Meanwhile the enemy now seem to sort out an east-west Battle Line; anchoring their right on Black Bull (with a reserve to support) and their left on Trail Drift, and creating an enfilading skirmish line of Scouts to cover Little Drift. Other enemy companies push towards the Trail Drift. {#}
As my General gets to the top of Cloud Kopje he can see the enemy on Black Bull (he cannot see The Bees), enemy companies in the plain and covering Little Drift, and the strung-out column.

He can see The Hornets and The Elephants, stationary in position. What he CANNOT see are the cavalry or the enemy reserve (hidden behind Black Bull) or the skirmish line of Scouts. This actually looks like a good time to attack from the east - with the Minnows and Wasps swinging onto the flank of the vulnerable column.
BUT......
My order to the Minnows was to await orders - they are therefore not going to move until I send for them. I reckon it will take eight moves for a messenger to reach them.. Dammit...
IF I order the smoke signal from Cloud Kopje the Wasps MAY obey it (they may, however, decide to wait with the Minnows) and attack, but the Bees certainly will attack, and, without support, are likely to be destroyed.

If I summon the Great Bulls (to the west) they can do nothing useful presently without crossing the Trail Drift (like the Hornets). I have no intention of launching my men across a defended drift.
If I order The Elephants in now they will likely be shot to pieces struggling across the Little Drift or the space between the drift and the enemy line.
But I MUST make a decision (it is stopwatch time - the longer I take the more "free moves" the enemy get).
However, all this becomes somewhat academic as the commander of The Bees decides, on his own initiative {#} and against standing orders, to attack the enemy moving on his flank and cutting him off from the Little Drift. NOT good. I order the Signal on Cloud Kopje lit - in case this DOES prompt the Wasps into action...

The enemy company being charged by The Bees is in a rough "L" formation, with one platoon on the slopes of Black Bull enfilading The Bees and one in reserve. They have done nothing this move, and so can pour volley fire into my regiments. My men fall in droves and the two leading regiments are pinned. Next move the commander of the Bees rallies some of his men, and sends a regiment though the leading units and crashing into the nearest enemy platoon. There is an inconclusive hand to hand struggle, despite casualties on both sides, and my men pull back - only to be volleyed at again next move by the two uncommitted platoons. Altogether bad news.
Meanwhile the enemy have deployed a company by the Trail Drift, shifted a reserve company to cover the valley between Black Bull and Black Calf Kopjes and brought more troops onto the field {#}.
While The Bees attempt to rally, another enemy company arrives on the field and some of the column escort move further towards the centre of the table. However, the enemy commander is still being cautious - as appears to be the case with the company commander on Black Bull. Were the latter to move his platoons to the kopje edge and shoot down into the Bees' flank I fear that that would scatter them; but either the officer in charge doesn't see this opportunity, or is too cautious. It is too soon to see if The Wasps or Minnows have heeded the smoke signal.

[Technical Note: It has probably been noted that British Line Companies deployed independently for battle usually separate into three platoons, deploying two forward and one in reserve as if ready for skirmishing.
British Platoons can fire independently if circumstances dictate, but do not not move as separate entities (other than minor facing adjustments) unless specifically detached from their companies or as a result of enforced actions (morale, combat etc.).
It is taken as read that once a company so deployed sees a mass enemy target in potential charging range it automatically closes ranks (for volley fire/to receive a charge), but the platoons themselves remain deployed as if in skirmish mode unless the forward platoons are commanded to close on the reserves/the reserve advances to form line with the advance units. While the former has the disadvantage of leaving two platoons potentially exposed to close combat while separated, it has the advantage of leaving the reserve still capable of volley fire into overlapping attackers between or either side of the forward elements. Once a platoon/concentrated company is involved in close combat it loses the volley fire option that move.]

The Bees are fired upon again by a single company, but to little effect and their commander pulls them back between Black Bull and the river {#}. This is still a potential deathtrap as next move the enemy on Black Bull shifts to the military crest commanding this patch, but The Bees' options are limited - and the commander is, at the end of the day, obeying MY orders; just not in the way I had hoped.
Surprisingly the enemy companies flanking the column push forwards towards the eastern kopjes and the company that has been shooting at The Bees decides to concentrate by the small kraal at the north west edge of Black Bull, rather than shoot again {#}.
Again, the enemy commander seems unsure what to do. Although he has secured against attack over the drifts and from the east, the column and it's escorts have halted on the trail and are sitting there exposed.
Perhaps unexpectedly The Wasps (off table) HAVE been activated by the smoke signal, but {#} move up behind The Bees - i.e. the "valley of death" between Black Bull Kopje and the river. There is no sign of The Minnows - and I am still sitting on Cloud Kopje trying to decide what to do next. I WANT to ride over on my pony to take command of my east wing - but the river is in the way and the enemy commands the Little Drift. I would have to go off table to reach them, which adds another element of uncertainty to the equation, PLUS I lose control of the smoke signal on Fat Pie Kopje, The Hornets and The Elephants.
Dammit... I bite the bullet and ride east.....
Meanwhile, the enemy commander still hesitates, the enemy on Black Bull fire on The Bees (to little effect) and an enemy company advances and takes Black Calf Kopje {#}. An enemy Native Auxiliary company arrives on table. The Bees pull off table. My figure leaves the table.

Next move the Law of Sod comes into play; the enemy general decides to do something while I'm travelling. He tests on the table below.

He elects to hold the Drifts & East Kopjes. Form Laager. Then force one of the Drifts with 1xAve.D Companies. His men move to effect this and the Laager begins to form. His men on Black Bull dig in {#}. The tail end of the column (the Naval Company) enters the field
While my general is still struggling to get to his off-table troops the British form their laager and begin mustering for an assault across a drift. They will deploy three companies for this. The enemy general pulls back the company at the foot of Black Bull to carry this out. That is possibly good for us IF I can get my guys moving. He also orders the Gatling Gun to Black Cow Kopje and pulls back a company to support.

Next go my general crosses the river, but it will be at least two moves before he can do anything useful.
In my general's absence the British sort out their laager and it's supporting troops/Gatling on Black Cow, then rush three companies across the Trail Drift. Two of these manage to form up before The Hornets, provoked by their arrival, charge {#}.

As the warriors rush into close range the redcoats unleash rapid volleys into their packed ranks. Two regiments of The Hornets are stopped in their tracks, but the third crashes into the line of bayonets. There is a sharp and bloody tussle - and the Hornets are forced to fall back. Not good....

Then worse; the following move enemy non-volley fire breaks the two shaken regiments and the third regiment is pulled back by its commander to allow it to rally, after it comes under volley fire from the (previously uncommitted) enemy company {#}.

Meanwhile, my general has arrived at the force off table to the east.
He scouts forward, where he can see enemy soldiers on Black Bull and Black Calf Kopjes. He will leave The Minnows in sight of these, while moving the The Wasps and Bees as swiftly as possible round the south of Black Calf (off table) and entering the table close to the track. This could take up to nine moves - long enough to lose the battle - if his movement dice are bad, so it's a risk, but the troops on the eastern kopjes are interdicting practically all the east table edge save the two "death valleys" (by the river and between the kopjes) and I'm not throwing my men away down those (I do not know about the company the enemy has withdrawn from north of Black Bull. Mind you, I don't know about the bloody Gatling on Black Cow either...).
My general also sends a messenger to light the beacon on Fat Pie Kopje to Summon The Great Bulls, off table to the west..
While my general is faffing about off-table the British west of the river drive off The Hornets, then follow them up as they retreat towards their original position in the westernmost donga {#}. They also place one company to control part of the western table edge, opposite Trail Drift. This occupies about three moves.

The enemy column reaches the drift and begins to cross, but is then halted as a company of redcoats and one of native auxiliaries jump the queue, followed by the cavalry {#}. The British general now heads for the west bank, and crosses to take command here {#}. 
While all this is going on the two companies facing The Hornets have kept up a harassing fire at long range on them - enough to keep my men's' heads down and cause casualties among the regiments on the slopes of Fat Pie Kopje {#}.
So, the situation, as my general approaches the south side of the table, is that the enemy have seemingly neutralised The Hornets and established a force on the west bank, which is being reinforced.
However, the Hornets will likely have to be winkled out of their donga with the bayonet. This could cause a headache for the British, whose real strength lies in their firepower (and who will have the uncommitted Elephants on their flank if they assault the area south of Fat Pie). Also, their column is strung out and potentially vulnerable to a thrust from the south, where my general and two brigades are lurking.

However, I only really have a chance of catching the column if the British begin to withdraw more forces from the east bank. I expect the Great Bulls to be activated by smoke signal soon (WHEN it gets lit). They too will run interference on the enemy on the west bank.
I am feeling reasonably confident that I will be able to maul the column, IF the enemy are distracted by the action on the west bank. We shall see......
Next move the enemy still do not move their troops from the eastern kopjes {#} - not good for me. I wait, holding my men in check. The cavalry and the companies in front of them cross the drift.
However, on the plus side someone on the east bank seems to have blundered - the two companies who had earlier been acting as column escorts and the rearguard (prior to the forming of the laager/square) move off alongside the column {#}. There is now no rear guard. Also, the Gatling moves off Black Cow and heads for the drift {#}. There are still companies on all three kopjes my side of the river (are THESE meant to form the rear guard? That sort of makes sense), but it looks like some confusion has set in as the enemy force moves off.
Not so good for me is the action of The Hornets - who pull back to the top of Fat Pie Kopje {#}. Or will this draw the leading enemy infantry further away from the column? We shall see.

It does...! The enemy on the west bank move towards Fat Pie {#}. They now have four companies, the auxiliaries and the cavalry - plus ALL the Staff on that side of the river. On the east side one company has deployed as rearguard to the column, but two are marching towards the Trail Drift and another towards Little Drift. In addition the companies of Black Calf and Black Bull have pulled off the kopjes and are marching to rejoin the column . I think this is probably my moment....
Or do I wait a move...? Decisions, decisions....
I hold off - but the Great Bulls don't, and rush onto the field south west of Trail Drift {#}. Likewise The Elephants, presumably prompted by the arrival of the enemy below Fat Pie Kopje, shift position - luckily with most of them ending the move in dead ground {#}. None of my other guys move.
On the west back the British react {#}. The two companies below Fat Pie open fire on those of The Elephants they can see, causing casualties and pinning them and the company nearest the Great Bulls deploys to meet this new threat. The cavalry close on the units below Fat Pie and the Gatling crosses the drift {#}.


In close combat the Great Bulls cause the company they have charged to run for the Drift - but not before bringing down all but a scatter of men.
Even worse for the British; The Elephants, by sheer weight of numbers, overwhelms the company facing them - taking them down to a man.
The Hornets do nothing{#} .
But now the British strike back... On the west bank volley fire from the units below Fat Pie pin and cause casualties to The Elephants. The Gatling unlimbers, the enemy supply units start to scatter. The company which has crossed Little Drift, unaware of the problems beyond the woods at the elbow of the river, cross the drift and approach the donga on the river's north side {#}.

On the east bank a rough laager begins to form around the two companies (redcoats and naval) near the drift {#}. They are joined by the rearguard {#}. The company which had been on Black Bull rushes to join them {#}. However, the company from black calf - isolated in the plain and facing The Minnows and my command, halts and fires {#}. The enemy scouts seem confused, and do not move {#}.

In my move the Great Bulls get among the enemy wagons at the drift. The Gatling crew, the remains of the enemy company and several wagon/column elements are destroyed. The Elephants scatter another enemy company, and kill the enemy general. All is looking good here.
The enemy company caught on the plain below Black Calf in a pincer by The Bees and The Minnows are overwhelmed. They die hard, but die they do.

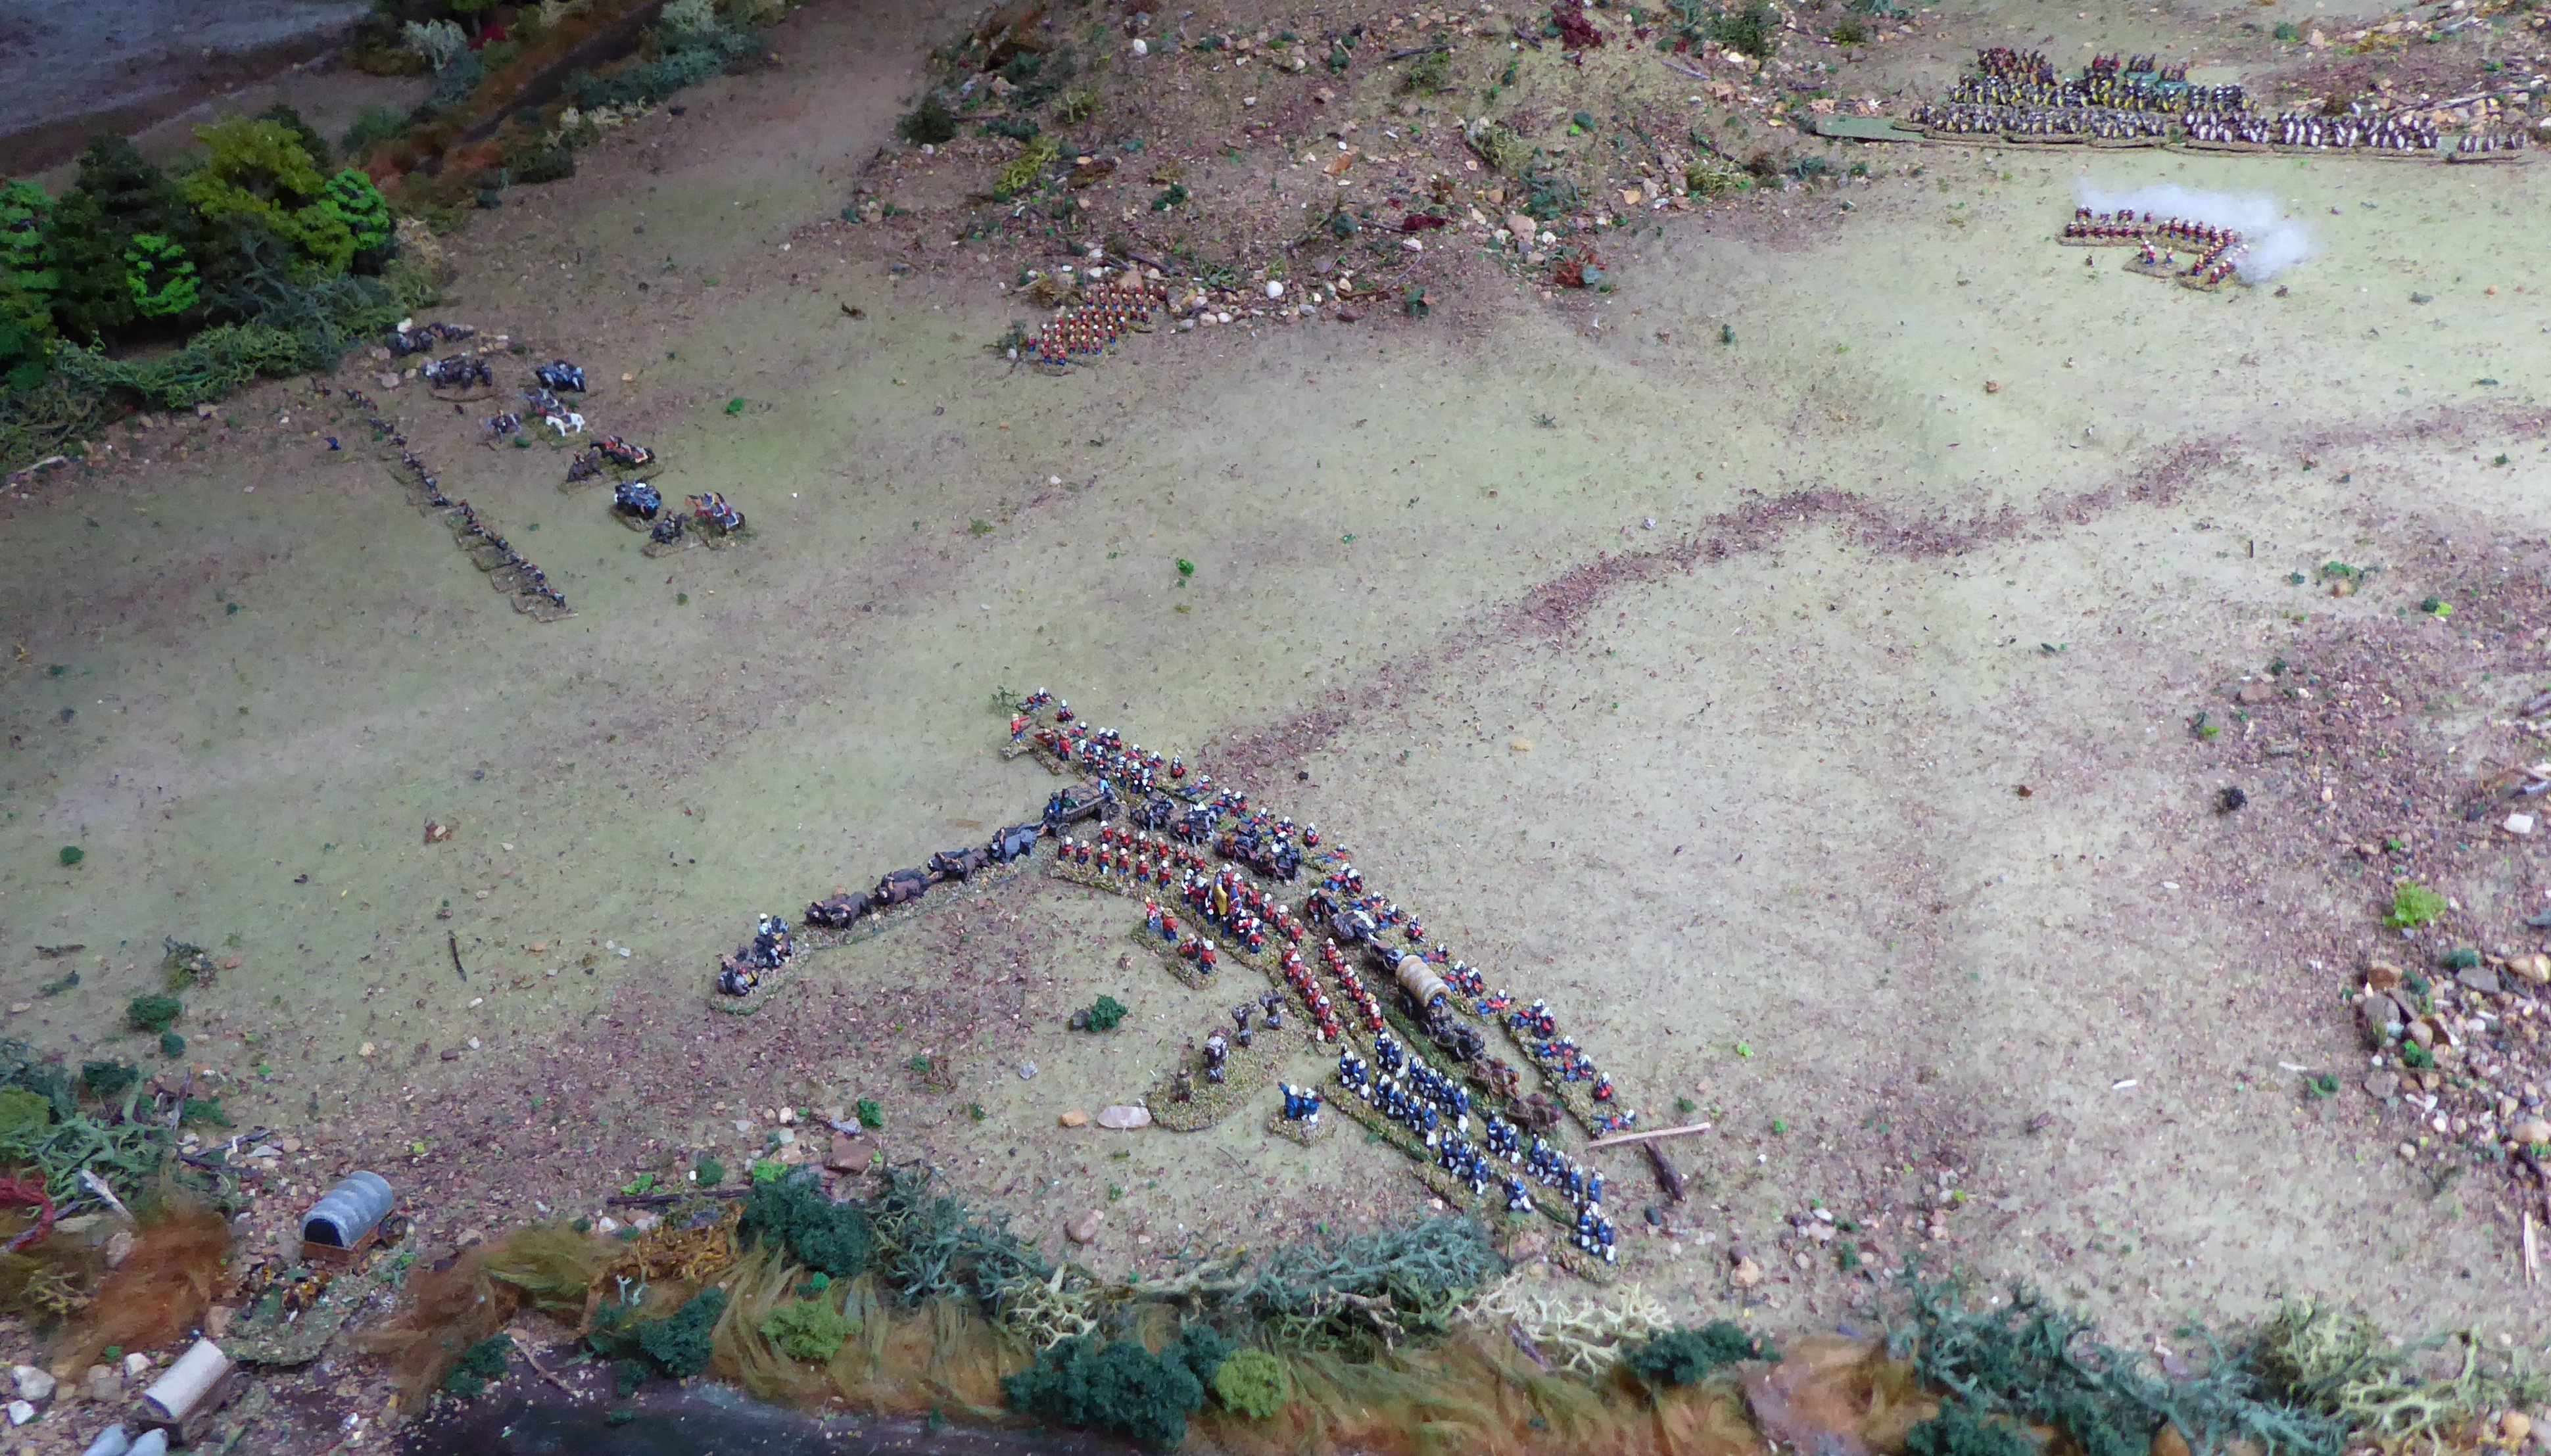
The Hornets STILL do nothing {#} .
On the east bank the enemy form a laager and a SE-NE skirmish line with the company from Black Bull and the scouts {#}. They are clearly in no mood to go down lightly. The enemy rearguard company pours volley fire into The Wasps and Bees {#}, causing casualties and shock.
On the west bank a scratch laager is formed; manned by the cavalry and stragglers from one of the broken redcoat companies. The native auxiliaries and other redcoat stragglers bolt for the nearby woods.

Then an act of sheer heroism (or desperation) {#}. Two platoons of the remaining enemy company on the west bank, below Fat Pie, charges the flank of The Elephant's Loins (command unit), forcing it back, while the other pours fire into one of the other Elephant regiments. The Elephants' Loins are driven back in confusion and fails to rally next move. It pulls back, and the rest of the Dintisna withdraws to match. The Hornets remain on Fat Pie. The Great Bulls wipe up the column units still on the west bank, then halt, facing the western laager {#}.
The one isolated enemy company makes for the kraal - seemingly unaware of happenings elsewhere {#}.
The west bank is entirely out of my control. We have badly mauled the enemy here and killed their general - but I don't "know" this. I also don't know about the enemy company blithely heading for the kraal.
On the east bank I have a choice; launch my regiments against the laager here, or stand off. But I hesitate. Then, while I am rallying my men on Black Cow, the Minnows charge the enemy skirmish line without orders. The enemy at the laager and the skirmish line open up - and I see myself how deadly their volleys can be. The Minnows withdraw at speed up Black Bull Kopje.
The remaining enemy company on the west bank runs to man the laager there {#}. The enemy company on the north bank - seeing the The Elephants and The Hornets unmolested to their left flank, turns and heads back across Little Drift {#}.

My men are weary. Losses have been heavy - and will only get heavier if I force the issue. The enemy have been badly hurt, and are now huddled down in their laagers like a warthog in a hole.
Almost half the British column of wagons and pack animals has been destroyed.
Four Redcoat companies have been massacred and two others mauled. Their auxiliaries have fled.
We have the head of their general and their Gun-That-Goes-Ha-Ha-Ha.
I fully expect that, left to themselves, they will pull back tomorrow.
I think we can safely say we have given them a bloody nose and seen them off and, while setting a watch, tend to our dead and wounded in the knowledge of a job done....

Summary:
Another great game - if frustrating (in a good way) - and again (unsurprisingly) a defeat on points for the British - but another sharp lesson for the home team.
Most of the battle "fought itself", as my general figure was absent or too far away to affect matters. There were a LOT of ad hoc dice decisions made by local commanders (on both sides - the British having their own C&C problems), which I feel reflects the reality of a lot of actions (no matter what the generals' memoirs say).
The "Butcher's Bill" was high for both sides.
I lost about 150 dead and about 270 seriously wounded out of a total of just over 460 casualties). A lighter loss when compared with the previous action, but still steep.
How many of my seriously wounded would survive, with little or no medical provision, is moot at this stage.
For the British the overall number of casualties (higher than in the previous action) was lower than mine, but what with my men overrunning or breaking four companies - and taking no prisoners - their loss in dead exceeded mine considerably: somewhere in the region of 300 British troops dead (including around fifteen officers, the general and his staff) plus the Gatling crew and forty so wagoneers etc. lost, with around forty walking wounded getting away.
I haven't worked out the fate of the redcoats or Native Auxiliaries who fled into the woods - how THEY fared is anyone's guess... Let's be generous and say they sneaked back to the laagers during the night.
Oh, and the commander of The Hornets...? Let's just say he was "Retired; with extreme prejudice"....
Probably this was an "unwinnable" scenario for the British, but no bad thing for that. However, like the previous "local generals" I learned a valuable lesson - don't charge the redcoated Soldiers from the front...
That probably ends the current "This Ain't Zululand" project. Watch this space for more fun....
As always, any queries, comments or snipes welcome....