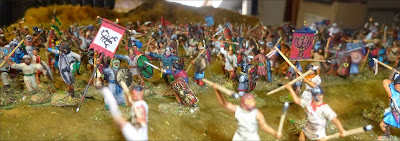
Wednesday, 13 March 2019

"People Called Romanes, They Go The House ?"

A Graffiti Game...

The quick little vandalism game completed...

Our unnamed bold boy sets off. We are "playing" him.

All patrols (unless in LoS of him or directed towards him by people he has passed, but not paid-off) will move randomly, all NPCs likewise.

Basically I throw three different coloured dice per group/individual - an Activation Dice (if this is less that 3 then the subject is not activated that move), a Distance Dice (how far they move) and a Direction Dice (where).

If our boy walks into the Ladies of the Night, drunks or the Crazy Cat/crazy Goose Lady (or vice versa) he is "trapped" for a move in conversation.

The cowled guy is a local, fruit-loop, serial killer. If he catches ANYONE alone and unawares from behind they are toast. However, if they sense him and turn (and scream/shout) he runs off... Shouting attracts Patrols.

The muggers will attack our hero and relieve him of his bribe money. These ne'er do wells will shy away from any patrols...

NPCs' and Watch's starting positions are decided by dice-throws. They are set up.
"Our" entry point and the Roman Patrol (at board edge) entry point are diced for, and we're off.... 

Our lad decides the front of the (currently unattended) Watch HQ (double points) in the small square is a good place to start... He makes his way there..


But "Old Cowley" the serial killer is lurking nearby.... He gets activated while we are painting, slinks round and moves towards our hero...

Luckily (dice) he is sensed, our boy turns, waves an aggressive paintbrush and the weirdo scuttles off..
Madam Palm also sashays into the square on the far side, but is too far away to distract our lucky lad...However, while our chap has been sneaking others have been moving about, and just as he finishes painting he detects the clink and stamp of "The Patrol" coming up from the direction of the dye works....


They see what he is up to and give chase.
He nips into the Main Square, then down the side of Watch HQ..


He loses some paint in running from them for the next couple of moves, but not too much - and they keep him in LoS... Racing along the back of the headquarters he turns a corner then risks pushing into a compound.. No dogs; so he hides there..

The Patrol pounds up to the corner, but he is nowhere is sight...


The Romans hang about a couple of moves, while the Centurion considers his options (no pun intended), and are joined by some Watchmen. For a moment it looks as if they will conduct an area search. But then some noisy drunks hove into view, blunder through the Patrol and cause a nuisance - and so are taken off by the Watch for a night in the cells. Their quarry having scarpered, and having lost a move tangling with the drunks, the Romans move off towards the main square.


Our hero climbs over the opposite wall of the compound where he is hiding (losing some more paint to spillage) and makes his way over to the dye works to refill his pot..


Once done he meanders along the streets, stopping here and there to slap up a slogan. Apart from a short delay, when he is buttonholed by the Crazy Cat Lady things go well - the Patrol seems to have decided to mooch about the main square for a while and this part of town seem quiet...

In another part of town the Cowled Creeper tries to sneak up on a Lady of the Night, but is spotted. There is some screaming and he is again foiled - but all of this is out of hearing of the Patrol (had they heard any screams they would have investigated). They remain mooching around the Square...


Another three sites sloganised our plucky lad reaches the warehouse, slaps some paint about, then moves across the road to the nice white wall of a private house. The Patrol is on the move again, but seems slow. Their hearts don't seem to be in it - or they are guarding the prime targets of the statue and the abandoned fort; who knows....


However, as he paints up another slogan the folks at the tavern spot see our boy and come across to see what he is about. Jolly and friendly they may be, but this will delay him - and he can only get rid of them by paying them off...


He does so.... Only another site or two and his job will be done. He by-passes the tavern and heads down an alleyway - where there is a nice quiet spot for graffiti on a well-to-do mansion...

However, while he is happily painting, one of the muggers turns the corner and heads his way.... Spooked, our hero runs off...


Unluckily the Roman Patrol is also heading for this part of town.. They spot him as he streaks past the end of the alleyway - and give chase...


He is, in theory, faster (that is his base speed is faster) than the Patrol, but luck, or the cobbles, are against him and....


Nicked......


Game over.... Not too shabby a result, in terms of damage done, but the capture wipes out the points accrued..... One to the Romans...

Summary;
All in all that was simple, but a lot of fun..

I may need to work on the NPC Activation/Movement mechanics... The basic principles, the Romans, drunks, weirdos and the Watch were fine... The other NPCs less so, but still, all flowed....

The principles of this outing, similar to last years Musketeer Adventures, can of course be applied to a wide range of mission types..


Next time, as the Generator moves along, things might start getting ratcheted up a tad. Whatever happens I will use this board set-up for a couple of games (possibly unrelated) before I pack it up......

I seem to have got the scratchbuilding buildings bug the last couple of weeks, so there is a danger my town could become a city......

Tuesday, 12 March 2019

Scenarios Generate...

The "Not The Judean Revolt" Project rumbles on.....Between work, painting, a range of displacement activities and reading (Pat Reid's "Colditz" account.. TOTALLY recommend... And I ended up buying the reprint of the game.. Oh, dear what a bad boy..) we progress..

Hop's Escape..Next Scenario was prompted by actions of the Sanhedrin and is an "escape" scenario.
Hop, the reluctant "Good" Samaritan, has to escape from Jericho..
Hop, his friend Joshua the innkeep (their fates currently in the in the hands of Hop’s mysterious - and dodgy - rescuee “Alpha”) - along with Hop’s irritating business partner Simeon the Sniffler reluctantly in tow - need to leave Joshua's inn (top left in pic below) without the knowledge of local police chief “Mister Jericho”.


A guide, arranged by Alpha through his dubious contacts, is to shepherd the group through Jericho’s dark, dodgy streets, and the maze of irrigation ditches, beyond the town, to a rendezvous with some mules for a fast night trek to Jerusalem (bottom right in pic above).

Potential hazards (apart from a possibly untrustworthy guide, a possibly duplicitous “Alpha”, and the loose cannon that is Simeon) include the patrols of the Jericho Watch (pic below), grudge-bearing associates of the band of ne'er do wells recently “neutralised” by “Alpha” and members of the Barabbas Gang (reluctantly aided by Hop).

Additional problems may include “The Men In Black” (Sanhedrin Enforcement) – and Undercover Tiber Boys (Roman Military Intelligence). Plus all the other dangers of an unlit city at night...

The hazards are encountered based on dice thrown for each street or ditch corner visible to the group each move.  On a throw of "1" a Blind appears at the corner. Next move said blind could be activated and move (direction and distance dice-based).


Activation: Named characters and the Guide are deemed always activated. Other individuals/groups/blinds throw a dice (1x6D) per move; result effects are 1-3 not activated. 4-6 Activated.

Blinds: At the end of each move the Guide dices 1x6D for every street/ditch corner/junction in line of sight within 12" and, on emerging from the town, for each end of the "perimeter road". A similar check is done for the Town Square. On a throw of "1"a Blind appears. Once within LoS and 8" of the group do a check throw (2x12D) on the Blind Table (below) to reveal the blind type.


Movement:
This is dice-dictated: each named character throws a 1x6D dice and adds/subtracts his personal ability. The result, in inches, is their maximum movement that move. Each activated non-player group does likewise. Each figure/group can, if activated, always move 1". Non-character figures/groups dice to see in which direction or move as per the Blinds Table.

Special Terrain:

Houses may not be entered. Compounds may be climbed into (speed halved) or entered by the gates.

The Tavern may be entered, but counts as "Night-Owls" (see Blinds Table).
Graveyard:The Graveyard counts as hard cover for concealment and shooting.

Simon and spirits. Throw a 1x6D at the end of every move Simon is in the area/within 2” of a tomb.  On a throw of 1 he “sees a spirit”.   A “spirit “  (pic below) will appear 6” away from Simon, starting to move, after Simon’s movement the turn after it appears. 

The Spirit is always Active and moves 1x6D per move directly towards Simon by the shortest route.

If it approaches within 1” of Simon he risks having a heart/panic attack. Throw a 1x6d. On a result of 1 he drops stone dead.  On a throw of  2-3 he becomes incapacitated and must be carried (half speed) by Hop or Joshua  for the rest of the game. On a throw of 4-5 he must stand and recover for 1x6D moves.
Once he has tested the “spirit” vanishes.   (Note; nobody else can see this spirit and this is a one-off
 occurrence -  i.e. only one “spirit” appears per game ).


Dye Works: The Dye Works count as hard cover for concealment and shooting. Movement halved.

If people crossing the dye works are in a “chase” or “hiding” scenario throw a 1x6d for each person for each move they remain in the works (partial moves count as a move).  On a throw of 1 that individual will leave “tracks” for a while when the works are exited (basically they have managed to get dye on their boots).

The leaving of tracks is automatic for the first move/partial move from the works. Thereafter those affected throw a dice per move until a dice throw of 5 or more is thrown (adding 1 to the die each move after the first). Once 5 or more is thrown that individual no longer leaves tracks.

Simon always takes 1 from his dice throw both when testing to see if he will leave tracks and when testing after getting messy…

A “Track Marker” is placed for EACH person leaving tracks. Searchers crossing tracks will spot these if approaching within 2” on a 1x6D and on a  throw of 2-6.  Random Watch patrols crossing tracks will spot and follow these up if approaching within 2” and on a 1x6D throw of 4-6. Tracks remain in situ for the whole of the game.


Individual movement factors;

The Guide and Alpha will move a dice throw in inches per move plus 2".

Joseph and Hop will move a dice throw per move plus 1".

NPCs move a dice throw per move.

Simeon moves a dice throw minus 2". At any time during their move he can be chivvied/dragged along by Hop by both figures moving next to each other and combining their move throws and dividing by two. However, next move Simeon tests with a single dice throw before his movement dice throw. On a throw of 1 he has a paddy and will not move next move at all....

If there are potential enemies in sight Simeon can also be chivvied/dragged along by Alpha by combining their move throws and dividing by two, as with Hop. However, Simeon will be intimidated by Alpha so will not make a "paddy test". Alpha will only do this three times during the game.

All character & NPCs can run by adding 4 to their move allowance. However, NPCs only run if attacking or if the group are already running.

If the group runs it risks being broken up. If the guide or Alpha move more than 12"
from the group at any time then that figure is removed from the board permanently. If the guide goes then thereafter all decisions as to which route the group will take are based on dice throws at corners/junctions. Likewise if any other character moves more than 12" from the group he is deemed lost and his route will be dice-determined.


Note; If anyone wonders where the Plot comes from the answer is the novel "Jericho Road" by Claud Cockburn.

So, what happened:

Well the party left Joshua's inn, wandered through the town and, although coming across a solitary (going off duty?) watchman managed to avoid any close encounters with the Blinds which appeared.  Until....

At the edge of town a Blind came very close - and was revealed as 6 of Alpha's mates from the Barabbas Gang.. Excellent. Extra hands...

However, on approaching the complex of irrigation ditches a Blind appeared ahead of the group and, shortly after, two more emerged from the town.


The Blind ahead of the gang was revealed as five watchmen. Outnumbered by the group (now they had the Barabbas Boys with them) the Watch merely watched (it's what they do best) as the escapees climbed up towards the graveyard.


So far so good... But another blind turned up - another bunch of Watchmen, six this time; if the two groups join up our lads could be in trouble. We back into the graveyard....


In the Graveyard Simeon thinks he sees a ghost, panics, and runs straight into the arms of the Watch... One down, as he is taken in for questioning...


At this point, as Hop, Joshua and Alpha run after the guide, who is making off at speed; spooked not by the spirit, but the large number of Watchmen. The Barabbas Boys are also getting jumpy.  They leave our group and withdraw towards the base edge...


With the Watch more interested in the Barabbas lads (diced for) Hop's party make off through the irrigation ditches. There is a close call (a run-in with some drinks), but, within a few moves all is done, and, sans Simeon, the group leave the table for Jerusalem..... 

A partial success for me, the player... On the Generator the embarrassment to the Civil Power of Hop's escape moves the Progress Token nearer revolt.


A further move takes place, with the Agitators choosing to use another token; this time the dice throw decides they'll go for for a bit of Anti-Roman vandalism the "People Called Romanes?" scenario....

I tweak the board a little (just add a semi-derelict fort and move the buildings a tad) and scribble out the rules....

"People Called Romanes?"
All our hero has to do is paint up 12 slogans without getting caught by the roving Roman Patrol.

However, this is, again a live night-time environment. Other hazards/potential informants include muggers and various folk who may point the enforcers his way if he has wandered passed - unless he has "squared" them from his limited purse (including various beggars, Watchmen, local night-owls and those wandering wayfarers of the night Madam Palm and her five lovely daughters..).


He moves 4" + a 1x6D in inches.
Painting a slogan takes a full move.
He can run at 6" plus a dice, but must throw a "spillage" dice each move he does so. Each "pip" represents the loss of a tenth of his paint pot. He has another pot left at his starting point, and can refill a pot at the Dye works.

Starting positions for the various folk (apart from the taverners) is diced for, as is the entry and route of Romans, muggers and Watchmen.

Each slogan painted on a "Sensitive Site" (the old Roman fort, the statue in the main Square or Watch HQ) counts double points. Once a Watch unit passes (or passes a unit or person which has already passed) a vandalised Sensitive Site that Watch unit cannot be bribed.

If he succeeds the Revolt Table will progress......
 

Friday, 15 February 2019

The Judean War Scenario Generator.....

The Great Experiment...
As touched on in the previous post I have decided to go for the "harder option"  in my "This Ain't The Judean Revolt" project....

The board/Revolt Table was printed out for me by the jolly chaps at the print shop and we have begun.....


First Moves of the Scenario Generator (me playing as Procurator).

First move the Agitators decide (dice) to go for an Assassination, so we leap to an "Assassination" scenario. This works as follows......

Agitator as NP Assassin; Target and Location Decision Mechanics:

Action One: Throw 1D12 to discover Level of target, then within each group for type of Target. Those marked with * asterisk will have bodyguards. Those marked ** have a 25% chance of having Military Bodyguards. Dice for this.

If the assassination is successful the Type value equals the number of Squares moved towards revolt . Half that number for number of squares back towards Stasis if it fails. Less than 1 = no effect.

1-6: Low-level Collaborator - businessman, farmer, minor priest/levite, minor official.

7-10: Medium-level Collaborator , Rival or Roman: wealthy businessman/contractor*, wealthy farmer*, tax collector**, important priest or preacher, Rival agitator minion, solitary sentry or off-duty Roman soldier/s.

11: High Level Judean or Roman: Sanhedrin-level Priest/Elder, Local Ethnarch**, Nobleman*, Rival leader*, Important Roman Civilian*.


12: Senior Roman Official: High-level Administrative or Military Officer **- even the Procurator or Member of his family. These will have significant protection at different levels of access. If outside their official locations/homes they may not only have bodyguards, but also a significant military guard.


Then dice for the Target Location:

Location (2X12d): 2-3; Open Road/Countryside, 4-12 Street, 13-16 Public Event/Meeting, 17-22 in street within close vicinity of Home/Place of work, 23 in Home /Office/Place of work, 24 Temple.

If the result is an Open Road/Countryside or ordinary Street attack then 1x6D throw again to see if this is a Planned or Opportunistic attack. A result of 1-2 means this is a chance encounter. Any result above 2 means a Planned one. All other Target Locations are Planned attacks.

If result is Temple dice again 1x6d. Result 1-5 at entrance/street in vicinity of entrance. Targets attacked outside the Temple MAY flee inside. Assassins individually dice to see if they have the bottle to chase on - 6 on a 6D.

If result is 6 on the location dice the Assassination attempt occurs within the Temple Complex (the public areas only).

The Temple Complex has it's own enforcement teams and is closely monitored by the Auxiliaries of the Antonia. Both parties may intervene but Auxiliaries may NOT go beyond the Balustrade.

If failure occurs within the Temple Complex an additional 6 spaces towards revolt are lost).                                      


On this occasion dice decide that a Low Level Collaborator, in this case a low-level priest/levite is the target.

The Location throws make it a Planned "Street Attack".

I then throw for the number of assassins allocated to the task (throw 1x6d for a Low Level Target. Add 1 to the dice throw for a Planned Attack to add a spotter/assistant assassin. Medium Level Target 2x6d. Add 1 to the total for a Planned Attack to add a spotter/assistant assassin.
Throw 3x6D for High Level subtracting 2 from the total for an Unplanned Attack and 4x6D for Senior Roman Targets subtracting 3 from the total for an Unplanned Attack.

In this case I throw a 1 on the dice, but it is Planned, so I get an assassin and a "spotter".

I next throw to see how aware/informed in advance of their danger the target is. 1-2; is either unaware, overconfident or too unworldly for the threat to register. 3-4 aware - and keeping a sensible eye out, but not enough to take any special precautions. 5 - very aware. Will take all reasonable precautions, including varying routes, never travelling alone. 6 - practically paranoid. Will be constantly watching. If rich enough will have bodyguards.

The Target throws a 1...... I then build the Narrative:


"Picking off the Priest"

The setting is a sleepy, prosperous suburb, just outside the city walls, home to Matthias son of Aaron of Hebron, a minor priest attached to the Temple. His family is not one of the great priestly families but he is well respected locally for his wisdom, public profile and good works. However.....

Lately he has been speaking out against the Freedom Movement in the small private and public gatherings in this cosy little community; arguing that peace, prosperity and the so-called religious "freedoms" granted by the Oppressors are important in themselves, and that provoking the Romans with what he calls "nationalist dreaming" will only bring about a massive retaliation. He EVEN used the term "status quo" !!!! This kind of talk goes down well in this neat little settlement... They need a lesson.....

Judah ben Simeon and Saul of Gadara have been despatched to demonstrate to these comfortable people that their secure little cocoon is an illusion - and that those who are not with are deemed against us..........

My two assassins take post where they can see Matthias's house and wait.

Each move the following happens:

Throw for Matthias. He may leave the house alone or with his wife (throw 1xE6D. 5 or 6 and the missus is coming with him part of the way). Matthias leaves his house on the throw of 6 on a 1x6d, adding 1 to the dice for each move he hasn't emerged. However, if at any time two 1s are thrown in sequence when testing for this it is found he has already left or the assassins have missed him because he is wearing a different outfit from usual. He will be between them and the Cite Gates. The assassins must check each man in a keffiyeh between them and the gate. To so so they must get within 3cm of the suspect, then throw 6d. A "6" and it is Matthias.


Local traffic will move randomly (1x6D each move, testing at each junction for direction to take).
If in a traffic jam all movement is at half speed. Confrontation between large bodies/wagons etc . will be decided by dice throw, adding two to the largest/highest status group. The other must try to back up.

We do not expect there to be an enforcement presence but throw a dice each move. On a throw of 1 an enforcement team has wandered into view. Here in this quiet suburb the only official enforcement presence is likely to the the local beat vigiles (in pairs). Anyone else will just be passing through (throw 12d 1-11 means vigiles. 12 means military unit passing through).

As the assassins wait and watch at the corner of the town square they see Matthias emerging from his house. Dammit - his wife is with him. A complication, but he is coming up the alleyway leading to where our lads are waiting, so that's good..


Local traffic moves - two slave drivers with their charges and several pedestrians decide to go down the alleyway leading to Matthias's house. My lads wait....

The next move there is obviously a jam in the alleyway. Matthias must avoid pollution from rubbing shoulders with the slaves, so he checks (dice) and retraces his step to approach the square by the other street. My lads have lost sight of him...!!! Not good.... They have a choice -run, and draw attention to themselves, or walk. They walk...


Bad news... Their casual ambling means that they run into traffic- a litter bearing a wealthy merchant, his bearers, staff and bodyguard. In going round him they get separated by a casual pedestrian. They lose two moves due to bad dice and the traffic- then another as the litter bearers come face to face with a hand cart... The cart backs up - but the litter needs to go in THAT direction (all diced for).. Another move of disastrous dice for the assassins - they are stuck in the crowd..


Luckily - out of sight to them - Matthias has been accosted by local worthy Lukas (there is a chance of this every time Matthias meets a person of higher status) and they stand chatting for several moves..


My lads are getting frustrated then - oh, oh...... The Enforcement Check goes against us; a pair of vigiles round the corner leading from the palm grove... That's ALL we need......


More delays,  but once the traffic chaos is sorted my lads finally get though the crowd, slipping past the vigiles unnoticed....
Matthias hoves into view - but the vigiles are still in the square checking up on the slave dealer's licence... It's a tough call. Do we try to take the target now, or wait, and possibly run into more traffic...?

We decide to lurk and wait.


As Matthias enters the square the guys move in, but he sees them out of the corner of his eye and turns... In the scuffle Judah and Saul both wound him - but nothing fatal...


And oh dear... An enforcement throw... What are the odds.... Two tents loads of legionaries arrive at the edge of town. But they're just passing through....

One of the vigiles turns at the noise, tests for courage and charges in with his baton - clouting Judah... His mate follows....


Saul gets in a killer stroke on Matthias, then briefly has a go at the one of the vigiles. Now Matthias is down both assassins turn make off at speed - job done; and they're not there to fight.... While one Vigile tends to the casualty the other gives chase....


Meanwhile the Legionary unit arrives in the square.... "Looks like some inter-Judean squabbling... What can you expect..? Let the Vigiles sort it out...".


There is a brief chase though the street, but the lone vigile gives up... Seriously; he does NOT get paid for this...


And, scampering off into the palm grove the assassins make off.. A couple of baton bruises, but otherwise unscathed... 


Mission accomplished.. That was great fun..... Lots of tension. The traffic issues and unknowns felt "realistic" and all in all I was happy with the mechanics..

The successful mission will have an effect on the Revolt Table... I wonder what the next scenario will be...?


Sunday, 27 January 2019

Judean War - 1/72 2019

How to proceed..... Thoughts...

Now that the figures & scenery are well on track I'm still undecided on exactly how I want to approach my solo Judean War project..... I could:


A) Simply fight out a range of Narrative-driven scenarios (fun, and quick to develop/set up).

B) Create a zone map and simply "fight a campaign" as I did with my "This Ain't Siluria" campaign last year - with socio-political aspects in the background, but with the revolt already in progress and the main emphasis being on the military operations. Simple enough to prepare... 

C) Create a simple "Box" type zonal map and run as above.

All well and good....


However, I have become more intrigued with the concept of not initially fighting the actual Revolt (which, let's face it, is primarily sieges) so much as gaming the period BEFORE things really kick off... 

Hence the idea of a "Run The Province" challenge - basically trying to PREVENT a revolt ("You mean I painted all those guys and now they're NOT going to fight....???!!!") - or a "Raise the Revolt" challenge ("Happy now..?"). This concept has caught my imagination.

In this I would using a "Revolt Table" (draft pic below), with tokens used by the "player" and the AI to diffuse/exacerbate the situation; with me fighting scenarios triggered by the Revolt Table and token use  - the results of the scenarios themselves then feeding into progress on the Revolt table........


This will be a lot of work - but could be a LOT of challenging fun....First thoughts have been running along the lines of: 
 
The Procurator, Sanhedrin and Agitators will each have a number of tokens (initially placed in their respective boxes). These may be applied in different ways, as decided by the Player/AI (dice) so as to move the "Revolt Level" up or down.....

Actual token numbers undecided, but lets' say starting levels of:
30 for the Procurator; these may be used for concession/conciliation or repression.

10 for the Sanhedrin (I'll use this term for all the religio-politico groupings with a desire for stability. Basically the wealthy classes with influence). These may be used to help keep the pot from boiling over, undermining the Procurator's position with Rome, intriguing with the less extreme Agitators  -and Parthia.

12 for the Agitators (a cover-all term for Zealots, Sicarii, religious extremists, nationalists and banditti; basically those with a desire to upset the status quo, either for ideals or for their own ends).

There are also two non-player boxes. A Parthian Intervention box and a Rome/Syria Intervention box. Tokens from these boxes may be taken by an appropriate player in lieu of playing a token that move.

There are 5 tokens for the Parthians ("Intervention Box Right"). They would just LOVE the kettle to boil over.

There are 3 tokens for Rome/Governor of Syria; Non-player. Their only interest is stability - and that rebellion does not thrive. The Procurator's fate is incidental. 

Starting with the Agitation Player each player may play a token (Sequence: Agitation, Procurator, Sanhedrin) or "pass". A token held by the player may be applied to any of the choices open to that player.

Once each player has played a token or passed that is a "move". Each Player token is used to carry out any one of the Players optional actions listed below. Used tokens are either discarded or placed in other player boxes if so described. AI decisions are dice-driven.

 
Victory Conditions: 

If playing the Procurator I lose if the land revolts (playing time to be decided, sy 50 moves, each move representing, say, two weeks) or if "Recalled".

If playing the Agitators I lose if there is no General Revolt. I win if there is a Revolt AND I have more tokens in hand than the Sanhedrin - i.e. everything descends into anarchy with "MY Mob" having the upper hand.

If playing the Sanhedrin I win if the Procurator is recalled before any revolt. I lose if there is a revolt without me still having more tokens in hand than the Agitators. Basically the rich and powerful will try to maintain the status quo (i.e them at the top of the tree). Keeping a Procurator off-balance helps. However once things start going too far towards a revolt they need to remain in control - hence they can change attitude.


Table/Track Box Effects:
As movement along the track progresses some boxes trigger scenarios (to be described in details as we progress). Victory or defeat (and fulfilling Victory conditions) will further affect progress forwards or backwards on the track.

The second "Occasional Open Protests", the "Civil Disobedience", "Mass Protests", "Mass Civil Disobedience"  boxes, if landed upon, will create the "Peaceful Demonstration?" scenario.

The "Vandalism" boxes prompt the
"People Called Romanes?" scenario.

Any of the "Attacks on...." boxes a suitable "Attack" Scenario, with Romans being attacked.
Any of the "Harassment" boxes a suitable "Harassment" Scenario.
The "Assassination" boxes will create an "Assassination" scenario, where Sicarii attempt an assassination.

Inter-community fighting/massacres will create "Civil Strife" scenarios, as local ethnic groups fight among themselves.

The "Taking Fortresses & Magazines" box will prompt a
"Fortress Sneak Attack" scenario, with Zealots trying to take a fort.
The "Seize the Temple" box will create a
"Seize the Temple" scenario, with a Zealot attack on the Temple itself.


PROCURATOR'S TOKENS
can be used for:


1) Concessions - Reduces/Increases Revolt index on dice throw (+ or - ).

2) Rejection of Petitions: Reduces/Increases Revolt index on dice throw (+ or - effect). Add 1 token to Rome Intervention pile.

3) Escorts for Officials - Reduces Revolt Index by dice throw. If Harassment of Officials has begun this creates "Tax Escort Scenario".

4) Arrests of High Profile Suspects - Creates "Arrest Scenario".

5) Appeal to Syria for Intervention: Reduce the Revolt level by 6. Take up to two tokens from the Syria Intervention Box. Add the next two expended tokens to to the Repression box

6) High Profile Execution - Reduces/Increases Revolt index on dice throw (+ or - effect). If attacks have already begun creates "Rescue" scenario.

7) Collective Punishment (fines) - Reduces/Increases Revolt index on dice throw (+ or - ).

8) Collective Punishment (confiscations and destruction) - Reduces/Increases Revolt index on dice throw (+ or - ) +/-2. Creates "Collective Punishment" scenario. If attacks have already begun creates "Resistance" scenario. Add 1 token to Rome Intervention pile and 1 token to Parthian Intervention Pile.

9) Collective Punishment (executions) - Reduces/Increases Revolt index on dice throw (+ or - effect) +/- 4. If attacks have already begun creates "Resistance" scenario.

10) Martial Law; Reduces/Increases Revolt index on dice throw (+ or - ) +/- 5. Add 1 token to Parthian Intervention Pile.

11) Area Sweeps: Reduces/Increases Revolt index on dice throw (+ or - ) +/- 6. Create "Dragnet" scenario. Add 1 token to Parthian Intervention Pile.

12) Overt Military Action: Reduces/Increases Revolt index on dice throw (+ or - effect) +/- 10. If inter-community fighting has begun then "Taking Sides" scenario may be created. If attacks have already begun creates creates "Battle Scenario". If already the militia has been raised, Temple taken, forts/magazines taken or towns fortified or the Antonia attacked then the scenario may relate to any one - or more - of these. Also, a major force may be attacked. Dice for choice.

13) Seizure of the Vestments: Reduces/Increases Revolt index on dice throw (+ or - effect) +/- 12. Remove three tokens from the Sanhedrin and place them in the Repression box. Creates the "Seize with Care" Scenario.


Once used, t
okens used for Repression are placed in the Repression box, those fo conciliation in the conciliation box. 
 
Rome's Attitude CheckToo repressive an approach (if ineffective) may cause Rome to question your ability... Or loyalty......

Tokens used for Repression are placed in the Repression box. Throw a 12d each move one or more tokens are added to this box. Add 1 for each token in the repression box then 1 for each square already moved Revolt-wards on the track, then minus one for each token in the Concession Box. If the score equals 48 then you are "Recalled"....

If more than 50 you are recalled with an invitation to slit your wrists.... Either way it is Game Over...


Sanhedrin Tokens
can be used for:

1) Calming the Masses: Reduces Revolt index by one dice throw.

2) "Render Unto Caesar!: Reduces/Increases Revolt index on dice throw (+ or - effect). Takes one token from the Agitation box.

3) Official Protestation: Reduces Revolt index by 2 plus one dice throw. Place this played token in the Repression box. Also, take one token from the Agitation box. Creates the "Aiding the Civil Power" scenario.

4) Appeal to Rome: Reduces Revolt index by 2 plus one dice throw. Place this token in the Repression box. Place one extra token to the Agitation box. Creates the "Kill the Messenger" scenario.

5) Covert encouragement: Add 5 to the Revolt table. Take one token from the Agitation box. Creates the "Whose Friend are You Anyway?" scenario.

6) Suborn the Civil Power: Take or Add 3 to the Revolt Table as chosen. Creates the "Jericho Road" or "Hop's Escape" scenario if not already played.

7) "Better that One Man..": Reduces/Increases Revolt index by 3 plus dice throw (+ or - effect). Takes one token from the Agitation box. Creates the "Stop That Preacher" scenario.


8) Bad Omens: Take or Add 5 to the Revolt Table as chosen. If reducing the Revolt level add that token to the Procurator's Box. If adding take one token from the Agitation box.

9) "My Enemy's Enemy": Take two tokens from the Parthian Intervention box. Remove two tokens from the Repression box and one from the Syria Intervention box and discard.

10) Overt Support: At anytime after the Taking Fortresses & Magazines stage has been passed Revolt-wards the Sanhedrin may throw itself behind the Revolt. Each token used for Overt Support moves the Revolt table forwards y one square. For every two tokens so used an token is taken from the Agitation box.


Agitation:

1) "Romani Ite Domum": Add 2 to the Revolt Table. Creates the "People Called Romanes?" scenario.

2) Taking isolated fortresses: Add 3 to the Revolt Table. Creates the "Fortress Sneak Attack" scenario
.

3) Suborn the Civil Power: Add 3 to the Revolt Table. Creates the "Jericho Road" or "Hop's Escape" scenario.

4) Incite a Preacher: Reduces/Increases Revolt index by 3 plus dice throw (+ or - effect). If a plus result creates the "Arrest a Preacher" scenario. If a minus result and followed by a Procurator's Arrest or Collective Punishment token creates a "Massacre of the Innocents" scenario.

5) Assassination; Add +/-3 to the Revolt Table based on dice throw. "Creates an "Assassination" scenario.

6) Attack on Roman Officials. Add 3 to the Revolt Table. "Creates a "Raid" scenario.


7) Attack on Roman Unit: Add 6 to the Revolt Table. "Creates a "Unit Attack" scenario.

8) Stirring up pogroms/inter-communal violence. Add 8 to the Revolt Table. Creates the "Civil Strife" scenario.

9) Disrupt the Temple:
Reduces/Increases Revolt index by 3 plus dice throw (+ or - effect). If a plus result creates the "Kick Out The Money Changers" scenario.

10) "Eat the Rich": Direct and public verbal attacks on the Temple Hierarchy. t Adds 2 to to the Revolt Table. Take 1 token from the Sanhedrin box.

Syrian/Rome Intervention:

Every turn after the "Taking Fortresses & Magazines" space is passed going towards revolt throw a 6 dice. On a throw of 6 take a token from the Syrian/Rome box and give it to the Procurator. However, the next three tokens expended by the Procurator automatically go into the repression box.

Parthian Intervention:
Every turn after the "Fortifying Towns" space is passed going towards revolt throw a 6 dice. On a throw of 6 take a token from the Parthian Box and place it in the Agitation Box.


The Scenarios:
As can be seen from the above, this is basically a "Scenario Generator". The Table/Track will provide a "narrative" or context for the scenarios, which will be fought out with figures and written up as I progress...

Some will be small, just a dozen or two figures. Some larger. But all will have a part to play in the "Story".....


All of the above are first draft/arbitrary and will need playtesting, but this will be a fun challenge..........


Tuesday, 15 January 2019

Another New Year. Another Plastic Mountain.....

Trundling on..

Am (finally) getting somewhere with my Jewish Revolt project: with bods painted (most of them), some scenery coming together, a scatter of one-off scenario thoughts prepared and a campaign map drafted.

A pic and outlines of thoughts below. As usual with me there has been an element of “Mission Creep”, but whatcha gonna do….?


My furious rebels have assembled (below).. Well, most of them...

I wanted a mish-mash of “official” militia units of "respectable people" in reasonable looted and out-of-the store-cupboard kit, and more irregular bodies of light troops representing a right old hotch potch of town bods (some Hellenised), militarised resistance groups, countryside fellows, figures to represent folk from the Diaspora (in Judea as pilgrims), Souk sweepings and badmashes and loads and loads of skirmishers.

The (rough) pic (at the end of my workbench) shows the "official" guys in looted Roman kit at the back, a Temple Guard type unit and various mixes of light spears, shield folk, non-shield folk etc. etc. with a range of outfits and weapons/protective gear.


There are still some more to paint (if I must) but I have enough for some large engagements, as well as some “chrome n’ character” bods for skirmishes. 

I need to do more standards and command folk, plus some distinctive figures for Zealot groups, JPF etc.... I probably ought to consider some chaps to work captured catapults and so forth....

Buildings are also work in progress (some at the back of the pic)....
This project is taking a while to get together... However, the mix of figures  ( because I am one who bases my lads individually) means, with a little poetic licence, that I have also gained for myself some bodies of bods who will do service as:

Non-uniform auxiliaries and/or Client King supporters (friendly or otherwise) for my 1stC Romans.

"Generic" Hellenic/Punic-ish/Mediterranean light troops a plenty…

Multi-period North African/middle eastern lads (inc. s
ouk sweepings and Barbary pirate types) for all sorts of games....

So, lots of armies for the effort on one (say I..).

Scenario and campaign ideas are collecting, plus I have been tweaking my House Rules, so a lot of activity offline at this end - but not a lot to report......

Watch this space, as they say.....


Or three... Or four......

VERY little to report.... Due to a busy reenactment season another filler post I'm afraid, just to show I'm still here...... Our ann...